
Creating a butterfly garden
Time Allocation: 45 mins *
Activity Level: Easy
Creating a sensory garden
Time Allocation: 45 mins *
Activity Level: Moderate
Creating a yarning circle: background
Time Allocation: 30 min
Activity Level: Easy
Creating a yarning circle: site selection
Time Allocation: 45 mins
Activity Level: Moderate
Creating a yarning circle: involving First Nations people
Time Allocation: 50 mins *
Activity Level: Moderate
Creating a yarning circle: building the yarning circle
Time Allocation: 50 mins
Activity Level: Moderate
Creating a yarning circle: connecting to Landcare
Time Allocation: 45 mins
Activity Level: Easy
Creating a yarning circle: using your yarning circle
Time Allocation: 45 mins
Activity Level: Moderate
Creating a yarning circle: yarning circle activities
Time Allocation: 45 mins *
Activity Level: Moderate
Creating a yarning circle: yarning and wellbeing
Time Allocation: 10-15 mins
Activity Level: Moderate
Local seasons: exploring First Nations weather knowledge
Time Allocation: 40 minutes
Activity Level: Moderate
Creating an Indigenous plant-use garden: vision
Time Allocation: 40 minutes*
Activity Level: Complex
Creating an Indigenous plant-use garden: plant list
Time Allocation: 40 minutes
Activity Level: Complex
Creating an Indigenous plant-use garden: harvesting
Time Allocation: 40 minutes
Activity Level: Complex
Creating an Indigenous plant-use garden: resources from the bush
Time Allocation: 40 minutes*
Activity Level: Complex
Creating an Indigenous plant-use garden: planting
Time Allocation: 40 minutes*
Activity Level: Complex
Creating an Indigenous plant-use garden: site assessment
Time Allocation: 30 minutes*
Activity Level: Complex
Whose Country: exploring First Nations peoples languages map (0-7yrs)
Time Allocation: 30 minutes
Activity Level: Easy
Whose Country: exploring First Nations peoples languages map (7-13yrs)
Time Allocation: 30 minutes
Activity Level: Easy
Whose Country: exploring First Nations peoples languages map (13-18yrs)
Time Allocation: 30 minutes
Activity Level: Easy
Growing your own pizza
Time Allocation: 30 – 40 minutes
Activity Level: Moderate
Creating your own potato chips: growing
Time Allocation: 30 – 40 minutes*
Activity Level: Moderate
Creating your own potato chips: cooking
Time Allocation: 30 – 40 minutes*
Activity Level: Moderate
Creating your own potato chips: marketing
Time Allocation: 30 – 40 minutes
Activity Level: Easy
Catchment management: the story of a river
Time Allocation: 40 minutes*
Activity Level: Moderate
Catchment management: water sustainability
Time Allocation: 40 minutes*
Activity Level: Moderate
Catchment management: what’s in a drop?
Time Allocation: 40 minutes*
Activity Level: Moderate
Catchment management: the drain is just for rain
Time Allocation: 40 minutes*
Activity Level: Moderate
Catchment management: where the river meets the sea
Time Allocation: 40 minutes*
Activity Level: Moderate
Propagating from fruit and vegetable scraps
Time Allocation: 30 minutes*
Activity Level: Easy
Building a nest box
Time Allocation: 30-40 minutes*
Activity Level: Complex
Caring for our coasts: beach survey
Time Allocation: 45 minutes*
Activity Level: Moderate
Caring for our coasts: beach clean-up
Time Allocation: 40 minutes*
Activity Level: Moderate
Understanding weeds: life cycle
Time Allocation: 30-40 minutes*
Activity Level: Moderate
Understanding weeds: investigation
Time Allocation: 30-40 minutes*
Activity Level: Moderate
Exploring the story of water
Time Allocation: 30 minutes*
Activity Level: Moderate
Creating a wildlife habitat: research
Time Allocation: 30 - 45 minutes*
Activity Level: Moderate
Creating a wildlife habitat: vision
Time Allocation: 45 minutes*
Activity Level: Moderate
Creating a wildlife habitat: design
Time Allocation: 45 minutes*
Activity Level: Complex
Creating a wildlife habitat: planting
Time Allocation: 45 minutes*
Activity Level: Moderate
Creating a wildlife habitat: monitoring and care
Time Allocation: 30 - 45 minutes*
Activity Level: Moderate
Creating a bee hotel: research
Time Allocation: 30-40 minutes*
Activity Level: Moderate
Creating a bee hotel: construction
Time Allocation: 30-40 minutes*
Activity Level: Complex
Making a large wicking bed
Time Allocation: 30-40 minutes* (this will be dependent on site selection and travel time)
Activity Level: Moderate
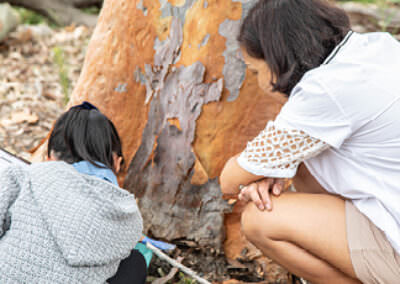
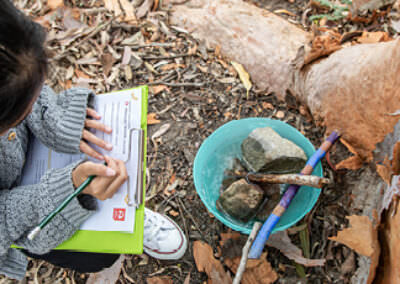
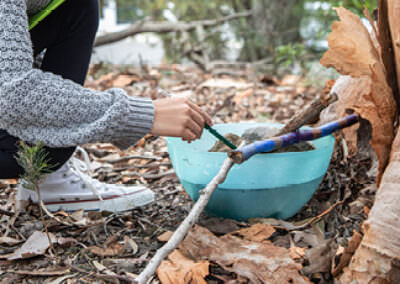
Creating a beneficial garden: assessment
Time Allocation: 30 - 40 minutes*
Activity Level: Moderate
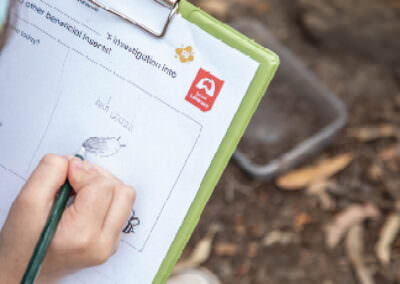
Creating a beneficial garden: investigation
Time Allocation: 30 -40 minutes*
Activity Level: Moderate
Creating a beneficial garden: planting
Time Allocation: 30 -40 minutes*
Activity Level: Moderate
Creating compost
Time Allocation: 30-40 minutes*
Activity Level: Moderate
Investigating the soil food web
Time Allocation: 30-40 minutes*
Activity Level: Moderate
Making a small wicking bed
Time Allocation: 30-40 minutes*
Activity Level: Moderate
Creating a frog-friendly habitat: research
Time Allocation: 40-60 minutes*
Activity Level: Moderate, Complex
Creating a frog-friendly habitat: design
Time Allocation: 40 minutes*
Activity Level: Moderate, Complex
Creating a frog-friendly habitat: construction
Time Allocation: 40-60 minutes*
Activity Level: Complex
Creating a food garden: harvesting
Time Allocation: 30-40 minutes
Activity Level: Moderate
Creating a food garden: planting
Time Allocation: 30 - 40 minutes
Activity Level: Moderate
Creating a food garden: installing a no dig garden bed
Time Allocation: 40 minutes
Activity Level: Complex
Creating a food garden: site assessment and mapping
Time Allocation: 30 minutes*
Activity Level: Moderate
Creating a food garden: vision
Time Allocation: 30 - 40 minutes*
Activity Level: Moderate
Waterways: behaviour change
Time Allocation: 30-40 minutes
Activity Level: Moderate
Waterways: clean-up
Time Allocation: 40 minutes*
Activity Level: Complex
Creating a worm farm
Time Allocation: 40 minutes*
Activity Level: Moderate
Growing healthy plants using natural pesticides
Time Allocation: 40 minutes*
Activity Level: Easy
Planning a Junior Landcare friendly event
Time Allocation: 40 - 50 minutes*
Activity Level: Moderate, Complex
Soil – more than just dirt!
Time Allocation: 30 minutes
Activity Level: Easy
Every drop counts, being water wise!
Time Allocation: 30 - 40 minutes
Activity Level: Easy
Sow a seed, grow a feed
Time Allocation: 30 minutes*
Activity Level: Easy
Water for wildlife
Time Allocation: 40 minutes*
Activity Level: Easy
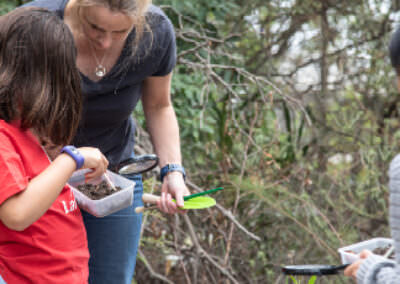
Getting the buzz on bees and other beneficial insects
Time Allocation: 30 - 40 minutes*
Activity Level: Easy
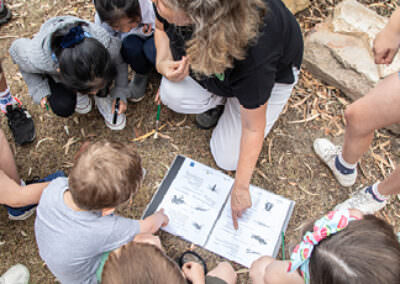
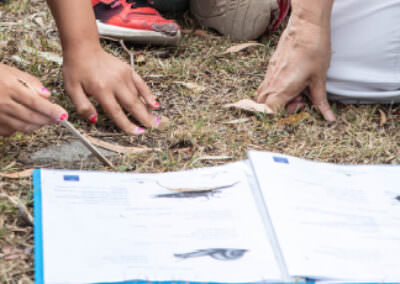
What’s happening in the habitat?
Time Allocation: 30 - 40 minutes*
Activity Level: Easy
Love Letters to the Land
Time Allocation: 45 mins
Activity Level: Easy
Introduction
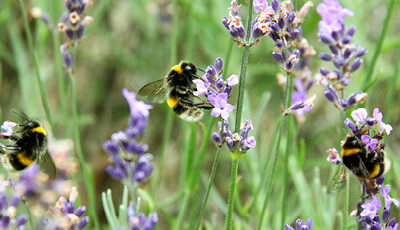
There are hundreds of different butterflies in Australia. Butterflies need nectar for their adult phase and host plants for their caterpillars. Most butterflies need specific types of host plants that only their type of caterpillar can eat. Before you begin, you will need to research the different butterflies in your area and find out what types of plants will be suitable, as well as prepare your site. Here are some suggested first steps:
- The conservation officer at your local council will be able to point you in the right direction about the types of butterfly in your area as well as what types of plants you can plant to attract butterflies and feed caterpillars.
- Use the Find a Group directory on the Landcare Australia website to get in touch with someone who may be able to help from your local group. They may also be able to help with resources and planting.
- The Australian Museum’s Butterfly and Moth Page
- Your local nursery.
Once you have selected and purchased your plants, you will need to select and prepare your garden bed. Butterflies need both sun and shelter away from the wind, so the best site for a garden bed for a butterfly garden is in a sunny, sheltered spot.
*This will be dependent on-site selection, travel time and having done prior research.
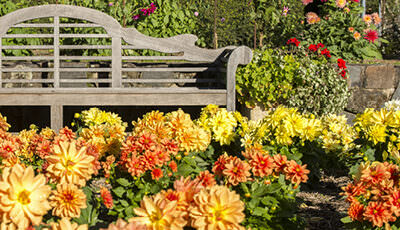
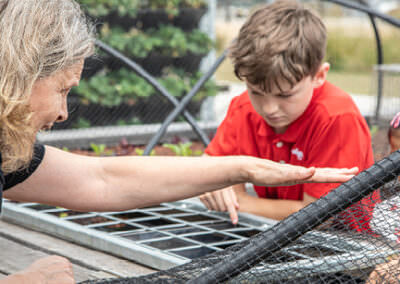
A sensory garden is a garden that invites users to engage with the plants and other features in the space in a way that stimulates all the senses. Choosing suitable and safe plants is important as sensory gardens encourage users to touch, smell and even taste the plants as they participate in the garden space. When planning this activity, it is important to:
- get help from others such as your local nursery, environment group or Landcare group to plan your site
- prepare your site well
- consider how all five senses will be engaged.
In this activity, we suggest that the space is prepared and materials and plants are purchased independently, however you may like to involve your learners in all aspects of the planning, design and planting of this activity. For hints and tips on this process, refer to the Creating a food garden activity series. You will also need to source plants prior to planting out your garden. Your local nursery, garden centre or Landcare group will be able to help give you some ideas about what will grow well in your area. Choose hardy plants that can cope with handling but that also have a sensory benefit, for example:
- long grasses that sway in the wind
- herbs and edible plants that are fragrant such as rosemary, mint and lavender
- plants with different surfaces, such as borage
- plants with a variety of different shapes and foliage colours
- a variety of nectar producing plants that will attract birds and butterflies to your garden.
* This is dependent on the scale of your garden having the preparation of your garden site completed prior to beginning.
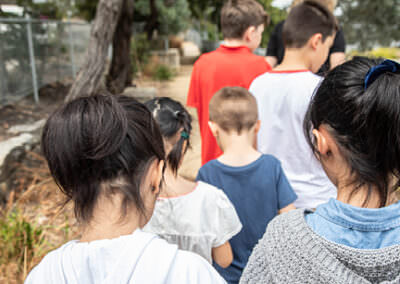
Building a yarning circle is a great way to create a space that is inviting and connects children to the outdoors. This space can be used by your class or youth group to yarn about important issues in an informal setting, and to learn more about the Cultural practices and teachings of Aboriginal and Torres Strait Islander peoples.
For First Nations people, the yarning circle was and still is an important place to conduct business, talk about issues in the community or on Country, and have a space where all voices are recognised and heard.
“We understand that what was spoken in the circle stayed there, unless it was necessary to take any information away like decisions on Cultural practices for another setting,” explains Adam Shipp, First Nations educator and proud Wiradjuri man.
“Our old people would sit or stand barefoot on the earth, on the dirt, which itself provided a healing and safe environment, and our mother earth provided grounding and strength through direct connection. These are practices that can be adopted in our schools today – and will help with mental, physical and spiritual wellbeing.
“We create this area to be a safe place for all; a place where all people have a chance to yarn on equal terms.”
Establishing a yarning circle in your school or community also provides an opportunity to create an outdoor learning space that will help immerse children in nature. We often think of nature as being separate to us; out in the ‘bush’ far away from our towns and cities. However, when you take the time to sit and observe everything around you, you will soon start to recognise the scents and colours of the trees, plants and flowers in your school; the sounds of the birds that visit those plants; and the insects that many of those birds and smaller animals will feed on. You may be surprised at just how much you can see, smell and hear just by sitting in your yarning circle or outdoor area.
Now that you’ve decided you would like to set up a yarning circle in your school or community, it is important to figure out where to place your seating area. Important things to consider include:
The physical area or location:
Seating:
Visibility and accessibility:
Once you have gone through the important considerations above, you can start thinking about how to design your yarning circle space to bring it to life.
The next learning activity ‘Creating a yarning circle: involving First Nations people’ will provide tips on how to get the local Aboriginal and Torres Strait Islander community as well as the broader school community involved.
It is important to think about how you might work with the local First Nations community. Considerations include:
Try to invite and incorporate First Nations’ voices and opinions from the very start of the project so that it is carried out as respectively and cooperatively as possible throughout.
You can research service providers for gardens and landscaping on websites like Supply Nation, which is a site set up to promote First Nations businesses in many different fields.
Does your school have Aboriginal and Torres Strait Islander students who would like to get involved in the project? They may have an idea about the design. Maybe they would like to design other cultural elements for the yarning circle or incorporate a special animal, plant or artefact that is important to them.
This may also be a good opportunity to incorporate a traditional story of the area where you live, working with the local Custodians and Elders. Keep in mind, their time is precious and you will need to have budget set aside for their time and assistance. If you need to purchase any items, such as a talking stick, to help your yarning circle operate, make sure you let them know early so they have time to prepare or help source materials.
For educators, Landcare facilitators or students starting the community consultation journey who feel they may not know where to begin, our advice is start talking with the Aboriginal and Torres Strait Islander families connected to your school. There may be an Indigenous Learning Officer or similar type of staff member in or connected to your school who could give you advice about working with/connecting with families of Aboriginal and Torres Strait Islander students. If such a role does not exist at your school, then reach out directly to families of/other students. Even if they do not have exact information on how to set up a yarning circle themselves, they may be able to connect you with Elders and/or community members who do have skills and knowledge to help you.
* This will be dependent on drafting and other aspects of the task
This is an exciting stage of the project when you can start to think about HOW you will build your yarning circle. There are many things to consider here, for example:
What materials will you use for the seating circle?
Wood and stone are often popular choices as they will help to maintain a natural look and feel for your space. Always remember, however, that a yarning circle can be as simple as sitting down in a circle, on the ground or with cushions, and that having a large budget is not necessarily a constraint.
What is your budget?
Sandstone or professional wooden seating can cost anywhere between $5,000-$15,000, depending on how much labour, time and quantity of seating is required. If this is outside of your budget, you may need explore other options. For example, in urban and regional areas where there is lots of development/construction work going on, you could reach out to developers or construction companies, councils, etc. to see if they are getting rid of any materials, such as large stone pieces or wood, that could be donated to your school instead of going to the tip.
What cultural considerations do you need to bear in mind?
There may be traditional customs and beliefs when it comes to natural materials being removed from/introduced to Country. Where possible, your choice of material should be done in consultation with Traditional Custodians and First Nations community representatives. This applies to the use of more conventional materials like sandstone too, as it may not be a natural part of the landscape you want to bring it to.
1. Consult with the local First Nations community about the location, design and best choice of materials to use.
2. Speak with local businesses (preferably First Nations businesses) about quotes for materials, construction of the site, etc.
3. If your budget is small, reach out to your local council or developers/construction businesses in your area to enquire about material donations. Local business may also be willing to donate time to help construct/install materials. You can also look for grants and connect with your local Landcare group for guidance or ideas on available grants.
4. If you are not using a professional construction/landscaping company to install your yarning circle, set up a community or parent working bee with volunteers who have experience in this area.
Remember, there will be important safety considerations when building the yarning circle e.g. the operation of machines (bobcat, etc.) to shift heavy materials into place and making sure seating is fixed securely and won’t move or roll over, potentially causing safety issues.
In this activity you are going to connect with your local Landcare or other community environment group. Working with your local Landcare or environment group is a great way to access local expertise, support and resources.
Connecting with Landcare can occur at any time during your yarning circle project, from the initial phase when you are selecting your site to set up your yarning circle to enhancing the area around your yarning circle once it has been established.
Landcare doesn’t always need to be a hands-on activity. Immersing children in a yarn or conversation is a great way to build their understanding and awareness of different cultures, landscapes and why it’s important to care for their environment and our natural resources.
Having a yarning circle in your school is also a great focal point for understanding the intricacies of your local landscape, connection to culture and connection to Country. It provides a space for many tangible and intangible connections that you can draw to enrich learning experiences.
You did it! Your yarning circle is now complete. It looks extremely inviting and has become a central point of attraction within your school. The question now is, how and when do you use it?
The main thing is that it does not just become a token gesture and space that isn’t well utilised in the school. A yarning circle can be used as a teaching and learning space for your everyday classes, when sharing and discussion is an important focus of the lesson.
When to use a yarning circle:
A yarning circle can be used whenever you need to have a chat, share or mediate. In a school setting, it could be used when:
You may wish to hold smaller intimate circles on regular occasions (for example, once a week) and then plan to hold larger ones where an Elder or First Nations community member/s are invited into the space, if/when possible.
Talking sticks:
This activity also introduces the concept of a talking stick. The stick symbolises your turn to have your say; when others should respectively listen to you before having their turn to speak with the stick. The yarning circle can continue until everyone has had their turn to speak, be listened to and voice any concerns or opportunities they wish to pursue. This will embed an important practice and safe space for all students so they feel comfortable sharing.
There are many different activities that can take place in your yarning circle. Yarning circles provide opportunities for all to be heard, for discussions to be had and for understandings to be reached.
This series has been created to help ensure your yarning circle is used regularly; and is a space that staff and students alike want to return to again and again and can be incorporated into existing activities or to inspire new ones.
The planner created in this Learning Activity should be displayed in a central location, such as the staff room or main entry, to remind teachers about the yarning circle and the various things that can take place there.
This activity also draws upon the Local Seasons: exploring First Nations weather knowledge Learning Activity in the Learning Centre.
* This is dependent on having already completed the Local Seasons: exploring First Nations weather knowledge Learning Activity, and pre-work such as a list of activities and dates compiled.
In this learning activity we explore how yarning circles can be used for wellbeing based on the morning circle routine. However, there are many other ways you can use your yarning circle for wellbeing activities, for example, for dispute resolution, restorative practice and cultural sharing.
Being outdoors tends to allow us to slow down and reflect. A well set-up yarning circle can provide a welcoming atmosphere and can be utilised as a safe space to talk, share, discuss and have a yarn together; a place to build respectful relationships and enrich not just students' learning experiences but their overall sense of wellbeing in a natural setting.
It's also a great place to invite First Nations community members to share more about their Culture and run cultural activities like weaving, stories, Indigenous plant use and bushfood tasting, even cooking if the amenities are available; the meditative practice of weaving, art and cooking can also have positive effects on mental health.
Finally, providing First Nations students with an opportunity to showcase their Culture is an important way to create a better understanding of self and identity, which is a powerful tool in improving wellbeing; whilst exposing non-Indigenous children to Aboriginal and Torres Strait Islander Cultures is an important way to develop respect for diversity and Traditional Cultural Knowledge.
This activity introduces children to going outside and experiencing the seasons.
First Nations people observe the seasons change and they know when it is best to collect food such as fruits or seeds, what type of shelter they would need to make, what clothing they would need to keep warm and when to move from one place to another.
To understand local stories and support these activities, we recommend reaching out to your local Traditional Owners and First Nations peoples community groups, who can assist in knowledge sharing and understanding local land, histories and culture.
Planning this garden starts a journey of understanding of Aboriginal and Torres Strait Islander culture and histories, and towards reconciliation. It is a wonderful opportunity to create a space to pay respect to the First Nations peoples of Australia and their extensive knowledge of the plants that grow naturally in the Australian landscape. The garden you will create will be a space that educates not only your group, but many children and adults for a long time to come.
Your vision, and collaborative and consultative planning is an important part of this project. Growing your garden will grow your understanding and strengthen your relationships with First Nations peoples.
For thousands of years, First Nations peoples across Australia have been planting and utilising a diverse range of plants. This learning activity will introduce our learners to a range of Australian plants and explore the multiple uses that each plant has for First Nations peoples.
This activity will help set the foundations to creating and understanding the importance of Indigenous plant-use and creating a garden, and help select plants to include in your Indigenous plant garden.
Creating an Indigenous plant-use garden is usually different to common vegetable gardens as these plants will require different growing conditions.
Harvesting your native produce will not only provide the experience and joy of growing your own edible plants, but also provide a deeper understanding of First Nations peoples culture and histories.
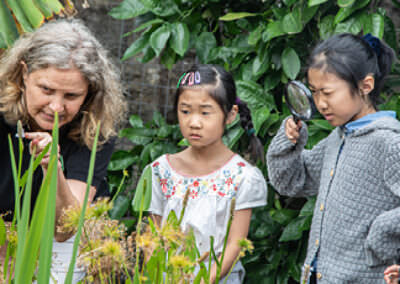
This activity explores the importance of plants for Aboriginal and Torres Strait Islander peoples who know and understand the plants, life cycles, seasons, and the different ways plants are used. Care must be taken when interacting with plant materials. Correct plant identification is crucial to knowing which plants are edible and which are best to avoid.
This is a great opportunity to invite your local Traditional Owners take you on a guided walk so they can share their deep knowledge, connection and understanding of the land, stories and culture specific for your area. This is also a great way for starting to build relationships with your local First Nations community for the future, and take action towards reconciliation. Growing your garden will grow these partnerships even further.
*Time allocation will be dependent on site selection and travel time. Learners may visit bushland or look at native plants in the school garden, local park or reserve.
Planting an Indigenous plant-use garden is a great way to learn about the importance of native plants to First Nations peoples. It is also an easy way to expand your diet in a way that incorporates foods that are native to this land and have been used by Aboriginal and Torres Strait Islander peoples for a very long time. The health benefits of these plants are becoming more widely understood so it is important for all Australians to start incorporating these foods in their cooking. Of course, many of these foods are extremely tasty as well!
Inviting the community to plant with the children is another opportunity to build relationships with the local First Nations peoples community (as well as other stakeholders in the school community such as parents and carers).
Prepare your garden area before planting. Refer to the site assessment learning activity to create the best conditions for your plant use garden.
*The time allocation for this activity is based on all materials being sourced prior to commencing the activity.
Assessing a suitable site for your Indigenous plant-use garden is important. It can be the difference between developing a successful thriving garden or creating a place that has constant ongoing issues.
In this activity, we will be assessing local areas so to locate the best site for an Indigenous plant-use garden. Working in teams will help build skills for working together in the development of the garden and foster self-reliance.
*Time allocation is dependent on site selection and travel time.
As children learn to acknowledge that Aboriginal and Torres Strait Islander peoples are the traditional custodians of lands, waterways and skies across Australia, it is important that they recognise that Australia is home to hundreds of many First Nations communities.
This activity introduces children to a First Nations languages map and builds understanding and appreciation of the importance of language to Aboriginal and Torres Strait Islander identity and culture.
This activity introduces children to a First Nations peoples languages map and builds an understanding and appreciation of the language and culture of local Aboriginal and Torres Strait Islander peoples.
Adam Shipp a Wiradjuri man shares the following:
“Language is a part of everything we do. It is in our country, our rocks, trees and landscapes. For Aboriginal and Torres Strait Islander people it is important for us to connect and reconnect to language of our ancestors and to speak this language every day. We believe our ancestors are always watching over us, so to speak our native tongue is to connect directly to them.”
Adam Shipp a Wiradjuri man shares the following.
“Language is a part of everything we do. It is in our country, our rocks, trees and landscapes. For Aboriginal and Torres Strait Islander people, it is important for us to connect and reconnect to the language of our ancestors and to speak this language every day. We believe our ancestors are always watching over us, so to speak our native tongue is to connect directly to them.”
In this activity, children are going to investigate what they would need if they were to grow their own pizza. This activity is designed to help young learners explore food production and how something seemingly simple, such as a pizza, uses ingredients from many different origins.
Before beginning this activity, gather the materials needed to ensure that the learning outcomes can be achieved. More information is available in the Educator Notes.
In this activity sequence, children will investigate what would be required to grow, cook and market their own brand of potato chips. For simplicity, we are focusing on the ‘hot chips’ style of potato chip, rather than ‘crisps’.
The process of growing the potatoes takes many months, but children will be rewarded with a wonderful crop at the conclusion of this exercise. We suggest combining this activity with gardening activities such as the Creating a food garden series to help provide the resources and materials needed to produce a crop of potatoes.
* Time allocation reflects the time suggested for learning about potatoes, planting them and completing the activity sheet.
Growing food for your own table is very satisfying. In this activity we are taking the concept of growing food one step further, to turn it into a product.
Children will use the potatoes they have grown to create their own potato chips. For simplicity, we are focusing on the ‘hot chip’ style of potato chip, rather than ‘crisps’.
The intention of this activity is to provide children with knowledge about food production, the timelines and other inputs involved in producing a crop. Ideally the potatoes that the children grow themselves should be used for this activity, however if this cannot occur store-bought potatoes can be substituted.
We suggest that you run this activity as part of a kitchen garden cooking activity.
* Time allocation reflects the time suggested for harvesting, cutting and preparing the chips. Cooking time may be additional depending on availability of oven space and temperature.
Growing food for your own table is very satisfying. In this activity sequence, we are taking the concept of growing food one step further, to promote the produce that the young learners have created.
In the first and second parts of this activity, children grew potatoes and turned their produce into hot chips. In this final sequence, the young learners will consolidate their understanding of food production by creating an advertisement about their chips.
The story of a river learning activity investigates the journey of water through the catchment, from the mountains to the sea. Fresh water is a finite resource and is essential for all land plants and animals to survive. Explore the competing demands for water in a typical catchment.
*Adult preparation for the activity 20 minutes
This water sustainability learning activity investigates the different uses for water across a catchment. Within a community, stakeholders can have different opinions on how water should be shared. Explore these competing demands for water in a typical catchment, and discover ways of being more sustainable.
*Time allocation includes 15 minutes of pre reading the case study resources.
This learning activity explores urban water consumption and waste water. Conduct a water audit at home or school to discover where water is wasted in your life and what you can do to save water.
This activity investigates the journey of water into the drains. Most rubbish, especially plastics, enters our waterways through stormwater. Explore your school or local area find out what is going down the drain.
*Time allocation includes adult preparation of 10 minutes for the activity.
This activity investigates the journey of waste into our waterways and eventually the sea. Students explore how waste can impact our wetland and marine environments.
*Time allocation includes 20 minutes of adult preparation.
Growing plants is a great way to introduce their features to young learners. In this activity you will be using fruit and vegetable food scraps that might have otherwise been discarded, to regrow or sprout new plants. A great way of engaging young learners in science is to encourage them to observe the new shoots and monitor how they grow and change over time. You will need to have your materials ready before you begin, so that the activity runs to the allotted time. This activity can be integrated with a cooking activity or aligned to a collection of fruit and vegetable scraps, so that resulting plants are produced authentically. *Time allocation will be dependent on having materials already prepared.
Many of our native animals need tree hollows to shelter and raise their young. Deforestation, competition from introduced animals and urbanisation has resulted in less hollows being available for native wildlife. Nest boxes are a great way to re-create habitat. This learning activity is designed to help educators and young learners successfully complete a nest box project.
Building nest boxes from scratch is a complex activity, using specialised tools and equipment, so we have given some pointers in this activity to make this more simple and achievable. There are many things you will need to consider when making a nest box, so we suggest getting in touch with your local landcare, environmental group or local government before beginning, as many of these organisations hold specialist knowledge about your local animals and can often help with resources and expertise.
*Time allocation is based on having prepared materials and research completed prior to commencing this activity.
This learning activity investigates microplastics, where they are found and how they end up in our coastal waters.
*Time allocation does not include travel time to the beach and coordinating the groups and equipment.
This learning activity explores the impacts of microplastics on our marine environments.
*Time allocation does not include travel time to the beach and coordinating the groups and equipment.
Weeds can look like any other plant, and can often even look very attractive.
However, a weed is a plant that grows where it is not wanted, and they are very successful in their reproduction. Learning about the life cycle of weeds can help us control and manage their spread, and understand the impact they have in the local environment.
*Time allocation will be dependent on site selection and travel time.
Investigating weeds in your local area and reaching out to local experts like Landcarers and council staff can help to build identification skills and become a Weed Warrior champion. Because our precious environment is threatened by invasive garden plants and weeds that take over large areas of bushland and evict native species, being skilled in identification and management of weeds is important for the health of your local environment and biodiversity to reduce pressure on fragile ecosystems.
*Time allocation will be dependent on site selection and travel time.
Water covers 75% of the earth’s surface; only 1% is available as fresh water. Freshwater is essential for all land plants and animals to survive. The story of water learning activity investigates the journey of water through the environment, from the mountains to the sea.
*Adult preparation for the activity 20 minutes
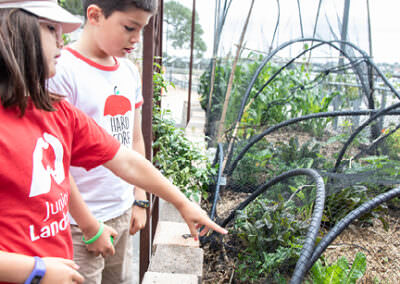
Creating a native wildlife habitat is a great way for kids to discover what is living in their backyard and local area. Not only will children learn about plant and animal species, they will understand the importance of urban habitats. The research phase is essential to discover the animals that already call your garden home.
We encourage our Junior Landcarers to learn more about wildlife habitats by exploring these other learning activities. These include the Creating a frog-friendly habitat sequence: research, design and construction, Creating a bee hotel sequence: research and construction as well as Building a nest box.
*Time allocation will be dependent on site selection and travel time. Additional time may be spent in consultation with your local Landcare group, council, or native plant nursery.
Having an understanding of the needs of native animals in your school or local area will help build a connection to place, and help to get support from your community to a create a wildlife habitat. This activity enables children to appreciate the diversity of local native animals in the community and understand how to protect them.
*Time allocation will be dependent on site selection and travel time. Additional time may be spent in consultation with your local Landcare group, council, or native plant nursery.
Creating a wildlife habitat helps you create an environment that will ensure the survival of local animal species. The design phase is essential to ensure your wildlife habitat will meet the needs of the native animals that already call your local area home, and encourage more species to live in your new wildlife habitat.
*Time allocation will be dependent on site selection and travel time. Additional time may be spent in consultation with your local Landcare group, council, or Indigenous plant nursery.
Planting is a great way to learn about the importance of native plants in creating habitats. Children will learn about the best location and conditions for native plants. The planting stage is where the children will be applying the information discovered in the research, vision and design activities already undertaken in this sequence. This will help establish a garden that will provide food and shelter for local native animals all year round.
*Time allocation will be dependent on site selection, travel time and that site preparation has been completed. Additional time may be spent in consultation with your local Landcare group, council, or native plant nursery.
What happens now that you have finished creating a wildlife habitat? The monitoring and care phase is important to ensure all your hard work isn’t washed away, and that your plants are healthy and growing well. It is also a great way to find out if your wildlife habitat is a success, and providing a home for local wildlife.
*Time allocation will be dependent on site selection and travel time. Additional time may be spent in consultation with your local Landcare group, council, or Indigenous plant nursery.
Before embarking on this learning activity, we encourage our Junior Landcarers to learn more about beneficial insects by doing the Creating a beneficial garden activity series to further provide our young learners the opportunity to learn more about invertebrates, focusing on pollinators and beneficial planting. This will help our young learners understand the importance of this activity and build their commitment.
Upon completion of this learning activity, children will have developed a deeper understanding of bees, including their identifying features and native habitat so that they can help protect them.
*Additional time may be spent in consultation with your local Landcare group, council or Indigenous Elders.
Before commencing this activity, the Junior Landcarers are encouraged to develop a better understanding of bees, their features and their native nesting habitat. Learners will apply prior learning and information gathered to identify the things to include in their bee hotel, to best mimic the bees’ natural habitat.
This activity will require adult supervision and some ground work to gather materials. We suggest connecting to your local Landcare group or hardware shop, as they may help provide some of the materials.
*Time allocation is based on all materials being sourced prior to commencing construction.
Wicking beds use a water reservoir and the capillary action of soil to supply water to plants from below, and can be built from a variety of different materials. The bed featured in our learning activity is made out of a halved IBC tank, but they can be made out of an old bath, halved barrel, upside-down fridge or some other vessel. Constructing the wicking bed explores a range of sustainability concepts including water use, land use, reusing materials and technology in food production.
Making a large wicking bed is a great way to save water and grow a productive vegetable garden, and can often be found in kitchen gardens, household vegetable patches and learning centres. This activity does involve a few key steps, and requires adult supervision to ensure that the sequence is successfully followed.
*The time allocation for this activity refers to the building of a wicking bed, with all materials prepared and ready to be installed. Preparation details are included in the Educator Notes. Sourcing and preparing the materials prior to commencing the activity is essential to successful completion of this activity within the allotted time. You will need extra time again for planting.
We’re going on a bug-hunt! A ‘bug’ is the broad term given to an invertebrate animal (animals without a backbone). Many different invertebrates visit gardens, or call them home. In this activity, you will be completing an assessment of the types of invertebrate in the garden. They could range from worms that break down organic matter, to bees that pollinate flowers, or even pest animals that eat crops, such as snails and slugs. This activity is designed to provide the knowledge and tools for other learning activities in this sequence.
*Time allocation will be dependent on site selection and travel time.
The aim of this activity is for our young learners to make the connection between beneficial insects in the garden and their relationship to flowering plants. Invertebrates or bugs that provide services such as pollination or pest-predation are commonly known as beneficial insects. These insects can often be encouraged into a garden by planting flowering plants alongside food crops. This is known as beneficial gardening.
*Time allocation will be dependent on site selection and travel time.
Planting flowering plants next to a food crop is known as beneficial planting. The flowering plants (beneficial plants) attract pollinators and predators, which help increase your food crop and protect plants from pests. In this activity, children will be applying the information discovered in the assessment and investigation learning activities already undertaken in this sequence. This activity provides opportunities to apply learning, test hypotheses and monitor progress.
*Time allocation will be dependent on site selection and travel time.
There are many different ways to create compost. This activity has been designed with the needs of the educators in mind and employs a simple method of composting. Before beginning this activity, it is important to gather the materials required, including the compost bin and a mixture of ‘green’ and ‘brown’ materials. Selecting an appropriate site for your compost is also important; choosing a site with good shade and direct contact with the soil is necessary for your compost to work.
We encourage our Junior Landcarers to learn more about soil by exploring these other learning activities: more than just dirt, soil food web, creating a worm farm, and the installing a no-dig-garden bed activities.
*The time allocation is based on materials being sourced prior to commencing construction.
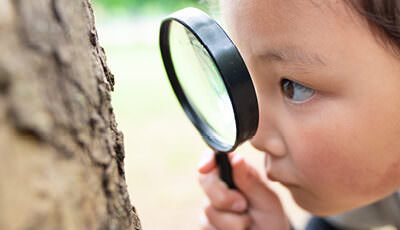
In every square metre of soil, there are millions of organisms. These organisms make up the soil food web. The soil food web recycles nutrients in the soil, making them available for plant growth. The concept of the soil food web may be very new to children and educators alike. This activity is designed to facilitate a hands-on exploration of some soil samples to find evidence of the soil food web.
Preparation of equipment and resources prior to beginning the learning activity will help to make it a success. Access to magnifiers is helpful because some of the organisms are quite small. If magnifying glasses are not available, using technology such as the camera on phones and tablets can be a good substitute and there are a number of apps that allow these cameras to be used in macro mode.
*Time allocation is dependent on site selection and travel time.
Making a small wicking bed out of a polystyrene box is a great way to upcycle materials to produce a functional planter-box, providing participants with a great sense of satisfaction. This activity does involve a few key steps, and requires adult supervision to ensure that the sequence is successfully followed. The water saving features of wicking make this small garden bed ideal for food plants such as herbs, vegetables and berry plants.
The small wicking bed is a great team-building activity, and more than one bed can be produced by older students working in small groups. This activity involves many roles to maximise student-participation and introduces scientific ideas that can be further investigated. When completed, the wicking bed may be deceptively heavy (a standard polystyrene box filled with soil could weigh around 20kg)and awkward to move, so it is best to build the bed in its final location.
*The time allocation includes preparation details included in the Educator Notes. Sourcing and preparing the materials prior to commencing the activity is essential to successful completion of this activity within the allotted time.
Most young learners will come with some prior knowledge of frogs. Upon completion of this learning activity, they will have developed a basic, moderate or complex understanding of a local frog’s specific survival needs, depending on their stage of learning. The research and planning phases are essential to creating a suitable frog habitat.
*Time allocation will be dependent on site selection and travel time. Additional time may be spent in consultation with your local Landcare group, council, or indigenous plant nursery.
Before constructing a frog-friendly habitat, young learners will be required to create a design or a plan. Learners will apply prior learning and information gathered during the research phase to identify the things to include in their habitat design. Having a sound understanding of the frog’s specific survival needs is essential to designing the frog-friendly habitat. The habitat will be created with both living and non-living elements. The design must be fit for purpose.
*The time allocated is to create a cross section design of the frog-friendly habitat, providing the research phase has been undertaken prior to commencing.
There is a comprehensive list of safety and planning considerations, and materials to gather before commencing the construction of a frog pond. Please refer to the educator notes via the button above. Before commencing this activity, the Junior Landcarers will have already created a habitat design, informed by their research to guide this next construction phase of the project. This activity will require adult supervision and some ground work to prepare and move materials. Adequate preparation of materials beforehand and following safety instructions are vital. Having several volunteers to contribute and help when others need a break will ensure this is an effective and efficient activity.
*The time allocation for this activity is based on all materials being sourced prior to commencing construction. Most of the construction materials can be sourced from a local hardware store; and the native aquatic plants and shrubs from a local indigenous plant nursery. It is difficult to advise on how long it will take to dig the pond hole - as this is site and soil specific.
Harvesting your produce at the right time will enable you to get the most out of it and ensure that you can reduce waste. Experiencing the value of growing your own edible fruits and vegetables and then sharing with the wider community, builds active, empowered and aware Junior Landcarers. This helps to build awareness of sustainable food production.
Planting seedlings is one of the most satisfying tasks as it helps to bring your food garden to life relatively quickly. Understanding the best location and conditions for your plants, taking good care, and documenting what you plant will help to grow a productive garden. Advance preparation of your garden bed, being ready with suitable plants, and working in teams will help this be an effective and efficient activity.
Being involved in making a no dig garden is a great team building activity, it helps to establish plants very quickly without having to do heavy work of digging out a garden bed. As there is minimal disturbance of the soil layers in establishing this garden bed, it does not disturb existing soil life.
This activity will require adult supervision and some ground work to prepare and move materials. Adequate preparation of materials beforehand is important and safety instructions are essential. Having several helpers to contribute and fill in when others need a break will help this be an effective and efficient activity.
The time allocation for this activity is based on using a small garden bed space of about 2 metres by 1 metre. Larger areas will require more time, materials and assistance.
It would be ideal to have equal amounts of green and brown materials to layer in the garden bed.
In this activity we will be getting to know our own grounds so that we can locate the best position for a food growing garden. Working in teams will help build skills for working together in the development of the food garden.
*Time allocation will be dependent on site selection and travel time.
Planning a food garden can be a very exciting and beneficial process to keep you healthy and engaged in the great outdoors. Get started with planning and creating a vision for your new food garden. Creating a vision for your garden will help it be on a pathway to success by reflecting on the purpose and assist in the steps to get the best possible benefits. Most young learners will come with some prior knowledge of food gardens. Upon completion of the activity they will have considered important aspects of developing a food garden as well as their vision.
*Time allocation will be dependent on site selection and travel time.
Water quality is important to the liveability of places for people, animals and vegetation. If everyone makes small changes, we can make a big difference to the health of our waterways. Junior Landcarers will be able to draw on their experiences from their waterways clean-up activity, field data collection and analysis, to identify ways they can personally adjust their habits to reduce their waste and influence others to do the same.
Junior Landcarers on their own or working as a team, can clean-up waterway to make a visible difference and help improve ecosystems. From picking up rubbish to collecting and analysing data, they can identify the ways people can help reduce waste and protect water supplies.
Adequate preparation of materials beforehand is important and safety instructions are essential. Please refer to the educator notes for a comprehensive list of safety and planning considerations, as well as materials to gather before commencing your waterways clean-up and data collection.
*Time allocation will be dependent on site selection and travel time.
An activity idea before you construct the worm farm, you may want to invite the young learners to form small groups and create a labelled cross-section drawing detailing the layers of the worm farm, this will help them understand the construction process. The young learners will need to have sound understanding of the purpose of a worm farm and the earthworms’ specific needs before commencing the worm farm construction. This activity will require adult supervision and some ground work to prepare the materials. Adequate preparation of materials beforehand is important and safety instructions are essential. The time allocation for this activity is based on constructing one worm farm.
*Time allocation estimate if all materials have been previously sourced.
Having healthy plants is dependent on a variety of factors. Before commencing this activity, be sure to identify the pest species on your plants. Certain pesticides are only suitable to treat specific pest species. The natural pesticide featured in this learning activity is to treat sucking pests such as aphids and scale.
*If all materials have been previously sourced.
With Australia’s growing population, we need to find solutions to manage our waste produced from food production, gardening, leisure activities, technology and general goods. We need to divert waste from landfill that can be reused, recycled or composted so that valuable resources can be recovered. Landfill is the name we give to the rubbish or waste that is buried, sometimes known as a tip or rubbish dump.
The resources we use create waste so what do we do with this waste matter? We are responsible for the waste we produce and where it ends up.
The adult’s key role is to facilitate discussions during this activity or project, and assist the young people with access to documentation and other adults who may be able to assist with the planning of the event.
*For introduction and initial brainstorm activity.
Soil is a vital non-renewable resource. Nutrient rich soil gives us clean air and water, bountiful crops, diverse wildlife, healthy forests and landscapes. In this activity we will get our hands dirty to understand how soil texture influences the moisture holding capacity of different soils.
Soil preparation and collection before commencing this activity will assist in the time allocation of the activity.
Water is the most common substance found on earth and less that 1% is available as fresh water. Yet all plants and animals need water to survive. We need to conserve and protect fresh water resources. The Every Drop Counts learning activity explores the many ways that water is used, how you can reduce your water usage and reuse water.
*Time allocation will be dependent on site selection and travel time.
Spring is here; the sun is out and shining so it’s time to get sowing! Plant a seed and watch your little gem grow into a seedling and then into a tasty treat ready for harvesting.
*Time allocation will be dependent on site selection and travel time.
With Australia’s changing climate we need to adapt to our altering conditions. This is challenging but also possible for humans through behaviour change and infrastructure change, for example how we design our homes, farms and cities. It is not quite so easy for our precious wildlife. In this activity we can help support the needs of wildlife by giving them access to water year round.
*Time allocation will be dependent on site selection and travel time.
To increase your chances of observing beneficial insects carefully consider the suitability of the observation site and the current conditions. Optimal conditions for bee observations:
- an area that is home to native and exotic flowering species
- area protected from strong winds
- an open sunny location
- a warm location with temperatures above 20⁰ C
- between 10am and 2pm when the flowers open up wide to invite the bees in.
*Time allocation will be dependent on site selection and travel time.
To increase your chances of observing animals carefully consider the suitability of the observation site and the current conditions. Consideration for animal observations:
- an area that has varied surfaces (sand, dirt, rocks, water bodies) and vegetation (grasses, high and low plants, shrubs, trees)
- rain, snow or wind may send some animals into hiding
- the time of day will determine the types of animals observed, e.g. nocturnal, crepuscular species may be sleeping or inactive during the day
- listen while you go searching, some animals make calls and will alert you to their location
*Time allocation will be dependent on site selection and travel time.
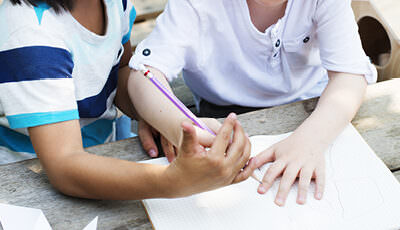
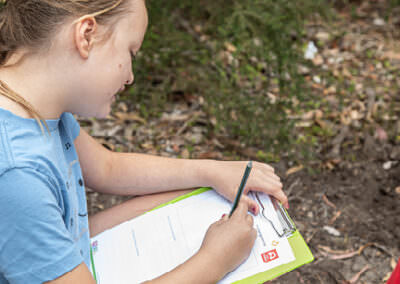
In this activity, you will invite your learners to connect with the natural features in your area – this could be in your schoolyard, eco-garden, local bushland or park etc.
The activity has been designed to help children think about why the land, the flora and fauna is important to them – and to identify a small action they can take to help protect, improve or enhance their local environment. Finally, this activity encourages learners to share their letters with a wider audience and promote caring for and protecting the environment on an ongoing basis.
If you need some inspiration, you can watch this video of Junior Landcare ambassador, Costa, speaking with students about why they love the environment and steps they are taking to care for it.
Checklist
- Outside drain (100g soil/dirt or clay , 100g leaves, twigs or sticks, plastic )
- Kitchen Sink (100ml of vegetable oil, 100g Organic food scraps)
- Kitchen Sink (20ml detergent)
- Toilet (4 squares of toilet paper)
- Toilet (2 x tissues)
- Toilet (2 x wet wipes)
- A tablespoon of soil/dirt
- 5 – 10 broken pieces of twigs or sticks
- A teaspoon of clay in water
- A teaspoon of chocolate drink powder
- 3 drops yellow food colouring and 1 square of toilet paper
- 10 sultanas
- Tablespoon of detergent
- 10 small rocks
- 5 small pieces of aluminium foil scrunched in balls
- ¼ piece of A4 paper ripped in strips
- Small plastic bag cut into pieces
- Tablespoon of vegetable oil
- Tablespoon of charcoal
- 20cm of plastic string or fishing line
- Tablespoon of sand
Instructions
 STEP 1
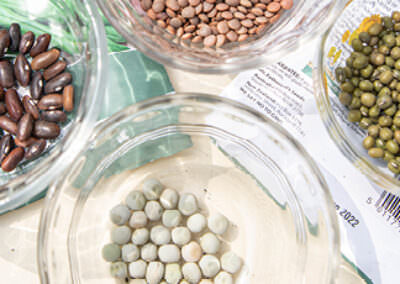
Choose a seed to sow that is suited to your climatic zone and one that will produce fruit, vegetables or herbs for you to eat. Your seed packet will explain the best time to sow seeds.
 STEP 2
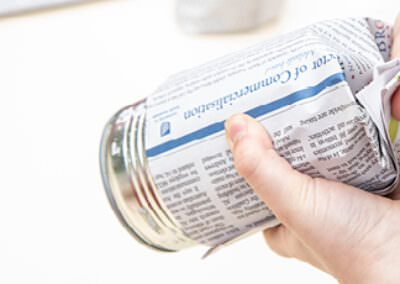
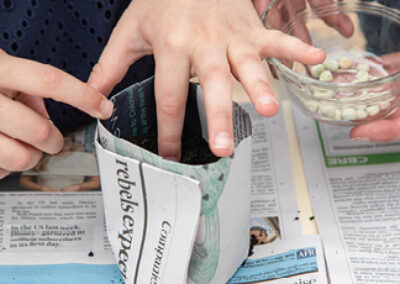
Make a newspaper seed starter pot for your seedling. Tear a single sheet of newspaper in half and fold into thirds. Wrap the paper around an empty can but not too tight. Secure with tape on the side of the cylinder. Fold the paper down onto the base of the can, secure the flaps with tape. Slip your newspaper pot gently off the can. Make sure to use biodegradable or paper-based tape (e.g. masking tape).
 STEP 3
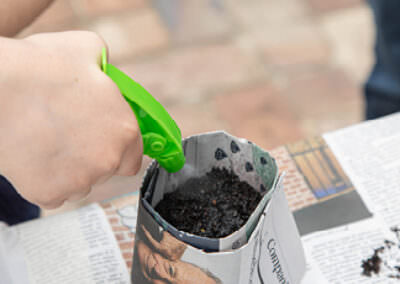
Fill the seed starter pot two-thirds full with seed raising or potting mix. Carefully place your seed into the centre of the pot to a depth suitable for the specific seed and then cover with a thin layer of potting mix.
 STEP 4
Your seed will need the right amount of water to germinate. Keep the soil in your seed planter pot soil moist by misting with a spray bottle every morning until it is time to plant in the ground or into a larger pot.
 Step 1
Why bees matter: Discuss the important role bees play in pollinating flowering plants and shrubs. As pollinators bees carry pollen from flower to flower to help the flowering plants make seeds, reproduce and make new plants. Bees help to grow our food. Without pollinators such as bees animals and humans would be without seeds, nuts and fruits to eat.
What makes other insects beneficial: Discuss the role insects play as decomposers, pollinators and as a food source for insectivores.
 Step 2
Outline safety aspects to the children, when observing insects.
Do not touch any insects, be gentle and quiet observers.
Instruct how to use tweezers, paintbrushes, tongs and garden trowels.
Guide the children to tread lightly, taking care not to stand on anything living while exploring. Ask the children to return things back to how they found them, e.g. turned rocks or logs.
Examine your chosen field guide with the children (device or printed version) prior to exploring outside. Point out a beneficial insect they are likely to observe and model how to use the field guide.
 Step 3
Head outside to your observation site for a minimum of 7 minutes. Insects are everywhere but finding a spot near a garden bed or away from asphalt will allow children the opportunity to do some light digging. Allow children time for ‘slow looking’ in a micro environment. Encourage the children to explore the site Allow children time for ‘slow looking’. Encourage the children to explore the site, carefully looking at different locations using their senses to lead them. Carefully look at flowers to see if there are any active bees or other flying insects. Encourage the children to gently turn over the topsoil, bark, small rocks and leaf litter looking for ground dwelling insects.
If the children are successful at spotting an insect, see if they can attempt to identify the insect using their field guide.
 Step 4
Use the activity sheet to encourage the children to make careful observations and thoughtful interpretations during and after the activity.
 Step 1
Predict which animals you might expect to see at your observation site, and which ones you might not expect to see?
Predict where in the habitat you might expect to see animals? Discuss locations in the habitat: in the air, on plants, in trees, under rocks, in the soil. Animals can be observed at different heights.
 Step 2
Examine your chosen field guide with the children (device or printed version) prior to exploring outside. Point out an animal they are likely to observe and model how to use the field guide.
Safety steps:
- outline safety aspects to the children, when observing animals
- be gentle and quiet observers. Do not touch any insects
- instruct how to use tweezers, paintbrushes, tongs and garden trowels
Guide the children to tread lightly, taking care not to stand on anything living while exploring. Ask the children to return things back to how they found them, e.g. turned rocks or logs.
 Step 3
Head outside to your observation site for a minimum of 7 minutes. We can find animals or traces of animals everywhere we go. Allow children time for purposeful observations, exploring the site, carefully looking at different locations and using their senses to lead them.
- Start by looking at the ground, get down low and guide the children to tread lightly. Use the trowels to gently move the soil, leaves and bark and magnifying glasses to examine small creatures up close. Remind the children to return things back to how they found them, e.g. turned rocks or logs.
- Stand up and see what you can find, taking care not to stand on anything living while exploring animals at eye height. Examine the leaves on bushes, flowers and bark on tree trunks.
- Look up high now, into the tall trees and the sky above. You might like to use binoculars to get a closer look at what is living above.
 Step 4
Use the activity sheet to encourage the children to make careful observations and thoughtful observations.
You might like to take photos instead to capture your observations.
 Step 1
Why bees matter: Discuss the important role bees play in pollinating flowering plants and shrubs. As pollinators bees carry pollen from flower to flower to help the flowering plants make seeds, reproduce and make new plants. Bees help to grow our food. Without pollinators such as bees, animals and humans would be without seeds, nuts and fruits to eat.
What makes other insects beneficial: Discuss the role insects play as decomposers, pollinators and as a food source for insectivores.
 Step 2
Examine your chosen field guide with the children (device or printed version) prior to exploring outside. Point out a beneficial insect they are likely to observe and model how to use the field guide.
Outline safety aspects to the children, when observing insects.
- Be gentle and quiet observers. Do not touch any insects.
- Instruct how to use the garden trowels or spoons and paddle sticks or paintbrushes.
- Guide the children to tread lightly, taking care not to stand on anything living while exploring.
- Ask the children to return things back to how they found them, e.g. turned rocks or logs.
 Step 3
Head outside to your observation site. Insects are everywhere but finding a spot near a garden bed or away from asphalt will allow children the opportunity to do some light digging.
Allow children time for ‘slow looking’ in a micro environment. Encourage the children to explore the site, carefully looking at different locations using their senses to lead them.
Carefully look at flowers to see if there are any active bees or other flying insects. Use the trowels or spoons to gently turn over the topsoil, bark, small rocks and leaf litter looking for ground dwelling insects. Using the paddle sticks or paintbrushes, attempt to move the insects into the plastic container to observe.
If the children are successful at spotting an insect, see if they can identify the insect using their field guide.
 Step 4
Use the activity sheet to encourage the children to make careful observations and thoughtful interpretations during and after the activity.
You might like to take photos to capture your observations.
Step 1
Why bees matter: Discuss the important role bees play in pollinating flowering plants and shrubs. As pollinators bees carry pollen from flower to flower to help the flowering plants make seeds, reproduce and make new plants. Bees help to grow our food. Without pollinators such as bees animals and humans would be without seeds, nuts and fruits to eat.
What makes other insects beneficial: Discuss the role insects play as decomposers, pollinators and as a food source for insectivores.
Step 2
Outline safety aspects to the children, when observing insects.
Do not touch any insects, be gentle and quiet observers.
Instruct how to use tweezers, paintbrushes, tongs and garden trowels.
Guide the children to tread lightly, taking care not to stand on anything living while exploring. Ask the children to return things back to how they found them, e.g. turned rocks or logs.
Examine your chosen field guide with the children (device or printed version) prior to exploring outside. Point out a beneficial insect they are likely to observe and model how to use the field guide.
Step 3
Head outside to your observation site for a minimum of 7 minutes. Insects are everywhere but finding a spot near a garden bed or away from asphalt will allow children the opportunity to do some light digging. Allow children time for ‘slow looking’ in a micro environment. Encourage the children to explore the site Allow children time for ‘slow looking’. Encourage the children to explore the site, carefully looking at different locations using their senses to lead them. Carefully look at flowers to see if there are any active bees or other flying insects. Encourage the children to gently turn over the topsoil, bark, small rocks and leaf litter looking for ground dwelling insects.
If the children are successful at spotting an insect, see if they can attempt to identify the insect using their field guide.
Step 4
Use the activity sheet to encourage the children to make careful observations and thoughtful interpretations during and after the activity.
 STEP 1
How do humans use water in our daily lives?
From morning to night we use water for drinking washing and cooking and contributes to our health. Water is an essential resource in our local environment, industry and agriculture. Discuss these concepts with the children. What other questions arise from this discussion.
Where does our drinking water come from?
The potable water we use comes from various sources depending on where you live in Australia. Water is obtained from rainwater and harvested in tanks and reservoirs, it comes from nearby streams, springs, rivers and lakes, from groundwater or desalination plants and is then treated.
Use the videos to help stimulate discussion and the journal activity sheet to draw or record highlights.
 STEP 2
How can we responsibly share water with other living things?
Water is a basic need and right for humans and animals alike. Animals, like humans need water for their minds and bodies to function properly. They can become stressed and confused when dehydrated. Most animals do not store large quantities of water in their bodies in the same way humans do, so most need to drink regularly. Much of their water is found in the food they eat.
We have the ability to help other living beings when they are in need of water and are unable to source it themselves.
Due to lack of regular rainfall, low rainfall, drought or bushfires, water can become scarce for animals. Providing water is a simple yet effective way to help local fauna (animals).
Continue to use the journal to draw or record discussion highlights.
 STEP 3
Find a shady location, bordered by high grasses, plants or shrubs in your outdoor space. Place the water container here; this will help hide wildlife hide from possible predators when drinking or bathing. Make sure it’s also in a location where you can easily access the container for cleaning and refilling and also observe any wildlife activity around the water.
When setting up your container add a rock or two to the base before covering with clean water. If the container is large you might also like to add a medium size branch to the container so that small animals such as skinks can climb in and out safely.
 STEP 4
Top up water when the level appears low or the water becomes dirty. Intermittently observe the water container on warm or hot days. Predict and record which animals might visit your water container and at what time of day in your journal. Which is the smallest animal who could access the water? Which is the largest? Think about where you live, and what animals you have observed in the past.
If you feel the location is not optimal after observing and trialing the location of your water container move it to another location which might be more suitable for wildlife.
STEP 1
How do humans use water in our daily lives?
From morning to night we use water for drinking washing and cooking and contributes to our health. Water is an essential resource in our local environment, industry and agriculture. Discuss these concepts with the children. What other questions arise from this discussion.
Where does our drinking water come from?
The potable water we use comes from various sources depending on where you live in Australia. Water is obtained from rainwater and harvested in tanks and reservoirs, it comes from nearby streams, springs, rivers and lakes, from groundwater or desalination plants and is then treated.
Use the videos to help stimulate discussion and the journal activity sheet to draw or record highlights.
STEP 2
How can we responsibly share water with other living things?
Water is a basic need and right for humans and animals alike. Animals, like humans need water for their minds and bodies to function properly. They can become stressed and confused when dehydrated. Most animals do not store large quantities of water in their bodies in the same way humans do, so most need to drink regularly. Much of their water is found in the food they eat.
We have the ability to help other living beings when they are in need of water and are unable to source it themselves.
Due to lack of regular rainfall, low rainfall, drought or bushfires, water can become scarce for animals. Providing water is a simple yet effective way to help local fauna (animals).
Continue to use the journal to draw or record discussion highlights.
STEP 3
Find a shady location, bordered by high grasses, plants or shrubs in your outdoor space. Place the water container here; this will help hide wildlife hide from possible predators when drinking or bathing. Make sure it’s also in a location where you can easily access the container for cleaning and refilling and also observe any wildlife activity around the water.
When setting up your container add a rock or two to the base before covering with clean water. If the container is large you might also like to add a medium size branch to the container so that small animals such as skinks can climb in and out safely.
STEP 4
Top up water when the level appears low or the water becomes dirty. Intermittently observe the water container on warm or hot days. Predict and record which animals might visit your water container and at what time of day in your journal. Which is the smallest animal who could access the water? Which is the largest? Think about where you live, and what animals you have observed in the past.
If you feel the location is not optimal after observing and trialing the location of your water container move it to another location which might be more suitable for wildlife.
 Step 1
If your location does not have a food garden, creating a vision will help to plan and achieve the best possible results.
In your research phase, find out more about successful food gardens.
Read more about a Junior Landcare case study that focuses on food production. Use the filters for topic and content type to search for a suitable case study to understand more about what can be achieved.
Research and discuss:
- the set up and steps involved
- the benefits
- the challenges
- special ideas.
 STEP 2
Creating the food garden vision.
- Ask the children what are the benefits of creating a food garden in our local area?
- Discuss the benefits for sustainability, health, learning, expenses and your community.
- What do you think will make your food garden a success?
- Who else can we involve?
You want the best possible outcome, therefore it is ideal to involve as many people as possible in your decision making process. This will help promote ownership and future interest in the food garden.
At a school, this could include interested students, the groundskeeper, volunteers and any other keen participants.
At home, it is good to have a family discussion to focus on what you would really like. Use your research for inspiration.
 STEP 3
Discuss in small groups:
- who will be responsible
- what resources will you need?
- where can you grow food?
- how big will your food garden be?
What is your food garden vision? What are your goals and your creative ideas? What gets you excited about your planned food garden?
Use the activity sheet to record ideas.
 STEP 4
After completing the activity sheet, have the children discuss their ideas and vision with each other.
In the discussion consider:
- limitations and restrictions
- who might be able to help?
- what equipment might we need?
- what budget is required?
Once you have discussed and agreed on your vision, you can go to the next stage of the creating your food garden learning activity.
 Step 1
Mapping and understanding your local space will help you explore the possibilities and decide the best location for creating a food garden.
Begin discussion by exploring what plants need to grow in your food garden. Include discussion around water, light and soil.
Gather any background information including other maps to help your discussion.
Where is the best location for our food garden?
Explain that we will be exploring the grounds to determine what the best location might be for a food garden.
To determine the best location for the food garden, account for the access to water, sunlight and shade, and that many plants do not like to grow in windy areas.
 Step 2
Define the areas you will explore together and distribute the printable activity sheets, pencils and clipboards. Children can work in groups.
If you have existing site maps, refer to it so that can point out north and other directions. Use the compasses to orient where north and south is and refer to it on your map/s.
Ask children to use their observation skills to look closely at their environment to understand it more.
You might like to take photos to capture your observations.
 Step 3
With the resources ready, conduct a walk around your grounds to assess each location.
Consider the size and shape of your food garden, noting it is a good idea to start small.
Children will use their observation skills to assess, map, label and photograph:
- location of buildings and other features
- location of water sources
- visibility – a location that people will see regularly
- ease of access for garden helpers
- drainage
- shade
- wind
- soil types
- safety.
Complete the activity sheet with your observations for each identified site.
 Step 4
Review each activity sheet and discuss locations to determine the best location for your food garden.
To help make your ultimate decision, return to each site at different times to note variations.
Children can debate and vote on which site they feel is the best location. Their maps can help inform others and be displayed.
STEP 1
Choose a seed to sow that is suited to your climatic zone and one that will produce fruit, vegetables or herbs for you to eat. Your seed packet will explain the best time to sow seeds.
STEP 2
Make a newspaper seed starter pot for your seedling. Tear a single sheet of newspaper in half and fold into thirds. Wrap the paper around an empty can but not too tight. Secure with tape on the side of the cylinder. Fold the paper down onto the base of the can, secure the flaps with tape. Slip your newspaper pot gently off the can. Make sure to use biodegradable or paper-based tape (e.g. masking tape).
STEP 3
Fill the seed starter pot two-thirds full with seed raising or potting mix. Carefully place your seed into the centre of the pot to a depth suitable for the specific seed and then cover with a thin layer of potting mix.
STEP 4
Your seed will need the right amount of water to germinate. Keep the soil in your seed planter pot soil moist by misting with a spray bottle every morning until it is time to plant in the ground or into a larger pot.
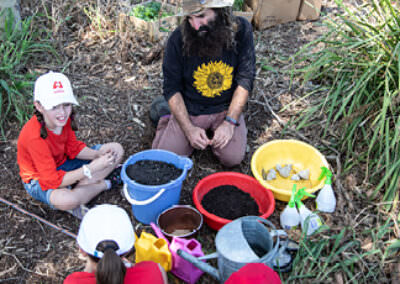 STEP 1
What makes up soil? Discuss that soil is made up of four things. They are pieces of finely ground rock, humus (humus is made up of little bits of decayed leaves and tiny pieces of rotting wood, seeds and decayed plants and animals), water and air.
Why is soil important? Discuss the five essential functions that soil perform.
- Regulating where rain and irrigation water goes.
- Sustaining plant and animal life by providing food and nutrients for plants. It provides a support base for plants in which to spread their roots so they can stand up straight.
- Filters pollutants – the minerals and microbes in soil are responsible for filtering, buffering, degrading, immobilizing, and detoxifying organic and inorganic materials, including industrial and human by-products and atmospheric deposits
- Cycling nutrients – carbon, nitrogen, phosphorus, and many other nutrients are stored, transformed, and cycled through soil
- Supporting structures – buildings need stable soil for support, and archaeological treasures associated with human habitation are protected in soils.
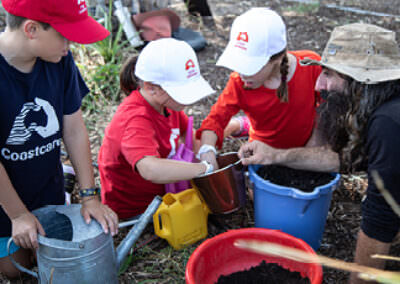 STEP 2
Find places in your local area that you can use for collecting soil. Go to an outdoor space and conduct a soil texture test with the equipment and the activity sheets. This could be your food garden, a bare patch in the backyard or somewhere that is easy to dig.
To help with time efficiency, collect different soil samples in containers beforehand.
If children are to collect some of their own soil samples for testing, there are a few things to consider. Outline safe digging practices and the importance of not harming plants, and how to return the soil once you have completed the activity.
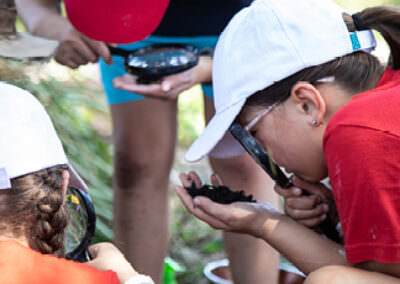 STEP 3
What different soils might you encounter in your local area?
- Sandy Soil – is quite dry and light and contains larger amounts of air. Water drains through it easily.
- Clay Soil – contains smaller amounts of air and pieces of finely ground rock. Clay soil is very heavy and sticky when wet and water does not drain through it easily. When clay becomes wet it swells and sticks together. Then as wet clay dries, it shrinks and cracks.
- Loam – with its medium sized particles, has the ability to trap water and retains nutrients for plant use, so it’s great for growing crops and food plants.
Demonstrate how children can use the soil texture key to classify different soil textures.
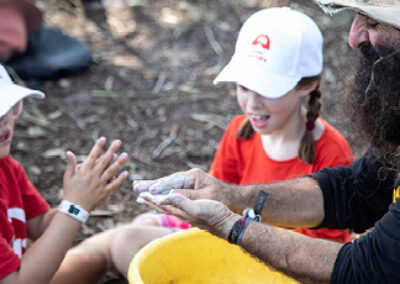 STEP 4
Children take each soil sample and wet it gradually with water. Use the activity sheet to help determine texture and to identify the soil.
How does the soil feel? Is it spongy, sticky, sandy or crumbly?
The ribbon test will help to determine what type of soil you have. Can you mould into a ball and then squeeze it into a ribbon between your fingers? If it forms a ribbon of 5cm or more, it will be a clay.
What type of soil have you found?
Which soil will be best for growing your food plants?
What can you do to improve the soil you have?
Clean up with water and return the soil to where it came from.
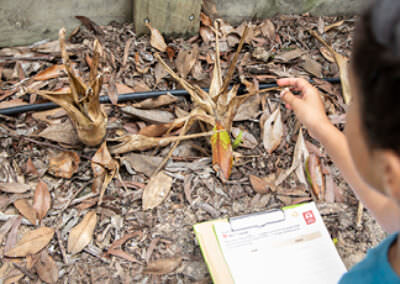 STEP 1
Make a list in the activity sheet of all the ways you use water in your home and garden. Think about what you do each day from morning until night, as well as over a week and a year.
Think about all the ways you use water at home. You might use water for:
- drinking and cooking
- washing, bathing and keeping clean
- watering your garden
- keeping cool and recreation activities.
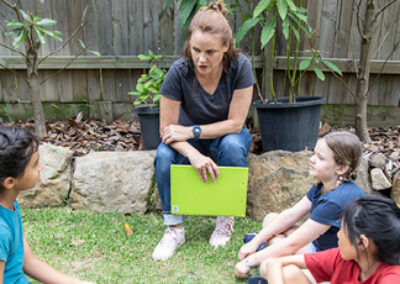 STEP 2
There are different ways water moves through the urban water cycle and natural water cycle.
Discuss the many ways waters arrives at your house. These may include:
- mains water
- dams
- recycled water
- rain water
- bore water.
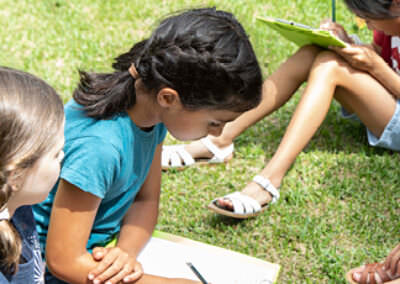 STEP 3
Use the Water Usage Table included in the activity sheet or the online Hunter Water: Water Usage Calculator to work out how much water you use each day.
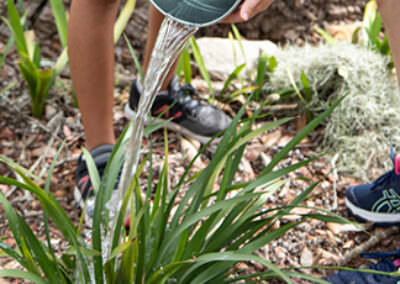 STEP 4
Using the information gathered in Steps 1, 2 and 3, list ways you can save water in your home and garden. Talk as a family about what each of you can do to make a difference.
Every drop counts!
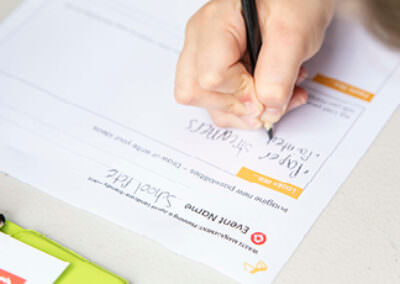 STEP 1
Provocation
So we have a special event [insert the name of your event] coming up in our community. I was wondering if it is possible for us to have celebrations and special events in our community while also showing care for the environment. Can we have both? Discuss.
Imagine new possibilities
Encourage the children to imagine new possibilities. What might an event that shows care and respect for the environment: Look like? Sound like? Feel like?
Complete the activity sheet to guide their planning.
 STEP 2
Connecting ideas
Planning is the most important step in organising a Junior Landcare-friendly event.
Discuss what values or beliefs will guide the children in planning for their event; for example care, respect, responsibility.
Considerations:
- what event are you holding?
- is it a swimming carnival, school dance, mini-fete, market stall, sports carnival, end of year class party or a cultural celebration?
- who is responsible for the overall planning of this event?
- will you have an organising committee? Some people you might want to involve include teachers, students, parents and other children
- how can you positively influence this group? How can you offer support and solutions?
- what waste do you anticipate at this event? Some items to consider are food scraps, glass, paper, firm plastic, aluminum, soft plastics and landfill.
- what are the expectations for a Junior Landcare-friendly event?
- how might this be different to previous events held in your community?
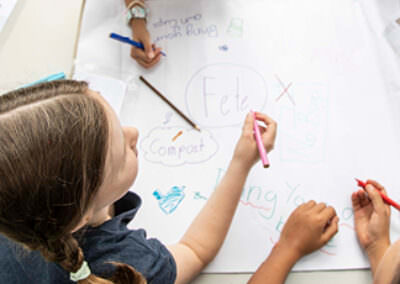 STEP 3
Seek solutions by brainstorming in groups, and record your ideas in your activity sheet, the poster sized sheet or digital device. Where possible, goods used at your event should be reusable, compostable or recyclable.
Organise – bin stations for your waste streams. Decide the best position for the bin stations.
You may need to organise extra waste collection services for a large event.
Refuse – can some items previously used be removed from your event? e.g. balloons, bottled water, straws, laminated signs.
Reuse – can non-sustainable items be substituted for reusable alternatives? e.g. bunting for balloons, water refill stations instead of bottled water, reusable cups, ceramic plates for plastic single-use plates.
Reduce – what actions can you take or how can you influence to minimise waste at this event? e.g. careful ordering, minimise non-reusable and non-recyclable packaging and catering products.
Rot – will there be food waste? Can this be composted onsite or offsite? e.g. someone from your community, the local council or a ShareWaste member may be able to take your food waste.
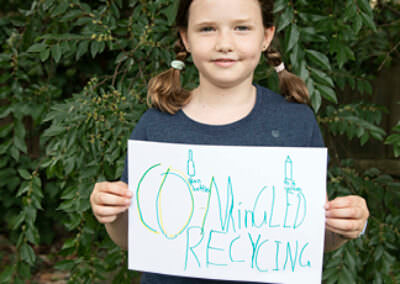 STEP 4
Putting ideas into action on the day
Managing waste onsite will be the biggest job for your group on the day. Have a clearly labelled four-bin recycling station if possible.
Here are a few useful tips to organise your bin stations:
- label the bins comingled recycling (paper cardboard, aluminum, steel, glass) composting, soft plastics, landfill (this may depend where you live in Australia and what your council collects)
- ensure the bin stations are set up in the same order at each location to avoid confusion
- roster friendly helpers at each bin station to prevent contamination of waste streams. This will make it easy for people to dispose of their waste responsibly. Give them a high 5 if they ‘bin it right!’
Use this event as an opportunity to teach others about what you have done and what you have learnt. e.g. fun signage, social media posts and announcements.
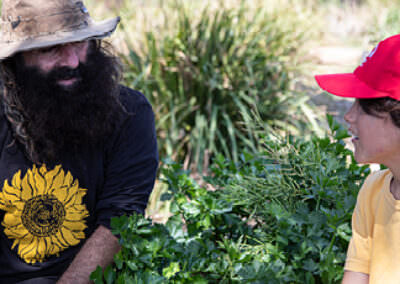 Step 1
Discuss the materials that you will need for your no dig garden bed. Ask the children what they think they will need to create a living garden soil. Discuss the benefits of carbon rich (brown) materials and nitrogen rich (green) materials.
Being ready with all your materials at the garden bed site location will save time and achieve the best results.
- Go through your checklist to ensure you have all the materials you need.
- As this is a step by step layering process, make sure you run through the plan with the children and outline the safety steps involved.
- Each layer will need to be watered in as this will settle the contents and enable best conditions for growth.
Have your garden border in place if you are making a raised bed. This can be untreated timber, bricks or straw bales.
No dig garden beds can be made without edging, however a path around the bed will help reduce weed build up.
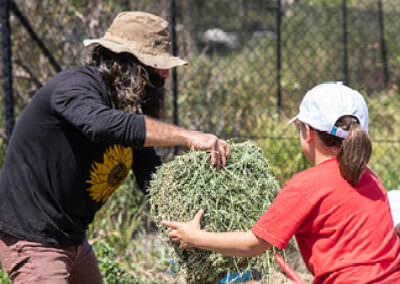 Step 2
If placing the garden bed on a non-porous surface like concrete, put a layer of blue metal gravel as the base. This will not be needed on a porous base.
Cover the garden bed base with a layer of wet soaked cardboard, to act as a thick weed mat. Water this layer.
Place a thin layer of other green materials over your weed mat. Then place loosely thick layers of the straw mulch. This makes up a bulky layer of material. Water this layer.
Put a layer of animal manure ensuring to sprinkle this on the straw mulch to help break it down. Water this layer.
Place another layer of other green materials on top of the animal manure. Then add another layer of the other brown materials. Water this layer.
Keep alternating between the other brown and green materials. Layering should stop about 30cms from the top to allow for the planting layer. Water this layer.
The top layer should be the vegetable garden soil mix or compost mixed with garden soil. Water this layer.
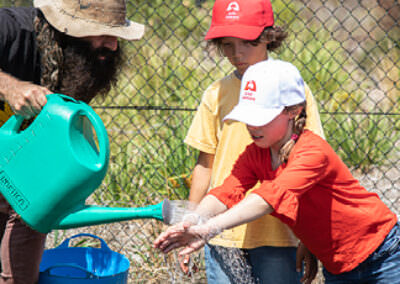 Step 3
Now that the no dig garden bed has been built, it won’t be long until seedlings can be planted. It can be good to wait a week or so before planting to allow the new garden bed to settle.
In the meantime, clean up after your work by packing away materials and thoroughly washing hands.
Ensure your no dig garden bed is looked after appropriately. Establish a regular watering roster. Be mindful of water restrictions in your local area.
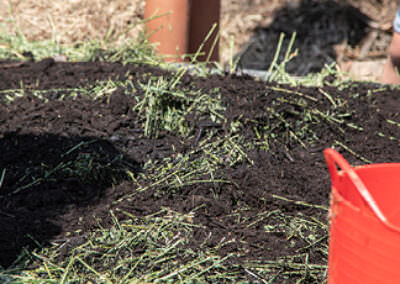 Step 4
Using the activity sheet, discuss what kind of layers were used to create your no dig garden bed.
Is straw mulch carbon rich or nitrogen rich? Is animal manure carbon rich or nitrogen rich?
Discuss whether you used more green or brown layers. What benefits do these materials bring? What do you expect to happen over time?
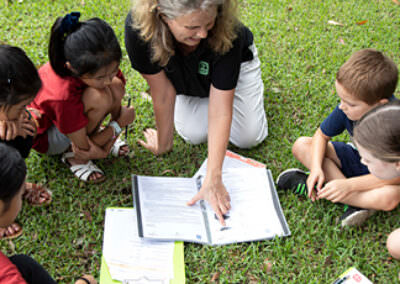 STEP 1
Provocation
What do plants need to be healthy to grow and create the produce we eat? We have some new plants in our food garden. We would like to have the best results possible from these plants, what can we do to keep them healthy?
Use the activity sheet to help build the discussion.
What does a flowering plant need to grow? Water, sunlight, air, soil, care.
What helps to keep plants healthy? Rich nutrients in the soil, lots of beneficial pollinators, mulch, lots of care, pest and disease control.
What are some of the threats to healthy plants? Pests, disease, weather variations, planting in the wrong season, neglect.
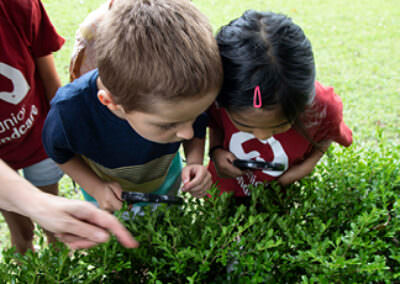 STEP 2
What is a pesticide? Discuss that a pesticide is a solution created to treat, deter or destroy pests and diseases that attack plants.
Why should we use a natural pesticide? Discuss that while treating plant pests and diseases, we do not want to harm the soil, water sources, other plants, beneficial insects, wildlife or people. Pesticides are often pest species specific.
Discuss how to identify plant pests. Use the online guides or a book for background information.
Aphids and scale are common garden pests so we will look at ways to manage aphids by preparing a solution using environmentally friendly ingredients.
Children can investigate these and other insects in their garden, using magnifying glasses to look up close. Refer to the online and printable resources to learn and help with identification.
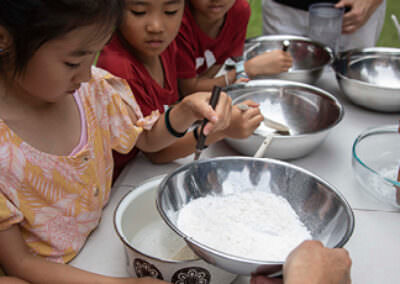 STEP 3
Keep in mind what resources you need to make the natural pesticide. Outline safe practices when using heating utensils and pesticide ingredients.
To create the natural pesticide:
- add two tablespoons of soap flakes to one litre of warm water in a saucepan or in a heatproof bowl.
- stir carefully with a wooden spoon until soap flakes are completely dissolved. Allow time to cool.
Your solution is now ready to be poured into a spray bottle.
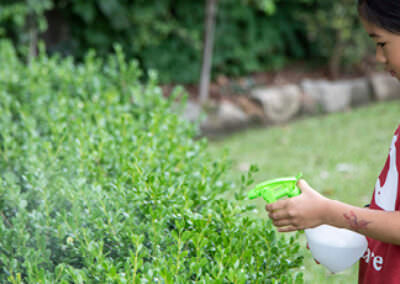 STEP 4
Apply the solution by spraying the top and the underside of each leaf and along the stems. Aphids normally congregate on the underside of the leaf so pay special attention to this area.
The natural pesticide should immediately destroy the garden pests. Reapply should the aphids or scale reappear on your plants.
Children can use the activity sheet to reflect on what actions they will take to monitor plants and assess if the natural pesticide has been effective.
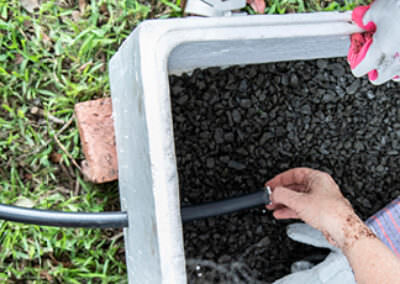 Step 1
On one side (use the smallest side) of your polystyrene box, carefully create a hole big enough to fit your garden hose/pipe. This will form the drainage so our worms don’t drown.
To further assist with drainage, place the gravel or small rocks over the base of your polystyrene box. Next, place your geotextile fabric or fly wire and hessian over the rocks.
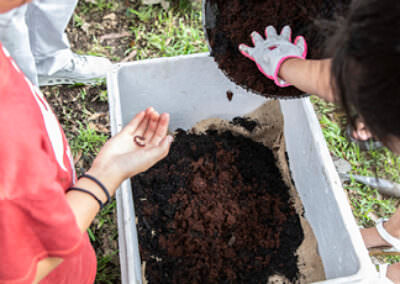 Step 2
Add bedding materials for the worms- this may be garden soil mixed with organic matter such as compost and coconut fibre.
Water this layer.
Add a layer of composting earthworms to the bedding. The worms will congregate in the scraps or tunnel beneath the surface.
Add an insulation of damp straw mulch on top of this layer.
Water this layer to moisten.
Make sure you have a bucket to catch the ‘worm wee’ coming out of the garden hose/pipe. This liquid gold ‘worm wee’ would be good to irrigate your existing garden beds.
Place the lid on your polystyrene box. Make sure you place a couple of aeration holes on the lid.
Find a nice shady place for your worm farm. Rest your worm farm on bricks.
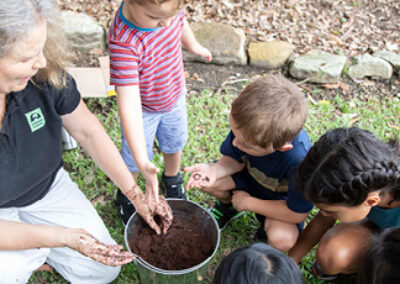 Step 3
Now that your worm farm has been built, it can be good to wait a couple of weeks before feeding your worms with food scraps.
Ensure that your worm farm is kept moist, about the consistency of a wet sponge.
In the meantime, discuss what type of food scraps your worms would enjoy. What is good for them? Why?
Complete the activity sheet to create a poster to raise awareness of your worm farm and the food scraps that you are collecting!
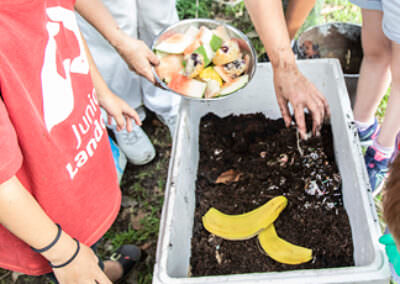 Step 4
After a couple of weeks, add small pieces of food scraps in heaps on areas of the bedding surface.
To maintain your worm farm, you will need to:
- Ensure that citrus peel, onions, garlic and artichokes are NOT given to the worms.
- Ensure that the bedding remains a neutral environment, around pH 7. Sprinkling the surface with lime or dolomite will help keep the pH neutral.
- Keep the worm farm in a cool well-protected shady place, this can be either inside or outside.
Step 1
On one side (use the smallest side) of your polystyrene box, carefully create a hole big enough to fit your garden hose/pipe. This will form the drainage so our worms don’t drown.
To further assist with drainage, place the gravel or small rocks over the base of your polystyrene box. Next, place your geotextile fabric or fly wire and hessian over the rocks.
Step 2
Add bedding materials for the worms- this may be garden soil mixed with organic matter such as compost and coconut fibre.
Water this layer.
Add a layer of composting earthworms to the bedding. The worms will congregate in the scraps or tunnel beneath the surface.
Add an insulation of damp straw mulch on top of this layer.
Water this layer to moisten.
Make sure you have a bucket to catch the ‘worm wee’ coming out of the garden hose/pipe. This liquid gold ‘worm wee’ would be good to irrigate your existing garden beds.
Place the lid on your polystyrene box. Make sure you place a couple of aeration holes on the lid.
Find a nice shady place for your worm farm. Rest your worm farm on bricks.
Step 3
Now that your worm farm has been built, it can be good to wait a couple of weeks before feeding your worms with food scraps.
Ensure that your worm farm is kept moist, about the consistency of a wet sponge.
In the meantime, discuss what type of food scraps your worms would enjoy. What is good for them? Why?
Complete the activity sheet to create a poster to raise awareness of your worm farm and the food scraps that you are collecting!
Step 4
After a couple of weeks, add small pieces of food scraps in heaps on areas of the bedding surface.
To maintain your worm farm, you will need to:
- Ensure that citrus peel, onions, garlic and artichokes are NOT given to the worms.
- Ensure that the bedding remains a neutral environment, around pH 7. Sprinkling the surface with lime or dolomite will help keep the pH neutral.
- Keep the worm farm in a cool well-protected shady place, this can be either inside or outside.
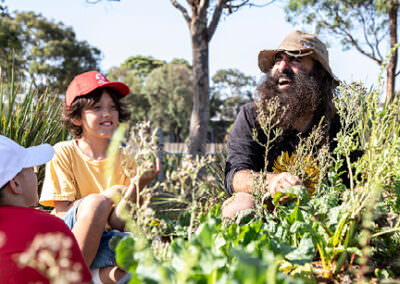 Step 1
Plan
Children can plant fruit and vegetable seedlings and herbs into moist, well-prepared soil all year round. Planning is the key to success. Refer to a planting guide like the Gardenate app to help plan what you intend to grow and when. Are you planting something that people like to eat?
Go through your checklist to ensure you have all the materials you need.
Run through the plan with the children and outline the safety steps involved.
Plant and seed labels are your friend. They will guide you on how, where and how far apart to plant your seedlings. You can use a measuring tape, a stick or hand widths to help.
If you have enough space and plants, you can plan to have your seedlings mature at different times.
Space out the pots onto your bare bed and discuss where they may go. Use planting information and the plant labels to help guide the discussion.
Consider how much space your plant needs when it is fully grown. Will it shade other plants?
Where do you think these plants should go?
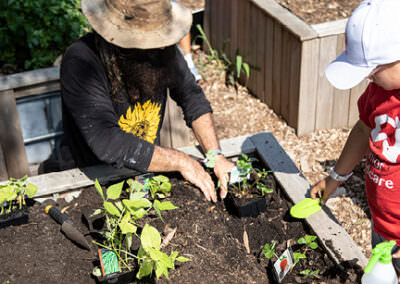 Step 2
Prepare
Fruits and vegetables grow best in rich, well-drained soil so preparing your garden bed is an important step. You may already have good conditions from building your no dig garden bed.
If using raised garden beds, you can prepare the soil in the garden beds. Dig the soil often to break up the clods (clumps), adding decomposed organic matter such as compost to improve the soil’s quality, drainage and moisture, and reducing the need to water.
To give the plants a head start, children can also add in a manure mix and well-rotted compost into the top 15cm of soil.
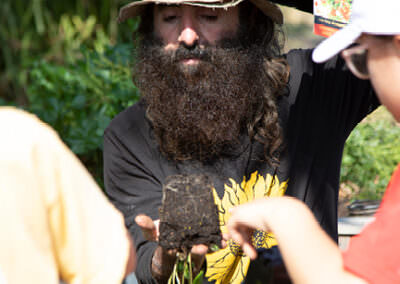 Step 3
Planting
You will need to obtain plants for your food garden. These can be started from seed, grown from cuttings, or purchased as mature plants.
Whilst you are waiting to plant, ensure that your seedlings are watered and in the shade, especially if it is a hot day. Overnight, the plants may need to be protected from pests so keep them under cover. If your seedlings have been grown indoors, they will need some ‘hardening off’. To help your plants acclimatise, you need to place the plants outdoors in small steps over a few days or weeks.
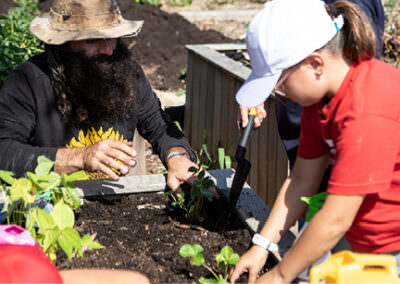 Step 4
Monitor and care
Now that you have completed your planting, use the activity sheet to draw a map and list your plants. Create rosters and tasks to share caring for your food plants with your Junior Landcare team.
Water all the crops to keep them moist on a regular basis. Tend to the garden by mulching and weeding regularly.
Refer to the Growing healthy plants using natural pesticides learning activity for guidance if you encounter sap-sucking insect damage on your food plants.
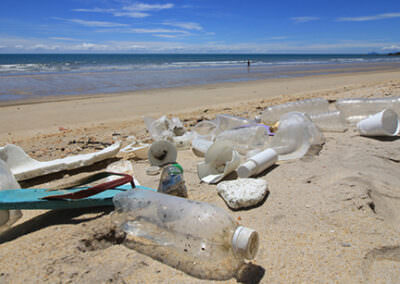 Step 1
Living things rely on water for their survival. In parts of the country, the health of our waterways is threatened due to human impacts such as irrigation practices, climate change and pollution.
This learning activity has two major benefits, cleaning land adjacent to our precious waterways, and collecting authentic valuable data on the health of our beaches and inland waterways.
Predict what items of waste the children believe they will be collecting during their clean-up.
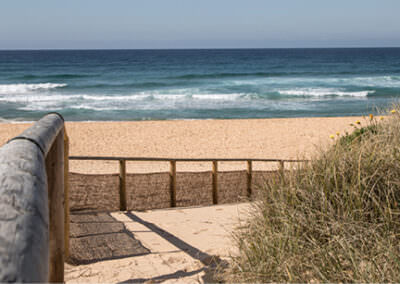 Step 2
Examine the map of the clean-up area ensuring safety aspects have been accounted for. Refer to the Educator Notes for this learning activity for a comprehensive list of safety and planning considerations.
Outline safety aspects to the children and provide a safety briefing.
- Instruct how to use the tongs or claw pick properly and how to place the rubbish in their bags safely
- Pair the children or place them in small groups to clean-up
- Ensure an adult is supervising at all times and in close proximity.
Encourage the participants to enjoy their natural surroundings as they clean up. After all, keeping beaches and waterways clean helps protect wildlife, improve their habit and restore the beauty of the waterways.
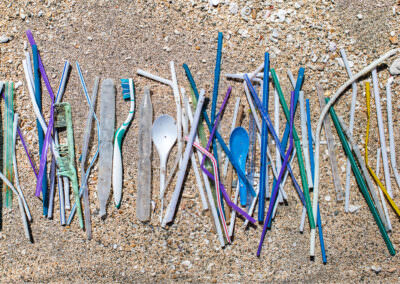 Step 3
Once the children have finished collecting rubbish for the allocated time frame, gather the children together with their bags of rubbish.
Carefully, tip the bags of rubbish onto large tarps for sorting and analysis.
Use these subheadings to sort the rubbish on the tarps:
- Plastic
- Polystyrene
- Glass and ceramic
- Other materials
- Cloth
- Metal
- Paper & cardboard
- Rubber
- Wood
- Additional items.
Sorting the rubbish will also assist with correct disposal of the waste.
Observe the rubbish items collected, is this what the children predicted to find?
 Step 4
It is now time to tally and record the rubbish collected. There are two data collection options:
Paper data collection
Use the Tangaroa Blue Clean-up Data Collection Sheet to tally and note the rubbish items collected.
OR
Digital data collection
This data can also be directly entered via the AMDI app on both Android and Apple platforms.
Once data is collected, waste items need to be grouped for correct disposal, e.g. organics, recyclables, repurposing etc.
It is now time to correctly dispose of the waste.
Make sure recyclables are correctly processed. Contact your local council for further information.
Use the activity sheet to help analyse what you have collected and discuss together what actions you might take next.
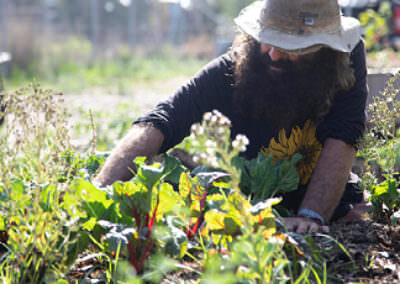 Step 1
Plan
Use your seed packaging and online garden guides, plus onsite monitoring to determine the best time to harvest your plants. Timing may vary, for example, you may need to harvest in your school garden before the summer holiday.
Ensure you have your collection materials ready and instruct the children how to collect the harvest safely. Wear protective footwear, use safe lifting procedures and look for spiky plant material and insects when harvesting.
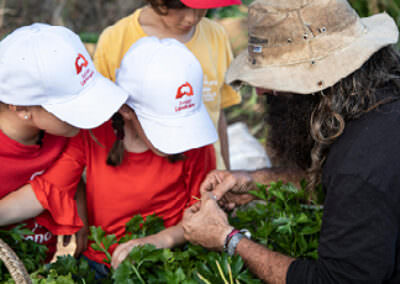 Step 2
Collect
Examine your produce for any disease or insect damage before harvesting.
Some leafy plants can be plucked so that you have the opportunity to have a second or even a third harvest from them.
Root vegetables may need to be pulled gently from the soil using a trowel or spade to loosen the soil.
Garden scissors can be useful to carefully cut fruits and leafy vegetables.
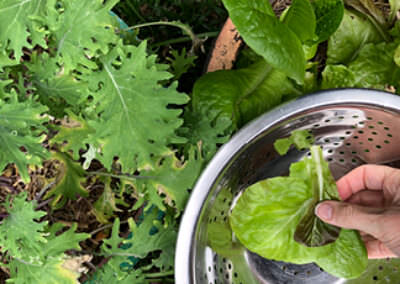 Step 3
Clean
Clean produce is important for healthy eating.
Make sure you wash your hands using soap or sanitiser before cleaning or eating your collected produce.
Once collected, use water to wash your produce. Using a colander, bucket or similar container will assist in the process.
Place your washed produce on a paper towel or clean tea towel can help collected produce dry off naturally.
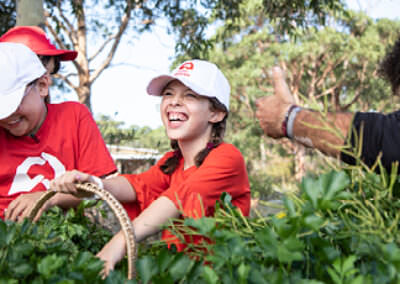 Step 4
Share
You may like to use scales to weigh your harvest before you divide the produce equally. Containers or paper bags will help to easily distribute the produce. Use the activity sheet to help children devise ideas to get the most out of their harvest.
Discuss:
What part of the plant have you harvested?
What uses can you find for your plant parts to avoid waste?
Look at ways you can share the bounty of a large harvest in your community.
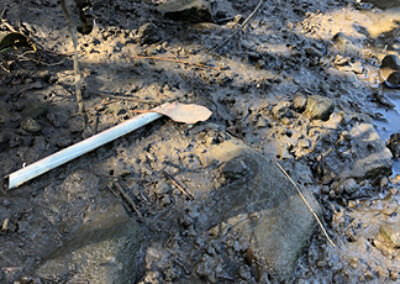 STEP 1
As a result of your Junior Landcare waterways clean-up activity, you have made a visible difference to cleaning your selected site. You have also gathered data which will inform future actions or behaviour change.
Provocations for behaviour change discussions and future action:
How do think the rubbish collected came to be at this site?
Were you surprised by any of the rubbish collected?
Was the volume of rubbish collection more or less than you expected?
If this rubbish had not been collected, how might this rubbish have caused harm to wildlife and the environment?
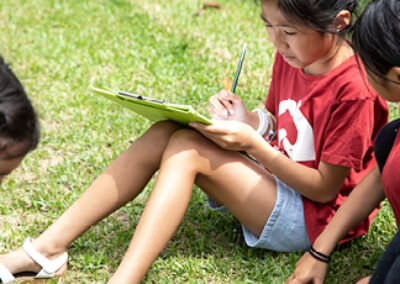 Step 2
While the efforts of the Junior Landcarers are to be commended, and frequent clean-ups will serve to protect the environment, what preventative measures can be undertaken if people were to change their behaviour?
Discuss how items found during the waterways clean-up could be reduced.
Explore items which we can reuse, refuse, reduce, recycle or swap out for eco-friendly options.
Use the suggested links in the Reference list to help build your discussions.
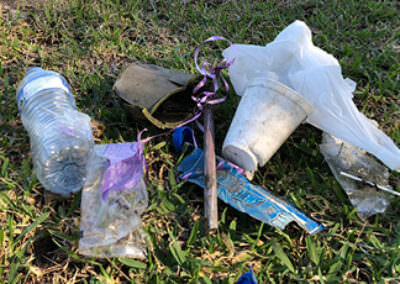 Step 3
Choose one type of rubbish collected during your clean-up. Seek solutions to this rubbish being reduced at home, school or at your youth group or Landcare group.
Example: single-use plastic straw solutions:
- Use reusable metal or bamboo straws
- Use paper straws
- Ditch straws altogether!
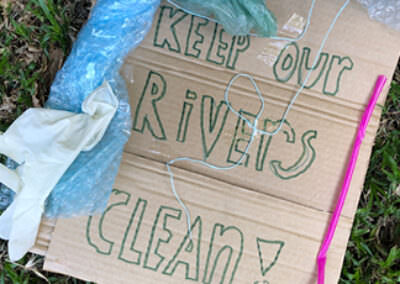 Step 4
If we want to motivate people to adopt new behaviour similar to yours, we need to show them that it’s worthwhile and easy.
Use the activity sheet to collect your ideas. Discussions could be:
- Creating your positive message
- How you can motivate others to change
- Who do you want to influence?
- How can you use the data collected from your clean-up activity?
- Impact of this rubbish type on wildlife and their habitat.
How might we communicate these important messages? Here are some examples:
- Create a poster
- Write social media posts
- Art display made from collected rubbish
- Student performance
How will you organise and spread your message?
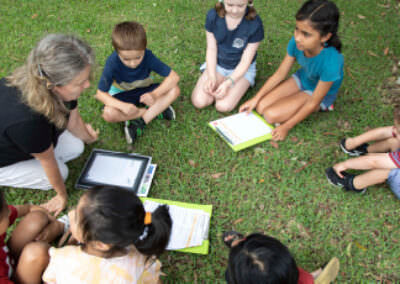 STEP 1
Tuning in
Before we design our frog-friendly habitat, we first need to find out: what do we think we know about frogs?
Discuss and brainstorm in groups so the information is visible for all to see, e.g. poster paper, whiteboard, devices or interactive whiteboard.
Do we need to fact-check any of these statements? Get the children to verify any statements that they may not be certain of by gathering supporting information.
 STEP 2
Delving deeper
Are there gaps in our learning?
What do we need to know about frogs that is essential to informing our frog habitat design and construction so it is suitable for our local frogs?
What questions do we still have? Discuss and brainstorm in groups.
Undertake further research.
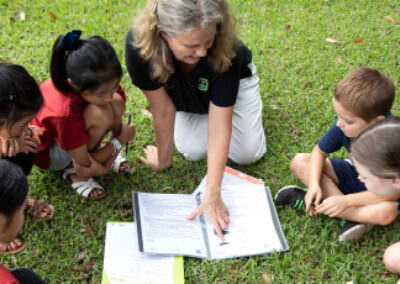 STEP 3
Honing in
It is essential to understand the specific needs of frogs local to your area. Use a digital or print frog guide to identify frogs local to your area.
Find out the frogs: diet, distribution and habitat, lifecycle, call and distinguishing characteristics.
Are there experts who can help with your investigations? Connect with your local Landcare group, environmental community group, local council ranger or Indigenous Elders.
Use the activity sheet to help children record their learnings.
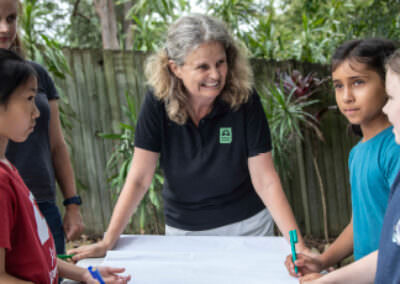 STEP 4
Processing and applying learning
How are we going to use this prior and new found knowledge to create a suitable habitat for local frog(s) species?
Discuss the next steps, this is the design phase.
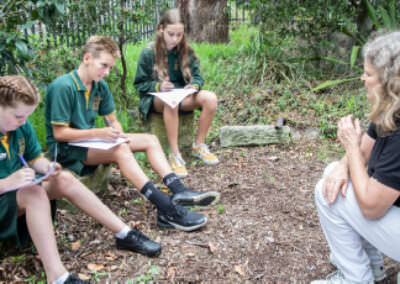 STEP 1
Selecting a site for the frog-friendly habitat.
Choose an area:
- that receives part shade and part sun during the day
- is away from existing large trees; this will avoid falling leaves entering the pond and tree root interference
- away from houses as frogs can be noisy!
- where rainwater naturally pools. Explore the direction that water flows in the schoolyard or yard, preferably after it has rained. The ideal location for the pond may be where runoff naturally accumulates.
Surrounded by vegetation, logs or rocks so the frogs can hide from predators.
Near a compost heap or flower garden if there is one, so there are insects nearby.
 STEP 2
Now that you have selected a suitable location, it’s time to map out the site.
Draw a simple map of your site.
Indicate the position, size and shape of the selected frog habitat site.
Using a measuring tape, measure the area so you know how much space you have for the pond or bog.
Show existing nearby structures, houses, seats, compost bins.
Map existing vegetation, logs or rocks and indicate where water pools naturally after rain, if you have that information.
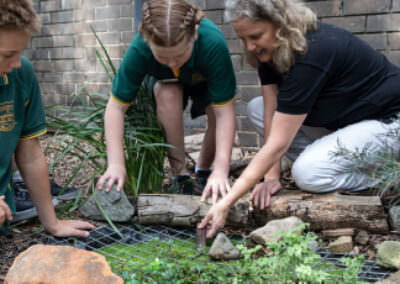 STEP 3
Considerations when designing a frog-friendly habitat:
- design a shallow pond with sloping sides so the frogs can easily enter and exit the pond
- if using a container, include a ramp in the design using logs, rocks, sand or gravel to lessen the gradient so the frogs can climb in and out easily
- decide whether to have an ‘overflow’ pond area for excess rainwater. The overflow pond is built below the height of the main pond and allows for water to move to the smaller pond in case of heavy rain
- select appropriate indigenous aquatic plants for your pond. Some might float while others might grow tall out of the water
- if your site is lacking native vegetation you will need to plant grasses, plants, ground cover and/or shrubs of different heights around the pond to provide hiding spots from predators and shelter from wind. Plants will also attract insects to your pond.
Creating a rock pile or log pile adjacent to the pond will provide shelter and shade.
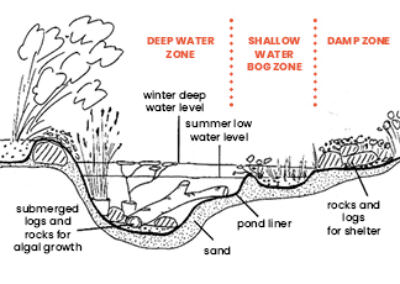 STEP 4
Draw a labelled cross section of your frog-friendly habitat design (refer to activity sheet).
Include in your design:
- the name of the frog species the habitat is being designed for
- label the building materials required, e.g. UV resistant plastic liner, prefabricated pond, bathtub
- label the selected indigenous plants you will use in and/or out of the water and where they will be placed
- include the approximate dimensions of the frog habitat
- identify the different zones in the habitat: damp, shallow water, deep water.
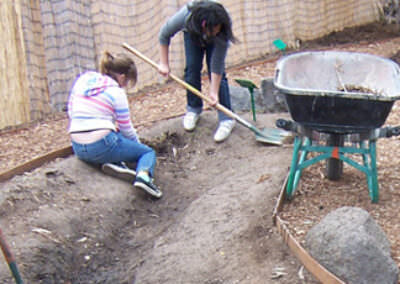 STEP 1
Once you have gathered all the necessary materials and carefully selected a suitable location for your frog-friendly pond, it’s time to get digging!
Dig out a hole approximately 30cm deep, and as wide as your area allows. Make sure the edges of the pond are level: Use a spirit level to check (Should you choose to have varying depths in your pond, a spirit level will not be necessary). Include gently sloping sides to allow frogs to get in and out of the pond easily.
If you are including an overflow pond, be sure to dig out this hole at the same time. The overflow pond will need to be dug out in a location lower than and adjacent to the frog pond.
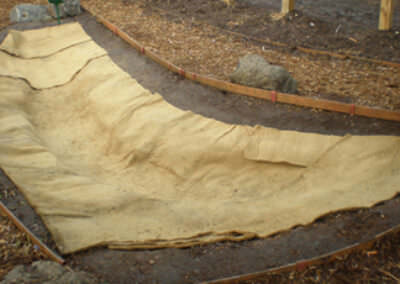 STEP 2
Use the soil removed from the hole to create mounds and undulations near the pond.
Once dug, line the hole with sand, old carpet or hessian bags, which smooths any edges and helps protect the liner.
Lay the pond liner across the sand/soft materials. Layer the base of the lined empty pond with gravel or clean sand.
Add locally-native aquatic plants in pots in the shallowest region, and place a few at the opposite end. Cover the plants with soil or sand and weigh down with a rock if required. The plants will provide habitat for the tadpoles to shelter in while they are small and most vulnerable to predators.
 STEP 3
Before adding water to your pond, ensure your water supply is free of chemicals, rainwater is a good option. If using tap water. Chlorine will dissipate within a week if left to stand, however other chemicals may require you to use water conditioner.
For a healthy pond, add a bucket of water from a nearby natural pond if available.
Place rocks and tree branches (removing any sharp ends) in the pond as resting (basking) and climbing places for frogs.
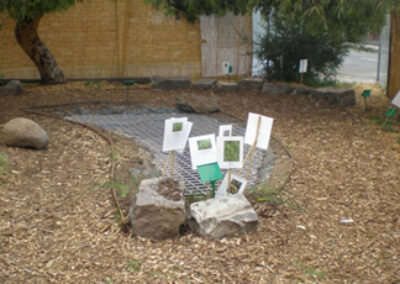 STEP 4
Plant selected native grasses and shrubs densely along the edge of the pond, for hiding spaces and to attract an insect food supply for the frogs.
Place additional rocks, logs, leaf litter and bark around the pond. Create a moist environment around the pond by watering the ground or mulching it. Newly morphed frogs have a better chance of surviving in a place with lots of moisture.
Use the activity sheet to create signage to keep the frogs and your frog-friendly habitat safe.
Be patient; frogs may take up to two years to begin settling into your frog-friendly habitat – it will be worth the wait!
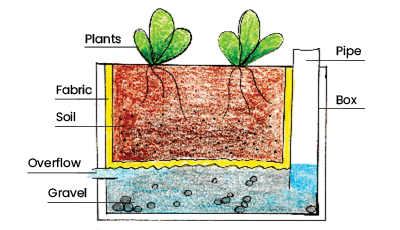 STEP 1
Plan
Go through your checklist to ensure you have all the materials you need.
Introduce the activity sheet and demonstrate the cross-section so the students understand this means a vertical slice through the wicking bed box. Explain that the children will be illustrating each part of the wicking bed as it is built on the activity sheet.
Run through the plan with the children and outline the safety steps involved.
A small wicking bed can be used all year round, but plant selection is a key to success.
Plant and seed labels are your friend. They will guide you on how, where and how far apart to plant your seedlings. You can use a measuring tape, a stick, or hand widths to help guide you.
Refer to a planting guide like the Gardenate app to help plan what you intend to grow and when. Are you planting something that people like to eat?
Space out the polystyrene boxes onto your site and discuss where they may go.
Consider how much space your plant needs when it is fully grown. Will it shade other plants?
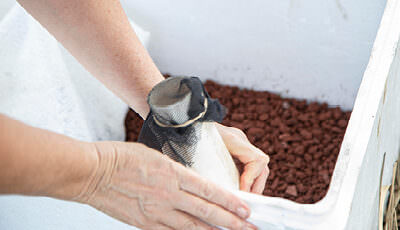 STEP 2
Build (Part 1)
Follow the steps in Costa’s video to make and plant-out your wicking bed. Ensure that all of your materials are available and ready.
Cut 40mm PVC pipe to the appropriate length. Cut it to fit the depth of your box plus a length of at least 3cm above. This is so that it rises above the height of the box and can be used to deliver water to your bed.
Add the pipe vertically into a corner. The pipe delivers the water to the gravel reservoir.
Leave some pipe sticking out above the height of the box. This pipe is like a snorkel, it allows air to go in all the time but you can use it to top up the water reservoir so the water is always in there.
Add gravel to a depth of 5cm. The gravel is used to fill the gaps around the pipe so that the soil layer can sit nice and evenly on the top of the pipe and get wet. You will need to use scoria, less than 7mm or ¼ minus gravel for effective capillary action.
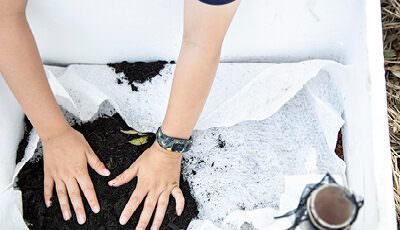 STEP 3
Build (Part 2)
Pierce a hole in the smallest side of the box using a screwdriver just above the top of the gravel layer. This is the overflow. Poke a short length of garden hose through the hole, to create the overflow pipe.
Add the fabric. This is a layer that separates the soil from the water but it is porous, so when it is wet, it will allow the water to wick or move through and then wet the soil.
Dampen down any potting mix/soil to minimise risk of airborne microorganisms.
Add the soil. The soil is where we grow the plants. Now it’s time to put the soil in just like filling a pot. Ensure the soil doesn’t fall in underneath the fabric.
Now you plant your wicking bed with your selected seeds or plants.
 STEP 4
Monitor and care
Check to see that the soil is wicking and keep the water topped up, especially as the plants get established.
You will know when to stop filling when water comes out the overflow pipe.
Cap your pipe with the PVC capping or flymesh tied on with a rubber band, this will help reduce evaporation and the breeding of mosquitoes.
Like with all gardens, you will need to replenish the water in hotter, drier and windier weather – just a lot less often.
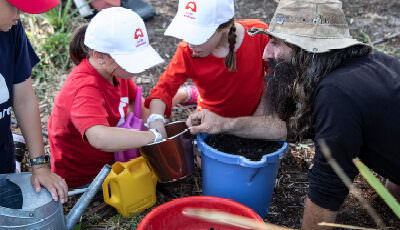 STEP 1
Identify a location for this investigation. Good locations to look for include under leaf litter, logs and in the mulch layer of the garden bed. Look for damp soil with plenty of organic material. (broken down leaf litter)
It is a good idea to collect a few samples first and set them aside to help with your explanation to the children later. Refer to the Educator’s Notes for some pointers on what to look for.
Assemble the materials you will need to conduct this investigation, including the digging/sampling tools and the resources you will need to view the soil samples.
We suggest establishing an area nearby your chosen location to use the magnification tools and complete the activity sheet.
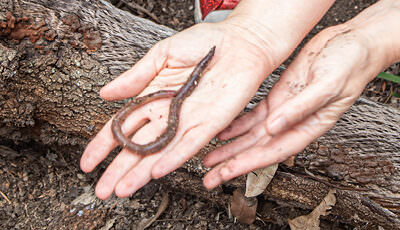 STEP 2
Before heading outside, discuss the idea of recycling. Focus on things that the children will be familiar with, such as recycling paper.
Explain that earth’s processes also recycle. Nutrients are recycled when organic material, such as leaves, bark and branches break-down.
A nutrient is a substance used by an organism to survive, grow, and reproduce.
In soil, nutrient recycling is performed underground by the soil food web. Take a moment to introduce the topic of the soil food web. Ask the children if they can describe what a worm does. Tell the children that the worm is part of the soil food web, but there are also other components too.
Use the soil food web diagram from the reference list below and show the children other elements of the food web and how they are linked together. (See the Educator’s Notes for more information).
Use online resources to research organisms that the children may encounter including:
- springtails
- nematodes
- the mycelial threads of fungi.
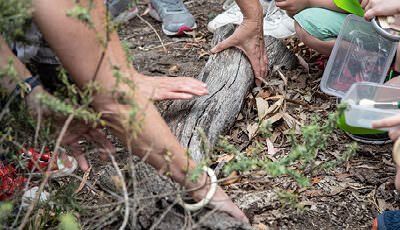 STEP 3
Head outside to the area that you have set-up for your investigation.
Outline safety aspects to the children, when conducting their observations.
- instruct how to use the garden trowels, spoons, paddle sticks or paintbrushes
- guide the children to tread lightly, taking care not to stand on anything living while exploring
- ask the children to return things back to how they found them, e.g. turned rocks or logs.
Ask the children to engage their senses during the investigation and take note of how the soil smells and feels as they sort through the organic layer.
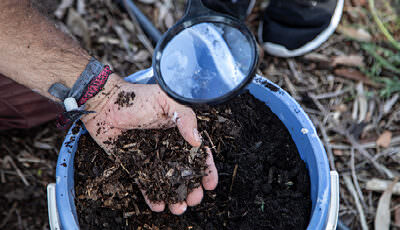 STEP 4
Bring the samples to your investigation area.
Use the magnifiers or an app on a mobile phone or tablet to zoom-in on the samples.
Ask the children to explain what they see and what they wonder.
Use the activity sheet to draw what they see, and using the close-up inset circle to draw more detail as observed under magnification.
Return the samples back to where they were found.
Ask the children: what do they think we would find if we looked in the leaf litter again in:
- 3 days
- 3 weeks
- 3 months.
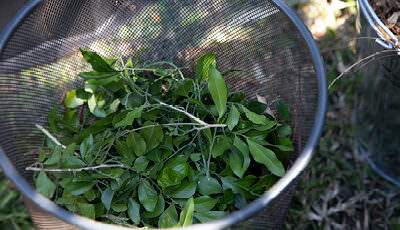 STEP 1
Prepare
Source the materials for the compost.
You will need a mixture of materials to compost, these are known as ‘browns’ and ‘greens’:
Carbons (browns) could be Autumn leaves, pea straw, lucerne hay, sugarcane mulch, moistened cardboard, shredded newspaper (not glossy paper).
Nitrogen (greens) could be lawn clippings, garden prunings, green leaves, kitchen peelings (too many food scraps can attract rodents see step 3) and coffee grounds. A ratio of about 60% “green” material to 40% “brown” material is ideal, but not essential.
 STEP 2
Explore
Before you head outside, encourage the children to think about how people use soil.
As a group, head outside to the proposed site.
Ideally, the site should be shaded most of the day, as the shade helps keep the compost at the right temperature.
The compost bin also needs to have direct contact with the soil beneath (i.e. not raised, or on concrete), so worms and other detritivores can move in and find the compost.
To prevent rodents ensure that your compost bin has no holes around the base and keep the lid closed.
As a group, investigate areas where decomposition of leaves and twigs occur naturally. This may happen in a depression in the ground, or under a bush. Examine how the leaves at the surface look, compared to the leaves that are further underground.
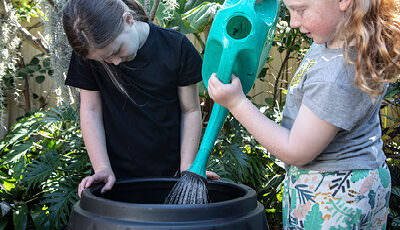 STEP 3
Build and monitor the compost pile
First, dig the compost bin into the ground to a depth of about 10 to 15 centimetres. This will help to deter rodents from entering.
Next, construct a layer of sticks on top of the soil. This will help with aeration. Begin layering your green and brown material, stopping once you get to about 15 cm from the top of the barrel. Finally, water the compost to help the composting process begin.
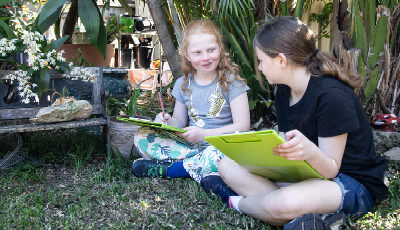 STEP 4
Promote change
It’s time to spread the word about composting to help others learn from your experience.
Use the persuasive writing frame in the activity sheet to promote the benefits of composting.
Keep monitoring your compost over time to see whether you need to give it any assistance. Use the ADAM principles to assess whether it is working: Remember, ADAM stands for Aliveness, Diversity, Aeration and Moisture. If it is not working, look for what is missing. See educator notes for more information.
The time of year and weather in your area will affect how quickly the process takes. You will know that it is time to use your compost when it looks and smells like rich, dark earth. It should also be crumbly to touch.
Eventually your compost is going to become ‘black gold’; a valuable resource that can be used on garden beds.
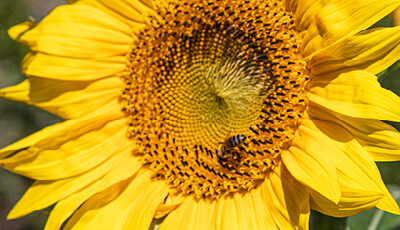 STEP 1
Review the garden insects
As a group discuss invertebrates, specifically insects and how we view their presence in the garden.
Ask the children to suggest some insects that could be listed under the following three headings:
- Pests
- Pollinators
- Predators
(Refer back to the investigation learning activity if you need help with the different types of insects and how they impact the garden).
Beneficial insects include:
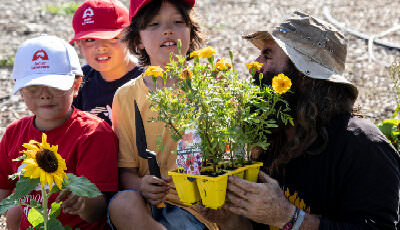 STEP 2
Make connections between the crop and the beneficial plants
Show the children the punnets of crop seedlings and the punnets of flowering plants.
As a group, ask the children to make connections between the food crop and the flowers that have been selected.
Ask the children to make a hypothesis (a smart guess) about how the insects found in the assessment and investigation learning activities might be attracted by these flowering plants.
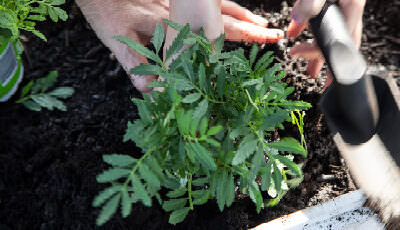 STEP 3
Planning the planting
Creating a beneficial garden can be a bit of an experiment. Use the activity sheet to map the garden and the beneficial links that you plan on creating.
Use the labels on the seedling punnets to decide on how to space your beneficial plants around your crop.
Beneficial plants are often planted in clumps around the outside of the garden bed. This helps with wise use of garden bed space and it helps the beneficial insects to see them.
It is best to plant your beneficial plants at the same time as your food crops.
When planting seedlings, space them in their pots out on top of the soil, check the label, and see that you have spaced them correctly with a ruler.
 STEP 4
Plant, care and monitor
Use a trowel to dig a hole just big enough so the plant’s root section can be inserted. Tap the pot gently and squeeze the plant out without damaging the roots, place it in the hole and fill it with soil.
Create a saucer shaped depression in the soil to act as a dam, and then water in the plants gently. Mulch around them to help reduce water loss and suppress weeds.
Check your beneficial plantings over time and make sure they are growing well. Can you find insects to see if the beneficial planting is attracting insects to help your crop? What other biodiversity improvements do you notice?
Complete the activity sheet and the links that you hoped would occur between the beneficial plants and the food crops.
Take notes about the different types of insect you find:
- are they pest species or are they beneficial?
- are there changes or improvements that you could make to the plantings?
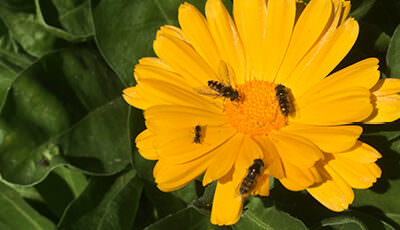 Step 1
Insects and their roles
Role-play insect pollination before heading outside.
Explain that pollination isn’t the only beneficial role that insects perform. Sometimes, insects are predators and are beneficial because they eat pest insects. When flowers attract pollinators, they can also attract predators.
We will be focusing on pollinators and predators in this activity.
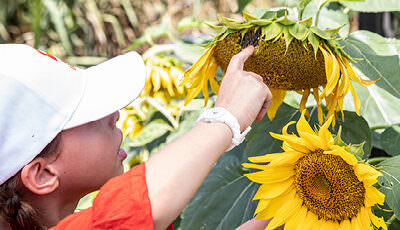 Step 2
Investigating
Using the tools and knowledge from the assessment activity, head outside.
Instead of studying the entire habitat, focus on the flowering plants.
Find some flowers (a large clump of flowers works best for this).
Practice quiet, still observation for 2 minutes, allowing the insects to go about their normal business whilst you observe.
Using the paint brushes, gently sweep insects into a container for closer observation.
Place a large sheet of white paper or fabric under some flowering plants and gently shake them. Study what falls out.
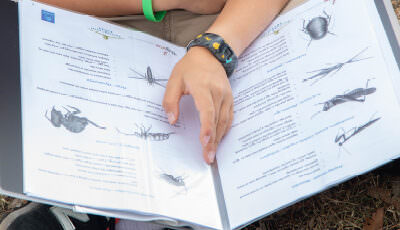 Step 3
Review
Review your results. Using your chosen field guide from the assessment activity, investigate the animals you have found.
Ask the students to observe the features of their animals and ask if they know what animals could be predators or pollinators.
Take some time to run ‘think-pair-share’, sourcing knowledge from the group. Consult your field guide for more information.
Ask the children: “Have we found any predators or pollinators that we could be a beneficial insect?”
Some common beneficial insects include:
- Bees: (native and European) Pollinators
- Ladybugs: Predators (larvae and adults) and Pollinators (adults)
- Hover flies: Predators (larvae) and Pollinators (adults)
- Mantids: Predators
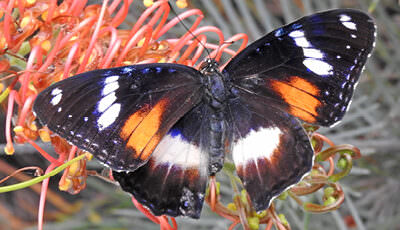 Step 4
Refine
Ask the children to develop a hypothesis (a smart guess) about why this animal was found amongst the flowers.
Select a beneficial insect and use the activity sheet to begin the beneficial insect investigation. You will be researching their features, benefits, survival needs and lifecycle and behaviours.
Either inside or in the garden, use resources (digital or printed), to research more information on the chosen animal. Complete the activity sheet.
Review the activity sheets and as a group, place the insects that were studied into a Pollinators and Predators Venn Diagram.
Share this Venn Diagram with the rest of your school.
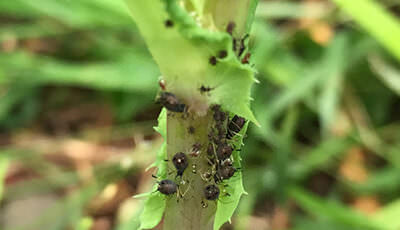 Step 1
Why do invertebrates matter?
Discuss the term invertebrate and how it describes animals without a backbone.
Discuss the important roles that they play in the garden. Some invertebrates, such as worms are detritivores and they break down material and recycle nutrients.
Insects such as bees, and even flies, play an important role in pollination. As pollinators, bees carry pollen from flower to flower to help the flowering plants make seeds, reproduce and make new plants. Bees help to grow our food. Without pollinators such as bees, animals and humans would be without seeds, nuts and fruits to eat.
Other invertebrates, such as spiders, are important predators and help to keep the garden ecosystem in balance.
Discuss the invertebrates that the children know about and the roles they may play as decomposers, pollinators and as a food source for insectivores.
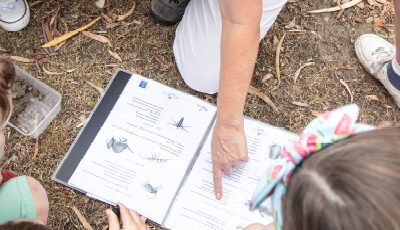 Step 2
Examine your chosen field guide with the children (device or printed version) prior to exploring outside. Point out an invertebrate that they are likely to observe, such as a bee, and model how to use the field guide. Discuss the role that the bee may play in the garden.
Outline safety aspects to the children, when observing invertebrates:
- be gentle and quiet observers; do not touch any of the invertebrates.
- instruct how to use the garden trowels, spoons, paddle sticks or paintbrushes.
- guide the children to tread lightly, taking care not to stand on anything living while exploring.
- ask the children to return things back to how they found them, e.g. turned rocks or logs.
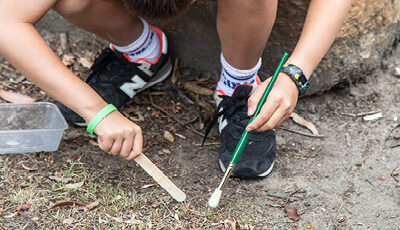 Step 3
Head outside to your observation site. Invertebrates are everywhere but finding a spot near a garden bed or away from asphalt will allow children the opportunity to do some light digging.
Allow children time for ‘slow looking’ in a micro environment. Encourage the children to explore the site, carefully looking at different locations using their senses to lead them.
Carefully look at flowers to see if there are any active bees or other flying insects. Use the trowels or spoons to gently turn over the topsoil, bark, small rocks and leaf litter looking for ground dwelling invertebrates such as snails, worms or millipedes. Using the paddle sticks or paintbrushes, attempt to move the insects into the plastic container for observation.
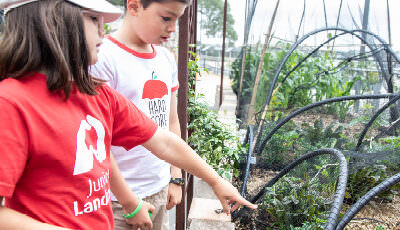 Step 4
If the children are successful at spotting an invertebrate, see if they can identify it using their field guide.
Show the children how to use visual cues, such as how many legs the invertebrate has, to help classify them.
You might like to take photos to capture your observations.
Model how to use the activity sheet to record the data and how the data can be displayed in a graph.
You will be able to refer back to the data from this assessment during the other activities in this activity sequence.
Use the activity sheet to encourage the children to make careful observations and thoughtful interpretations during and after the activity.
Why should we monitor and care?
Now you have finished creating a wildlife habitat, what’s next?
Discuss as a class why monitoring and caring for your wildlife habitat is an important phase of your project. Including the following:
- why is water important for plant growth?
- are all insects in our garden pests?
- how can we tell if our garden is healthy?
Making a rain gauge
Rain helps sustain life and provides water for plants to help them grow. You can determine if you need to add more water to your wildlife habitat by monitoring the rainfall. A simple way to do this is by making a rain gauge.
- Using scissors, carefully cut the top section off a 1.25L clear bottle.
- Fill the bottom of the bottle with small rocks for weight (2cm deep).
- From the top of the rock layer, mark out 1cm intervals on the side of the bottle with a ruler and permanent black marker.
- Fill the bottle with water up to the top of the rock layer.
- Make a funnel by inverting the top of the bottle you cut off in step 1
- Place the rain gauge in your fauna habitat where it will be exposed to rainfall, making sure to secure around it with rocks so it doesn’t fall over.
When it rains, observe and record the rainfall amounts. If there has been a lot of rain, there is no need to water the garden.
Plan
Use your wildlife habitat design to determine your site selection and how many plants you will need.
Walk around your site and mark out where you will plant the different types of native plants to create a multi-layered habitat. Consider and include:
- access to water
- maintenance access
- the location of animal habitats like a lizard lounge, nest box or insect hotel
- position spiky plants away from pathways
- Read any labels – plants will get bigger as they grow, so don’t plant them close together.
Plant during the cooler months when there is generally higher rainfall to reduce the need for watering.
Prepare
Have your site prepared and plants ready before planting.
Get the whole school involved in the site preparation.
- Ask Junior Landcare students or the gardening club to help prepare the site.
- Plan your school working bee around this project to get extra help preparing the site.
- Ask for donations of plants and mulch from local nurseries, councils nurseries and families from the school.
Planting
Once the plants are in their correct positions, dig a hole that is slightly deeper and wider than the pot. Water the hole in preparation for planting.
Make sure the hole is big enough to fit the plant and totally cover the roots.
Gently remove the plants from their pots ready for planting. It is best to have as little disturbance to the roots as possible. Keep the soil and plant intact by gently squeezing each side of the pot, then placing your hand flat over the soil with the stem between your fingers. This will provide the least amount of stress and disturbance to the plant during the process.
When you backfill the soil, leave a shallow ‘well’ to help catch rainwater, so water will stay longer and reach down to the roots.
Press the soil around the plant lightly, without packing it down to hard. Pressing too hard pushes out air which is needed by the roots.
Maintenance and upkeep
Your plants are in the ground, what’s next?
Mulching
Placing thick (between 7 to 10 cm deep) Eucalyptus mulch layer around your plants will keep the soil moist and cool, control weed growth and help maintain micro-organisms in the soil.
Mulch your native plants soon after you have planted and watered your plants in. Apply mulch as an evenly spread blanket on top of soil surface.
Wear a mask when spreading mulch.
Contact local councils or tree loppers about free eucalyptus mulch.
Roster
Using the Planting Activity Sheet, create a roster to share plant caring activities with your Junior Landcare team.
This can include watering, measuring growth, plant changes and checking mulch. You can also start making observations to see if any new native animals have arrived.
The more involvement and ongoing maintenance, the better the growth of your plants.
Mapping your local area
Take a moment to introduce the topic of habitat design to the children.
You have learnt about local animals and plants and their shelter needs. It is important that you determine the best location to build your wildlife habitat to increase biodiversity and to create a safe environment for everyone.
Using the Design Activity Sheet, create a map of built environments in your local area with Google Maps in satellite view. Draw your map using the legend/keys to highlight residential, industrial, natural areas/parklands and your school.
Using what you’ve got
There are many existing features in your local area that can be incorporated into your wildlife habitat design, including established trees, rainwater tanks and ponds. Make sustainable choices by using what you’ve already got.
Walk around the location where you want to establish your wildlife habitat and use the checklist in the Activity Sheet, along with the built environments map to identify these existing features.
Climate matters
Start a discussion about climate zones using the Bureau of Meteorology climate zone map.
Explain that climate zones are regions that are defined by their temperature and rainfall. The climate zone you live in, impacts the type of plants that will grow in your local area.
Determine your climate zone using the map.
Consider your climate zone and use your plant list from the vision activity along with associated field guides and nursery lists to select species that will flower at different times of year. This will provide food and pollination sources all year round.
Wildlife habitat design
Reflect on the information you have collected on your map and plant list to help guide your wildlife habitat design. Use The Habitat Network resources to help choose the best position for your plants.
Draw your wildlife habitat design in the Activity Sheet, including existing features, new plants and any animal habitats like a lizard lounge, nest box or insect hotel.
Remember to:
- create a multi-layered habitat
- provide access to water
- have access for maintenance
- plant spiky plants (providing safe hiding places) away from pathways.
- use plants that will provide year-round food and shelter locations for many different species.
These ideas will help you design your wildlife habitat.
Monitoring growth, looking for pests
Another important part of monitoring is recording the growth of your plants.
Use the growth chart in the activity sheet to monitor the garden. Record the height and width of your plants.
Measure from the top of the soil straight up to the highest tip of the plant to determine the height.
A sewing tape measure can be used to measure the circumference of the plants to see if they are getting wider/fuller.
Other than water, another factor affecting growth are pests. There are many beneficial insects living in your garden that help your plants stay healthy. There are also pests that cause damage.
Use the link to find the best natural pesticides for the pests that cause damage. Natural pesticides will help keep your plants healthy.
Processing and applying learning
You have finally created a wildlife habitat, but how do you know if animals are using your garden?
When you are monitoring and caring for your garden take a few minutes to look around and make observations. Look on the ground, in the trees and shrubs and up in the air.
Can you see any scats (animal poo), tracks, or traces? Can you hear any new animal calls or noises?
Write these down with the other observations in your Planting Activity Sheets.
To finish this stage of the project, have a discussion in your class about the long term approach for your new habitat. How will you look after it, how will you monitor what visits and lives in the habitat, how can you encourage even more wildlife to your garden.
Keep the Junior Landcare group, garden club, school council and P&C involved in the long term care of your wildlife habitat garden.
Habitat requirements
What are your goals and your creative ideas in creating your habitat garden? What wildlife would you like to attract and support?
All animals need food, water and shelter to survive. A habitat provides a safe place to live, but not all animals need the same type of habitat. For example, Brushtail Possums live in tree hollows and like to feed on insects and flowers, whilst skinks like to bask in the sun and shelter in leaf litter.
Thinking about the animals you would like to attract to your wildlife garden, choose three of the animals you discovered during the research activity. Discuss their habitat requirements. Where does the animal like to live? What does it feed on? Record these details in the activity sheet.
Use the field guide book, online resources, or Wildlife App in the checklist to help your research.
Animal habitats
Now that you have found out more about the food and shelter requirements for your animals, what else might they need?
Your local environment may not always be able to provide some of the shelter needed for your animals. Using built features can also help to provide shelter, particularly when your new habitat is establishing.
Are there any built features the animals in your local area might need? These could include a lizard lounge, nest boxes, an insect hotel or water feature such as a frog pond.
Draw one of these built features in the Activity Sheet and be creative in your design.
How plants create habitat
Ideally, in an outdoor location surrounded by a range of native plant forms, discuss how plants create habitats for wildlife, focusing on the animals living needs.
To ensure biodiversity when creating your wildlife habitat, it is important to use a variety of native plant forms (such as trees, shrubs, flowers and grasses). This creates a multi layered environment providing lots of safe places for small birds and other animals.
There are lots of people in the community that can help you learn more about the plants that thrive in your local area. Contact your local Landcare group, Traditional Custorians, local council or native plant nursery to discuss plant choices and where to source them. They can often provide you with a local plant species list to use.
Choosing native plants
Use a local plant species list or plant guide to help make a list of plants for your new habitat.
Record plant suggestions in the table in the activity sheet along with their plant form (tree, shrub, grass). This will help you to think about the plants to be included in your design.
After completing the activity sheet, reflect on your learnings. Children can discuss their ideas and vision with each other. How are we going to use this knowledge to create a suitable habitat for local wildlife species? In the discussion consider:
- limitations and restrictions
- who might be able to help?
- what equipment might we need?
- what budget is required?
Tuning in
To create a wildlife habitat, you need to know what animals live in your local area and the plants that make up their habitat. The best place to start is by making observations.
Look, listen and learn
Go outside, sit quietly and listen for 2 minutes. Using the Activity Sheet, circle in the urban and natural sounds and list any extra sounds you hear.
Now look around your backyard and local area. What is the main environment you see? Circle the one in the activity sheet that you think matches best.
Delving deeper
Explore your garden or local park for 10 minutes. Remember to look on the ground, in the trees and shrubs, and up in the air.
There are lots of animals you might not see during the day. You can use a Field Guide (book/handout or an App for Australian Fauna identification) to help discover what other animals could be found in your local area.
Record the names of native animals you discover or research in the Activity Sheet. Tick if they were observed or found in the field guide.
Honing in – looking for clues
What other evidence can you use to identify the animals in your local area? Discuss in a group what animal clues you have seen before.
Go outside to photograph or collect some animal clues. Tick off any animals clues you discover in the activity sheet. Remember to tread lightly so you don’t disturb animal homes.
Draw one of the tracks or traces you have discovered in the activity sheet.
Processing and applying learning
Reflect and discuss – what have you learnt from looking more closely at species and habitats in your local area?
How would this be different if you looked in different seasons or even at different times of the day?
Biodiversity boosts ecosystem productivity; every species has an important role to play.
Watch one of the suggested videos in the reference list on biodiversity. Discuss why maintaining biodiversity is important.
As a result of completing the research activity, children should have a better understanding of the native bees that we are creating habitat for.
It is important for our learners to understand the importance of this activity, to build ownership that will help achieve the best results.
Discuss the materials that you will need for your bee hotel.
Ask the children what materials can be used? What materials do we already have? What materials can’t we use and why? Are tools needed to collect and trim the materials? Do you need a container to hold the materials you have gathered? What additional materials are needed?
Consider reaching out to your local Landcare, bushcare or ‘friends of’ group to help collect materials required.
Being ready with all your materials will save time and achieve the best results.
Simple bundled nest
Bundle hollow and pithy stems that are about 15 – 20cm long. Wire them together at each end, ready to hang them in a tree or on a fence.
If you prefer, place your stems in an empty food can or plastic planter pots, ensuring the stems are tight, without any gaps. Tie your wire around the can or the pot tightly at each end, ensuring everything is secured.
Bee hotel nest
Use a small hardwood box of at least 10cm deep. Remember that the larger the box, the more nesting materials you would need to fill it. A 12x12cm diameter is a good size!
Cover one end with plywood or fine mesh to stop materials from falling.
Bees prefer a ‘blunt’ end to the burrow. When drilling, ensure you don’t drill all the way through the wood.
Drill a number of holes in each of untreated ‘rounds’ of wood, ranging from 3mm-8mm. Space the holes around 2cm apart. Try to minimize burrs, to keep tunnels smooth and inviting for the bees.
Place 1-3 pre-drilled, untreated rounds of wood in the box. Add the hollow and pithy stems. Add layers of bark or rotten wood. Pack the box tightly with the materials, so the openings are facing out.
Close the front of the box using wire mesh, using a staple gun or tacks.
You may choose to paint the bee hotel boxes before installing to increase their longevity.
Ideally, install your nest in a sunny position to attract the best insects. Hang your hotel at least 0.5m off the ground. The best place to hang the hotel is where the participants can observe them. Don’t put them in a foot traffic thoroughfare, but off to the side, where observers can quietly stand and watch, but aren’t standing in the flight path.
Hang your bee hotel nest with hooks and wire or keep it as a free-standing nest, but not on the ground.
Don’t forget to provide lots of food. So you will need to plant or have lots of flowering plants in the area. Refer to the Creating a beneficial garden: planting learning activity for ideas.
Use the activity sheet to create a sign for your new bee habitat to help people understand more about its importance and the bees that will live there.
Enjoy waiting for your bees to move in, it may take a season to happen!
Tuning in
Before we design and create our bee hotel, we first need to understand the organisms that we are supporting. What do we think we know about bees? What are the types of bees that we commonly see? How are bees different to flies and wasps?
Discuss and brainstorm in groups, perhaps allocating each group a type of bee to research, so the information is visible for all to see, e.g. poster paper, whiteboard, devices or interactive whiteboard.
Do we need to fact-check any of these statements? Get children to verify any statements that they may not be certain of by gathering supporting information.
Delving deeper
Are there gaps in our learning?
What are some different types of native bees? Research their features including their size, foraging habits and nesting habitats.
Consult your field guide for more information and use resources (digital or printed) as recommended in the reference list, to research more information on the chosen native bee.
Think about what people can create to mimic the bees’ nesting habitat.
What questions do we still have? Discuss and brainstorm.
Honing in
It is essential to understand the specific needs of native bees local to your area. Use a digital or print native bee guide to identify bees local to your area.
Are there experts who can help with your investigations? Connect with your local Landcare group, environmental community group, local council ranger or Indigenous Elders.
Processing and applying learning
How are we going to use this prior and new found knowledge to create a suitable habitat for local bee species?
Focusing on reed bees, complete the activity sheet to record your learnings.
Discuss the next steps, preparing for the construction phase.
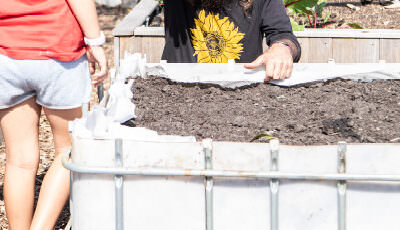 Step 1
Plan
Go through your checklist to ensure you have all the materials you need.
Finding an appropriate vessel for a reservoir is important. It needs to be watertight, or have the ability to be made watertight.
It also needs to be deep enough, but not too deep. Ideally, your reservoir should be about 150 – 200 mm deep, and then have a soil layer on top no more than 300mm deep. This is because soil only can wick effectively for around 300mm.
Refer to a planting guide like the Gardenate app to help plan what you intend to grow and when.
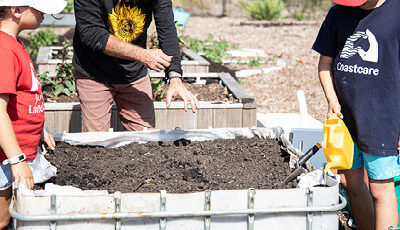 Step 2
Build
Run through the building plan with the children and outline the safety steps involved. Ensure that all of your materials are available and ready.
Ensure that the site is ready and everything is in the correct, level position. You will not be able to move the wicking bed later because it will be too heavy.
Introduce the activity sheet and discuss how you will investigate the capacity of the wicking bed as it is built.
Follow the steps in the video and educator notes to build your wicking bed.
Fill up the reservoir and use the activity sheet to discuss the capacity of the bed.
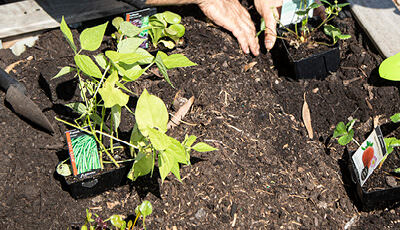 Step 3
Planting
Now you are ready to plant your wicking bed with your selected plants.
Discuss the plants that you have selected, explain why the wicking bed is being used to grow this crop and the advantages of growing your crop in this type of bed.
Plant labels are your friend. They will guide you on how, where and how far apart to plant your seedlings. You can use a measuring tape, a stick, or hand widths to help guide you.
Water your plants in after you plant them. You will need to water them directly for the first week or two. After this time, the wicking action will supply them with the moisture they need.
Mulch your planting with a good quality light mulch, such as lucerne or pea straw.
 Step 4
Monitor and care
Check to see that the soil is wicking and keep the water topped up, especially as the plants get established.
You will know when to stop filling when water comes out the overflow pipe.
Cap the filling pipe with PVC capping or fly-mesh tied on with a rubber band, this will help reduce evaporation and the breeding of mosquitoes.
Like with all gardens, you will need to replenish the water in hotter, drier and windier weather – just a lot less often.
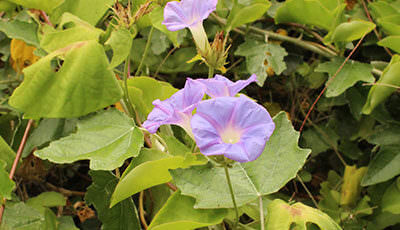 STEP 1
Tuning in
Take your group to the site selected to look at the flowering plants around you.
Discuss how flowering plant life cycles work from germination to flowering; with successful pollination leading to the creation of seeds in fruits. Look at plant features such as leaves, roots, flowers, nuts, fruits and seeds in their life cycle, and discuss why it might be successful.
Weeds are plants that grow where they are not wanted. Discuss how some flowering plants can be very successful weeds because they produce lots of seed, grow and spread very quickly. Weeds can have a variety of growth forms. This can include grass, tree, shrub, climbers, succulents and bulbs.
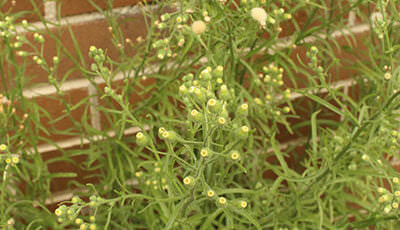 STEP 2
Delving deeper
What do we need to know about weeds?
Can you name any weeds?
What questions do we still have? Discuss and brainstorm in groups.
Using the activity sheet, talk through the life cycle of the Blackberry plant (shrub).
Discuss what the plant would look like through their lifecycle and ask the children to match this the diagram with the life cycle stage.
It helps to understand the specific features of the plant to learn ways weeds spread from seed into parks, gardens, paddocks and bushland in your area
Discuss the role that birds and animals play in dispersing the seed by eating the fruit and using the plant as habitat.
Why do you think weeds are a problem in the community?
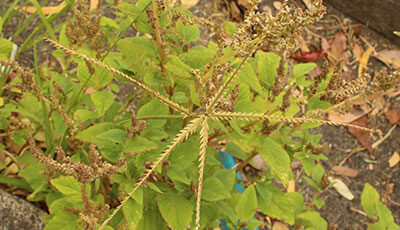 STEP 3
Honing in
To understand more about weeds, explore a digital or printed guide to help you. We have several listed in the reference list and recommend the visual stories about pest plants from EnviroStories as a great introduction.
Research more information about two weeds and look at their life cycle, their seeds and fruits, how their seeds are spread (dispersed) and what problems they cause.
Are there experts who can help with your investigations? Connect with your local Landcare group, parks, Indigenous Elders, council, groundsperson, gardeners or other weed experts to help you. Their wealth of knowledge and experience is valuable to increase knowledge in this important environmental and agricultural issue.
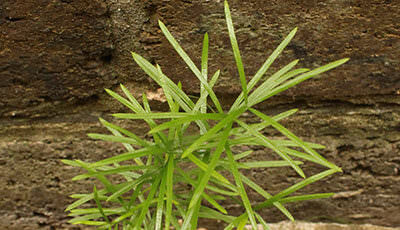 STEP 4
Processing and applying learning
What have you learnt about the life cycle of the weeds you have studied?
How can this help in the fight to get rid of these weeds?
What actions might you take to reduce the impact of such weeds?
 Step 1
Lorem ipsum dolor sit amet, consectetur adipiscing elit. Mauris congue lorem magna, eget rhoncus enim blandit sit amet. Nullam sollicitudin, ligula nec aliquet congue, urna neque tristique sapien, eget facilisis sapien lectus ut libero. Nam vel rhoncus sem. Quisque dictum nisi sem, et bibendum turpis iaculis id. Mauris finibus, nisi at ullamcorper semper, risus nibh varius odio, ut pellentesque erat ligula ut tortor. Sed non commodo nisl, et semper sapien. Duis eu odio viverra, sodales ex vitae, scelerisque ante. Vivamus ultricies ut libero in facilisis. Nulla tincidunt euismod ante. Phasellus in vestibulum felis. In congue est vel iaculis sagittis. Sed maximus rhoncus venenatis. Nulla nibh nibh, euismod non congue eget, mollis sed dolor. Aliquam nec pharetra augue. Nunc suscipit urna urna, ac aliquet tortor suscipit ut.
Discussion: What is water?
Have a discussion as a class on what water is and why it is important for plants, animals and people. Introduce key ideas about water:
- Where does our water come from?
- What happens if our water gets polluted/dirty
- Can we run out of water?
Demonstration/activity: How water flows.
Use clay to make a small hill in a waterproof container. Ask your students which way they think the water will flow? Pour water onto the hill to demonstrate how the water flows downhill.
Activity: Follow the journey of water.
Organise each group or child to have a jar with their item from the resource list. Introduce the journey of water story and explain that as they will add items as you read the story. Ask the children to observe what happens to the water as they add each item so that you can discuss at the end of the story.
Using the activity sheet, read the story of water or make up your own and ask the kids to add the item in their jar to the container of water. Kids put small amounts of household material (detergent, oil, dirt, chocolate drink powder, plastic etc) to represent land uses and environmental issues.
Discussion
What did the children observe as they added different items to the water?
Discussing this as it happens can lead to more learning discoveries.
What have you discovered?
What can we do to stop these things getting in the waterways and the ocean?
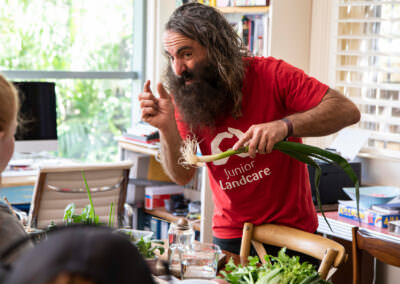 STEP 1
Engage
Watch our Junior Landcare videos with Costa to inspire the children and provide background knowledge to the learning activity.
Show the children some plants and identify the various parts of the plant.
Ask the children for some suggestions about the types of plants that they might propagate from scraps. Consider:
- Spring onions
- Onions
- Bok-choi
- Lettuce
- Carrot
- Celery
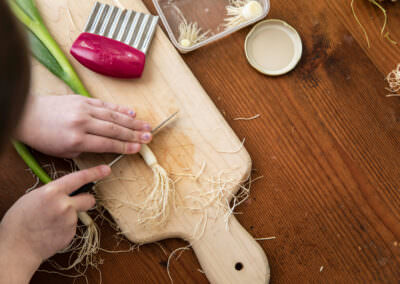 STEP 2
Prepare
Trim your scraps so that there is some remaining ‘core’ of the plant that will allow regrowth. A guideline is to leave a two-finger width of plant remaining and remove any browned off, or rotted vegetative material. This will maintain the integrity of the plant and help give it some energy to begin its regrowth.
Use this opportunity to point out the features of your plant, ask the children to use their senses. What can they:
- See
- Smell
- Feel
This is a good time to ask the young learners about any wonderings that they may have. What are they thinking about this learning activity on how plants can be propagated?
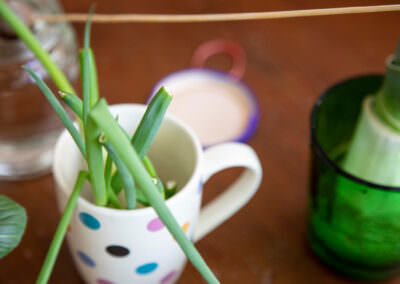 STEP 3
Regrow
Place the prepared scrap into a container with water. Ensure the plant can stand up: you may need to carefully trim the roots of the plant so they can stand independently.
Introduce the activity sheet and begin taking your initial observations.
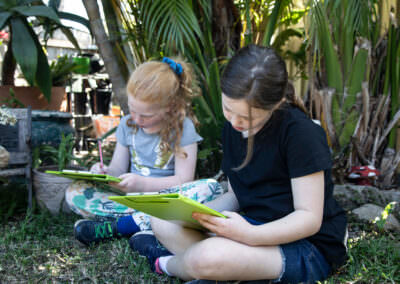 STEP 4
Monitor and Replant
As a group, study how your plant changes over time. Help your young learners to identify the newly sprouting parts of the plant.
Record your observations on the activity sheet.
Once your plant has sufficient roots and shoots, plant it in the garden. Continue to water, monitor and care for the plant help to help continue its growth.
Discussion: what rubbish?
Refer to the top 10 types of rubbish found in the marine environments on the activity sheet. Discuss why they are in the top 10 and their impacts to the marine environment.
How many of these are plastic?
Beach survey: set up
Locate each group 100m apart on the high tide mark. Record the date, time, location, group names and weather on your activity sheet. Take a photo of your site.
Each group measures out 10m with the tape measure or rope. Place the hula-hoop at the 0 point.
You’re ready to start!
Beach survey: observation and collection
- Take a photo of survey point 1
- Record the rubbish and natural debris you find within the hula-hoop circle on the activity sheet
- Use the spade to fill up the sieve with a sample of sand from within the hula-hoop
- Gently shake the sand through the sieve
- Record in the data sheet if there are microplastics present
- Put rubbish in the garbage bag for disposal
- Empty sample of microplastic into the bucket
- Repeat steps at the 2, 4, 6, 8, 10 metre mark.
Beach survey: pack up
Collect all equipment and rubbish from your sites. Recycle rubbish where possible. Take samples of microplastic back to school.
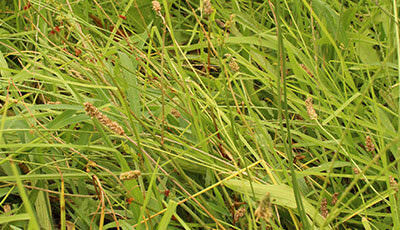 STEP 1
Tuning in
Reflect on what you learnt in the life cycle activity. Can you recall what we learnt? Today we are going to look more closely in our local area for weeds.
Once again, reach out to your local Landcare group or weed expert for some weed identification advice. What did you learn last time from your local weed expert?
For this activity take your group where they will be able to see some weeds.
Often this can be easier to observe in unmown grassy patches or in garden areas where there has been less regular maintenance activity.
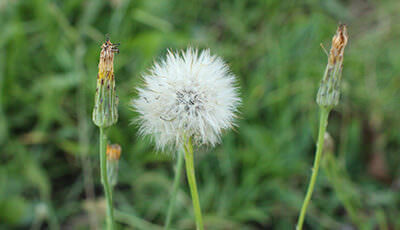 STEP 2
Where are the weeds?
Begin the discussion by seating your group to look at the flowering plants around you. Explain that today we are going on an exploratory mission as Weed Warriors to find out more about local weeds.
To be a Weed Warrior Champion and help look after our environment, you need to be observant, understand your environment and be a problem solver.
The group’s task is to understand what we already know about weeds and conduct an investigation so that we can be active and empowered Weed Warrior Champions.
Let’s collect some ideas first. Use the ‘Did you know facts’ to help build the discussion.
- What are weeds?
- Why do you think weeds are a problem in the community?
- Where do weeds come from?
- Can you name any weeds?
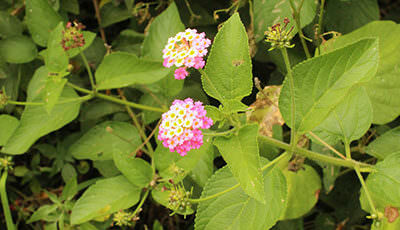 STEP 3
Investigating
Use your observation skills to look closely at your location, and investigate weeds in three different outdoor areas. The visual guides of common weeds will help you, along with any experts, field guides and online resources provided in the resource listing in this activity.
When identifying a weed, use its main features as reference, these could be flower, colour, plant shape, leaf form, presence of seeds and their shape.
Draw the most common weed you can see.
Use the activity sheet to include more information about weeds at each location.
In small groups ‘think-pair-share’ what has been discovered to complete the results.
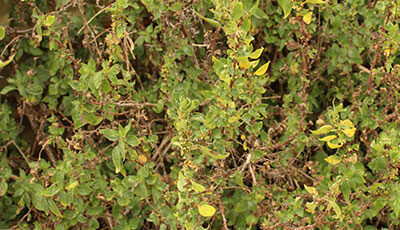 STEP 4
Processing and applying learning
Review the activity sheets and as a group discuss these questions:
- What have you learnt and discovered about weeds in your location?
- How many different kinds of weeds did you find?
- Is there anything that surprised you about your discoveries?
- What actions might you take to reduce the impact of such weeds in your local area?
Discussion: where does rubbish come from?
Where do you think most of the rubbish on the coasts comes from?
Beach clean-up: preparation
Divide your participants into smaller groups, perhaps between 2-3 groups. Locate each group 250m apart. Record the date, time, location, group names and weather on your activity sheet. Take a photo of your site.
Each group spreads out from the low tide mark to the far edge of the sand i.e., footpath, houses, vegetation, dunes.
You’re ready to clean-up the beach!
Beach clean-up: collection
Put on your gloves.
Walk 250m along your line and pick up rubbish.
Remember to take a photo every 50 metres and record on the activity sheet the type of rubbish.
Tick the box on the activity sheet for the type of rubbish you have collected.
Put the collected rubbish in the garbage bags.
Weigh your rubbish
At the end of the 250m stretch, use a hand-held scale to weigh each bag and record the line they were collected i.e., low tide mark, high tide or edge of beach.
Combine the weights to determine the total weight of rubbish collected at your site.
Combine these weights to give a school total of rubbish collected.
Collect all equipment and rubbish from your sites. Recycle rubbish where possible.
Take an after photo of your location.
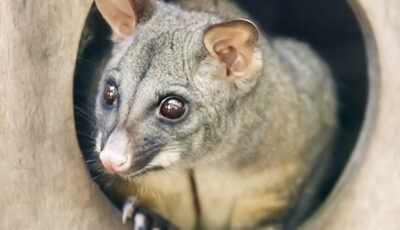 STEP 1
Prepare
Before you begin, approach your Local Landcare or Environmental Group and Local Government for advice, expertise, materials and support.
Consult these Field Guide Apps to research animals in your area. Select an animal that you would like to attract and research its requirements.
Consult nest box guidelines (see the Educator Notes for more information) to find out more about how to construct a suitable box.
Prepare a safety plan for this activity and seek endorsement from your organisation.
Cut and paint the materials, if you are making the box from scratch.
Many aspects of this activity carry risk, so you may need to mitigate risks by:
- Purchasing pre-cut, flat-pack nesting boxes
- Purchasing complete, pre-made boxes
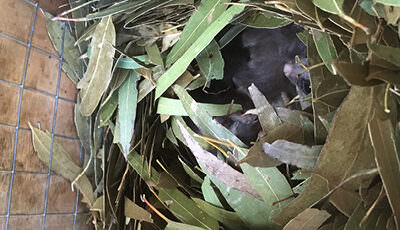 STEP 2
Animal Investigation
Explain to the children that they are going to be creating habitat.
As a group, investigate an animal that you are building a box for. Introduce the activity sheet and use the sheet to record your notes about the animal you are providing habitat for.
Run through your planned build-process, including the safety priorities, tool and equipment use and who will be responsible for how they are used.
Head outside and identify suitable locations for the nest box.
Ask the children if they can identify how the animal that they researched would use the surrounding area.
Use the information learnt during the animal investigation to help guide this discussion
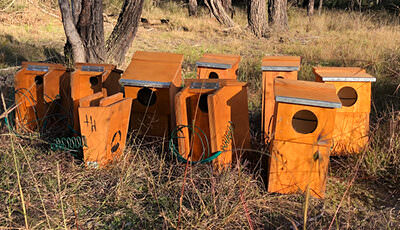 STEP 3
Build and Install
As a team, assemble the pre-prepared panels of the box.
As the box is assembled, discuss the dimensions of the box and the entry hole size. Ask the children how the dimensions and entry will affect the type of animal you are trying to attract.
Refer to the nest box guidelines and fauna field guide to help determine the height and best location of your nest box. Ask a trained professional to help install the nest box at your selected site.
 STEP 4
Maintain and Monitor
Sometimes introduced birds and wild bees can take over a nest box. Work with the children to decide on a plan in case this occurs. Your local landcare or other community environmental care group will have some suggestions about what to do if this happens. They can also provide suggestions on how to maintain and monitor your nest box. Many groups have access to pole cameras which allow for nonintrusive observation of the animals inside.
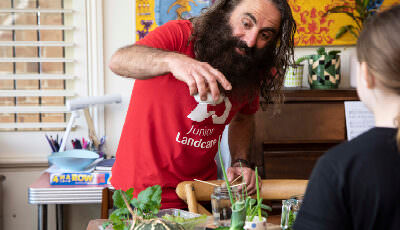 STEP 1
Engage
Watch our Junior Landcare videos with Costa to inspire the children and provide background knowledge to the learning activity.
Show the children some plants and identify the various parts of the plant.
Ask the children for some suggestions about the types of plants that they might propagate from scraps. Consider:
- Spring onions
- Onions
- Bok-choi
- Lettuce
- Carrot
- Celery
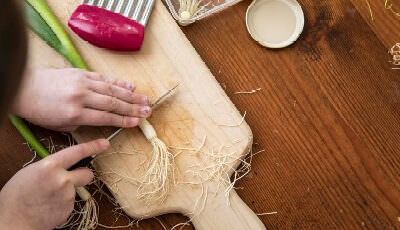 STEP 2
Prepare
Trim your scraps so that there is some remaining ‘core’ of the plant that will allow regrowth. A guideline is to leave a two-finger width of plant remaining and remove any browned off, or rotted vegetative material. This will maintain the integrity of the plant and help give it some energy to begin its regrowth.
Use this opportunity to point out the features of your plant, ask the children to use their senses. What can they:
- See
- Smell
- Feel
This is a good time to ask the young learners about any wonderings that they may have. What are they thinking about this learning activity on how plants can be propagated?
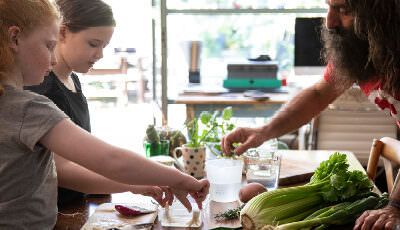 STEP 3
Regrow
Place the prepared scrap into a container with water. Ensure the plant can stand up: you may need to carefully trim the roots of the plant so they can stand independently.
Introduce the activity sheet and begin taking your initial observations.
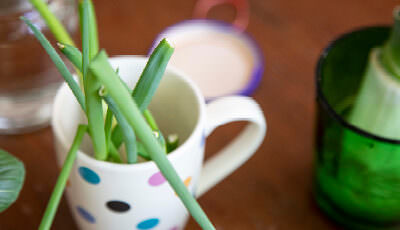 STEP 4
Monitor and Replant
As a group, study how your plant changes over time. Help your young learners to identify the newly sprouting parts of the plant.
Record your observations on the activity sheet.
Once your plant has sufficient roots and shoots, plant it in the garden. Continue to water, monitor and care for the plant help to help continue its growth.
The journey so far
As a class, discuss the impact of the local land uses you identified in the water sustainability activity – specifically around waste.
Does urban, industrial and stormwater waste generated in your local area have any downstream impacts?
Experiment: sink, float or dissolve
Let’s test a few common materials that end up in our stormwater and wastewater systems:
Fill 6 x 1L clear containers with 500ml of water. Follow the instructions in the activity sheet and add the materials to the containers.
Stir each container with the plastic ruler; observe and record the changes in the activity observation sheet.
Were you surprised by the results of the experiment?
Does this change your attitude to waste in our waterways and their downstream impacts?
What now?
Use all the knowledge gained from the Catchment Management activities to discuss what you can do to reduce your water consumption and reduce the amount of waste entering out wastewater and stormwater systems.
What happens when it rains?
As a class, discuss where the water goes when it rains. You can refer back to the story of a river learning activity to help prompt the discussion.
Discover stormwater features
Watch the Stormwater network video and identify stormwater features in your local area. These could include creeks, lakes, swamps and wetlands, stormwater channels and drains, as well as pollutant traps.
Are these natural features or urban constructions?
Stormwater assessment
Students will identify and map the school’s stormwater drains, and identify potential pollution problems.
Divide the school grounds into zones and allocate a group of students to each zone. Each group needs a copy of the school map and the activity sheet.
Groups walk around their zone and mark on the map the location of any stormwater drains. They collect data on the condition of the drain, presence of rubbish and debris, and direction water would flow.
Where possible, follow the drain to see where it ends up i.e., stormwater channel, closed pipe, creek, wetland. Record your data in the activity sheet.
Discussion and results
As a class, discuss the results of your stormwater assessments.
Did you see impacts of litter, sediment and leaves entering the stormwater drains?
What impacts would this have on the broader community and environment?
Create a list in the activity sheet of what could be done at your school to improve stormwater and runoff.
What’s in a drop?
Use the list of water sustainable strategies from the water sustainability activity and discuss which are most effective in your area and why.
Then discuss some of the water sustainable strategies you see at home and at school.
How to conduct a water audit
Watch the Sydney Water video on how to conduct a water audit.
Prepare for your school water audit.
Divide the school into five zones and mark them on the school map. Divide the class into five groups. Assign each group a school zone, provide activity sheets and maps and allocate someone in the group who can write the notes.
School water audit
In your assigned groups, use the activity data sheet and complete the school water audit. Ensure that you:
- Add group location, including building and room number
- Tally up all water devices
- Record any water saving features for each device (such as tap aerator, tap timer).
- Record the number of any broken devices
- Record any dripping devices.
Make sure you turn devices off during the audit. Notify staff to ensure all rooms are accessible and set a time limit of 20 minutes for the audit.
Assessing the audit and ideas to be more sustainable with water use
Use the water usage table in the activity sheet to determine the number of litres of water that is wasted daily for each device.
Record daily litres of water used against each of the broken or leaking devices. Add these to calculate the total litres of water used in a day and determine the daily total of water wasted.
Discuss: Where are the locations that have wasted the most water? What ideas do you have to help reduce water wastage at your school or location? How can you encourage behaviour change amongst your peers?
What is water sustainability?
Begin a discussion as a class on water sustainability and changes in water use over the last 250 years.
Reflect on what you discovered from the story of a river activity. What do you already understand about water sustainability?
Use local information or the National Geographic article from the reference list to help frame the conversation.
Land use in your area
As a class, discuss the land uses in your local area. You may want to create a map.
Use the list of land uses from the story of a river activity. Using Google maps, make a colour coded map of the local land uses in your catchment.
You may wish to include the following land uses:
- Residential
- Industrial
- Rural
- Agricultural
- Recreational zones
Refer to the educator notes for more details.
Mark the areas where you think water is wasted.
Using the activity sheet, mark the urban water cycle elements that are present in your catchment.
Case study: History of Sydney Olympic Park
Use Sydney Olympic Park or a local example to look at changing land uses over time and impact they have had on the local area.
Watch the video Sydney Olympic Park: A Place Rich in History.
Find out about the Indigenous history of Sydney Olympic Park.
Discover ways the Environment of the Sydney Olympic Park site has been restored.
Learn about Sydney Olympic Park’s integrated approach to water conservation and catchment management.
Change of land use in your area
Together, discuss the changing land uses over time in your area. Do you know of any land uses in your area where the water has polluted the catchment?
In the activity sheet, make a list of strategies (your ideas) that can help ensure water sustainability in your local area. Ideas include water recycling, water efficiencies, wastewater and rainwater tanks.
What is a water catchment?
Have a discussion as a class on catchment management, the water cycle, where freshwater comes from and why it is important for life.
Use the Australian Topographic Drainage Divisions and River Regions map to determine the catchment you live in.
Land uses in your catchment
As a class discuss the different land uses present in your local area and how they use water. List these in the activity sheet.
Follow the journey of a river through the catchment.
Using the activity sheet, read the story of a river, or make up your own, and ask the students to add the item in their jar to the container of water. Students put small amounts of household material (detergent, oil, dirt, chocolate powder, plastic etc.) to represent land uses and environmental issues.
Clean-up our waterways
Following the activity sheet, the students can use plastic strainers to remove the floating pollution and discuss ways of stopping it returning. Once the water has settled, students can scoop off the cleaner water into a separate container.
Discussion: What can we do to stop these things getting in the waterways and the ocean?
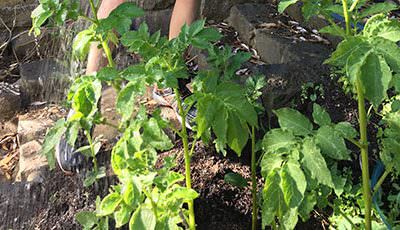 Step 1
Recap the first and second parts of this activity sequence, when the children grew and prepared their potato chips.
Tell the children that today, they will imagine that they have started their own potato chip company. They will become the writer, actor and director of a TV commercial to advertise their potato chips.
The commercial should include key messages about the care and dedication needed to grow that potatoes, as well as the experience of enjoying the finished product.
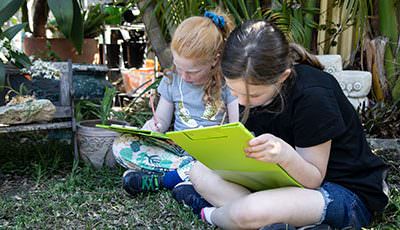 Step 2
Introduce the activity sheet.
Suggest that the process of growing the potatoes could be a unique selling point.
As a whole group, identify the important parts of the process that will be promoted and create a shared list of these.
Use the activity sheet to plan the commercial on the storyboard template.
Remind the children to focus on both growing the food, as well as enjoying the finished product.
 Step 3
In pairs or small groups, use your devices to record the advertisements.
Add the images taken during the first and second parts of the activity sequence to help illustrate the story of creating the finished product.
Use digital editing software or apps to create a 30-60 second advertisement for the chips.
 Step 4
Share your advertisements with your community through avenues such as online newsletters or social media posts.
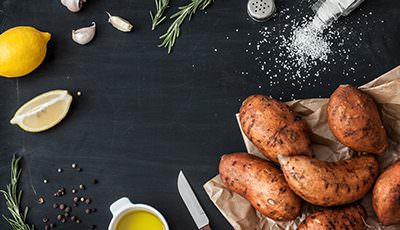 Step 1
Prepare
In an earlier class, harvest the potatoes/sweet potatoes from the garden and wash them.
Run through your plan with your volunteers or assisting staff.
Print the activity sheet out for the children.
Gather empty frozen chip packets from many different brands and suppliers (you can ask for donations from your community).
Preheat ovens and assemble the seasonings and oil.
Tell the children to imagine that they are going to start their own potato chip company.
In small groups, ask the children to discuss their favourite style and flavouring of chip
 Step 2
Discuss
Ask the children: ‘If you were going to cook your own chips, what would you need to know?”
Distribute the empty chip packets and ask the children to see if they can find the ingredient lists and country of origin. Compare the types of ingredients that are used in commercial hot chips.
As a class, discuss the ingredients for making oven baked potato chips:
Ingredients:
- Potatoes
- Olive oil for drizzling
- Pepper
- Salt
- Herbs (fresh or dried), including: parsley, thyme, rosemary, others, as preferred
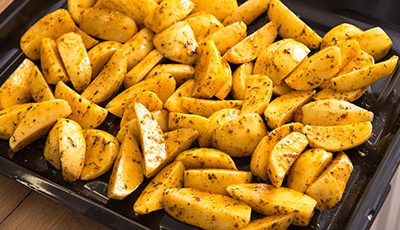 Step 3
Create
Explain the procedure for cooking the potato chips:
STEP 1
Heat oven to its highest setting, ideally 250C/fan 230C/gas 9. Cut each potato into 1cm-wide slices, then into 1cm-thick sticks.
STEP 2
Shake the potatoes out onto a roasting pan, drizzle with oil, ensuring each chip is evenly coated, then season well. Bake for about 15-20 mins, turning the potatoes at least twice, until golden brown and crisp.
Distribute the activity sheet and model how to write the procedural text.
Ask the children to make decisions about the additives they use, for example, will they attempt to make their chip ‘healthy’ by using less oil and salt, or will they aim for a particular flavour combination? Record this on the activity sheet.
Whilst children are working on the activity sheet, use the volunteers or additional staff to work with small groups of children to prepare and season their potato chips.
Use a digital recording device to take photographs of the children preparing or cooking their chips, as this will be used in part 3 of this activity sequence.
Write their name on a piece of baking paper with the pencil and put the chips on this, and then in the oven.
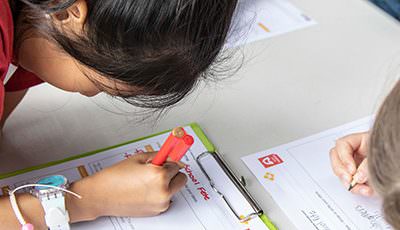 Step 4
Reflect
Ask the children to reflect on the cooking process.
Discuss what worked well and what could be improved for next time.
Reflect on the flavour combinations and ask for suggestions about what could be changed or done differently.
Model how to write a review.
Use the activity sheet to write the review of their product and give the chips a star rating.
 Step 1
Plan
Prepare the soil in the garden bed. Refer to the installing a no dig garden bed learning activity if needed.
Source ‘Seed’ potatoes. Although potatoes can be grown from store-bought potatoes, Seed potatoes are recommended as they are not treated with sprout inhibitors and are sourced from disease free stock. Seed potatoes are available from nurseries and garden centres.
Note: Different types of potato are more suited to some uses than others. Varieties such as Desiree potatoes are good for making hot chips.
Download the Gardenate app or use the Gardenate website to help determine the timing, spacing and other compatible plants required for your climate zone.
If you are in a tropical climate, consider whether sweet potatoes could be a better alternative.
Print the activity sheet and growing guides out for the children.
Draw a large timeline on the whiteboard (you will use this to model the use of the timeline later).
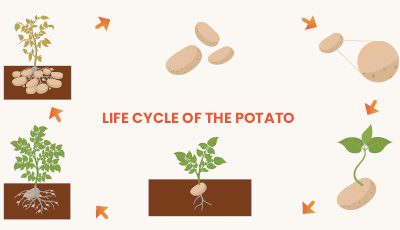 Step 2
Discuss
Ask the children: ‘If you were going to grow, manufacture and market your own brand of chip, what would you need to know?”
Focus the discussion towards growing potatoes and explain that chips are made from potatoes.
Discuss how potatoes grow underground as part of a plant that grows above ground.
If the children are unfamiliar with the concept of how potatoes grow, watch a clip, such as this one from Gardening Australia.
Distribute the activity sheet and growing guide.
Discuss what inputs would be required for growing potatoes:
- Timelines, including seasonal considerations
- Soil, water and care
- Harvesting
- Washing
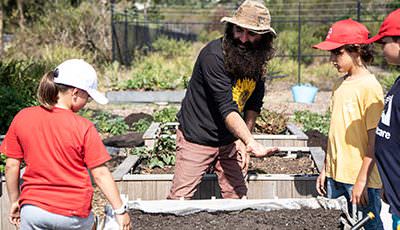 Step 3
Plant
Head outside to the garden.
Model how to plant the potatoes:
Potatoes should be planted in rows. Bury the potatoes 10-15cm deep and space them 30 – 40cm apart. Use rulers to measure depth and spacing.
If your potatoes have sprouted, face the sprouts facing upwards.
Use a digital recording device to take photographs of the children planting or caring for their crop, as this will be used in part 3 of this activity sequence.
Model how to use the activity sheet and work with groups to plant the potatoes, alternating between planting and completing the activity sheet.
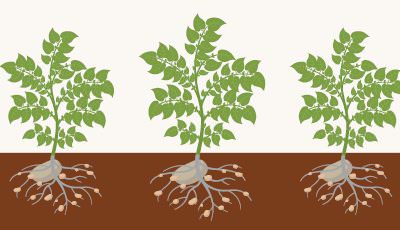 Step 4
Monitor and Care
Use the activity sheet to identify possible challenges that may occur. Discuss factors such as:
- Growing times
- Seasons
- Water availability.
When the potato plants are approximately 20cm high, mound more compost-rich soil around the stem of the plant. This will encourage the plant to produce more potatoes.
Engage
Ask the children about their favourite types of pizza.
Ask the children whether they know where pizzas originate from – discuss the cultural origins of different types of food.
Originally from Italy, the popularity of pizza surged following World War 2, when returning troops came home, bringing their love of pizza with them.
As a class, compile a list of pizza types and record the elements, including the base, sauce and toppings.
Explain that in this lesson they will be finding out what it would take to grow their own pizza.
Note, this activity can be conducted in small groups, pairs, or individually.
Ask the children to choose a type of pizza.
Plan
Distribute the activity sheet and ingredient cards.
Assemble the pizza, using the check-list on the activity sheet to identify the toppings required.
Pass around the frozen pizza boxes. Ask the children whether they can identify the ingredients lists and country of origin.
Discuss observations and respond to wonderings – for example, how a frozen pizza that is manufactured overseas could get to Australia.
Use the ingredient cards to identify the source of each ingredient.
As a group, discuss the ingredients and their origins. Children may not be aware that the dough comes from wheat, cheese from milk and the pepperoni from pigs.
Elaborate on the concept of resource use. Discuss the resources that would be required to grow a tomato. Compare those resources to the resources needed to grow a pig to produce pepperoni.
Investigate and explore
Explore the idea of growing a pizza and how difficult this concept could be.
Use the ingredient cards to find out more about the farming involved and the timelines required to grow or produce the ingredients, including the:
- Base
- Cheese
- Topping
Record this information on the activity sheet.
Reflect
Use textas and pencils to decorate the pizza.
As a group, reflect on the concept of ‘growing a pizza’.
After exploring the complexities involved, discuss how modern farming and supply-chains allow multifaceted products, such as pizzas to be produced.
Compare the different types of pizza from the first part of the lesson. Ask the children if they can identify whether some pizzas would be easier or harder to ‘grow’.
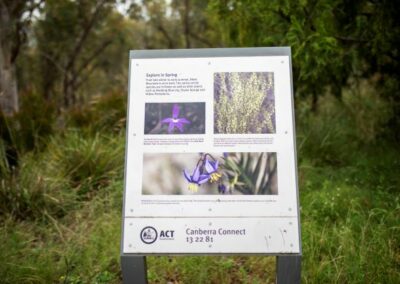 STEP 1
Plan
Begin this activity at your location with an Acknowledgement of Country. By acknowledging the land, you are also making a promise that you will care for the Land, the waterways, the plants and the animals.
Use your plant labels and garden guides along with onsite monitoring to determine the best time to harvest your plants. Timing may vary, for example, you may need to harvest in your school garden before holiday periods.
Ensure you have your collection resources ready and revise safe harvesting techniques. Wear protective footwear, use safe lifting procedures and look for spiky plant material and insects when harvesting.
Use the activity sheet to record each step of harvesting, describe what is happening.
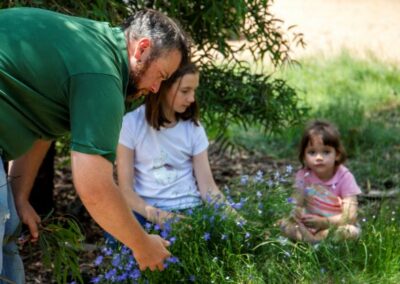 STEP 2
Collect
Examine your produce for any disease or insect damage before harvesting.
A sustainable practice is to take what you need, and not what you greed. This ensures that there is always something left for the animals, the next person and the next time.
Fruits, nuts and seeds can be picked carefully by hand whilst root vegetables may need to be pulled gently from the soil using a trowel or spade to loosen the soil. Blady grass material will need to pulled gently or cut off near the base.
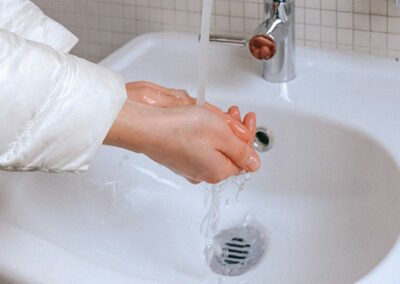 STEP 3
Clean
Clean produce is important for healthy eating.
Make sure you wash your hands using soap or sanitiser before cleaning or eating your collected produce.
Once collected, use water to wash your produce. Using a colander, bucket or similar container.
Place your washed produce on a paper towel or clean tea towel so the produce can dry off naturally.
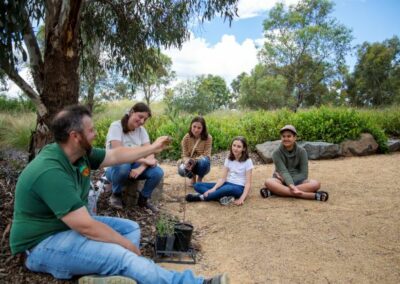 STEP 4
Share
You may like to use scales to weigh your harvest before you divide the produce equally. Containers or paper bags will help to easily distribute the produce. Use the activity sheet to help children devise ideas to get the most out of their harvest.
Discuss:
- What part of the plant have you harvested?
- What is your plant harvest going to be used for?
- How would you prepare your plant material for use?
- What have you done to ensure you have harvested your produce sustainably and in a way that supports caring for Country?
Complete the activity sheet to record your learnings.
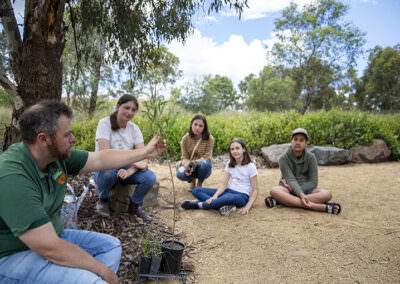 STEP 1
Plan
Begin this activity at your location with an Acknowledgement of Country. By acknowledging the Land, you are also making a promise that you will care for the Land, the waterways, the plants and the animals.
Following a plan is an important process when setting up your Indigenous plant-use garden. A plan will assist you to know where to plant certain plants to achieve the best results.
Go through your checklist to ensure you have all the materials needed.
Review the plan with the children before starting and outline the safety steps by asking them what would make this activity safe. Outline safe tool use.
Space out the pots onto the bare bed, discussing where they may go. Use your final design from the site assessment learning activity to help guide this. Refer to any planting information and plant labels to help guide the discussion.
Remember to consider how much space the plants need when fully grown. Will it shade other plants? Where do you think these plants should go?
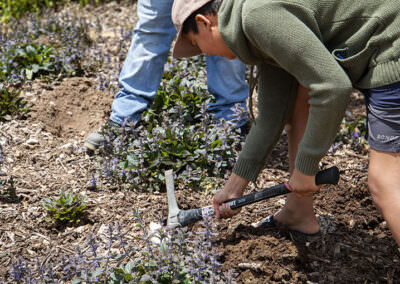 STEP 2
Prepare
Once the plants are in their correct positions, dig a hole that is slightly deeper and wider than the pot. Water the hole in preparation for planting.
Remove the plants from their pots ready for planting. It is best to have the least amount of disturbance to the roots as possible. Keep the soil and plant intact by gently squeezing each side of the pot, then place your hand flat over the soil with the stem between your fingers. This will provide the least amount of stress and disturbance to the plant during the process.
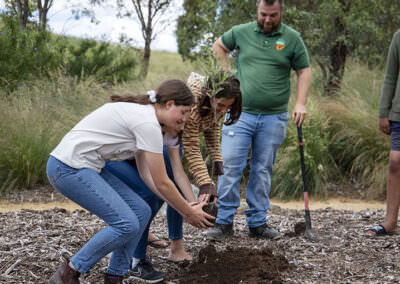 STEP 3
Planting
It is finally time to plant!
If the plant is going into new soil in a garden bed, you will need to dig a hole big enough to fit the plant and totally cover the roots. Press the soil around the plant gently without packing the soil too hard or too tight. Packing the soil hard will push the air out of the soil that is needed by the roots.
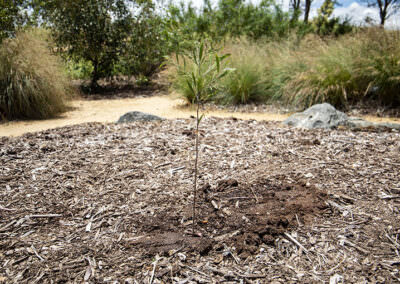 STEP 4
Maintenance and upkeep
Now that you have completed your planting, use the activity sheet to draw a map and listyour plants, include how many plants you have planted.
Create rosters and a task list to share the responsibility to care for your plants with your garden team. This can include watering, measuring growth and plant changes, checking mulch and looking for pests.
The more involvement and ongoing maintenance you put into the garden, the better the results you will have. It is important to respect this area and the significant plants that it holds.
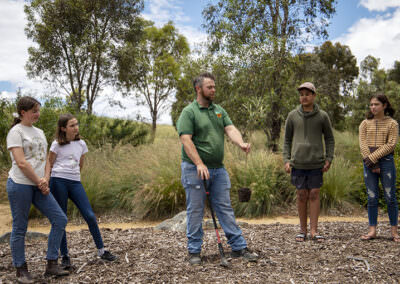 STEP 1
Understanding your site and the needs of your plants
Begin this activity at your location with an Acknowledgement of Country. By acknowledging the land, you are also making a promise that you will care for the land, the waterways, the plants and the animals.
Mapping and understanding the planned site will help you explore the possibilities and decide the best location for your Indigenous plant-use garden.
Consulting with your local Elders and First Nations peoples community is essential to learn about sacred sites and to include their perspective on appropriate sites.
Begin discussion by exploring what plants need to grow, including discussion around water, light and soil.
It is important to understand the type of soil existing in the planned site. Look at the Soil – more than just dirt learning activity to further understand different types of soil in local areas. Your local council or Landcare group may have more information.
Now think about the plants that you have included in your plant list activity and the growing conditions needed by these plants.
Does the planned site meet those conditions? How could you improve the conditions, e.g. water access, suitable soil?
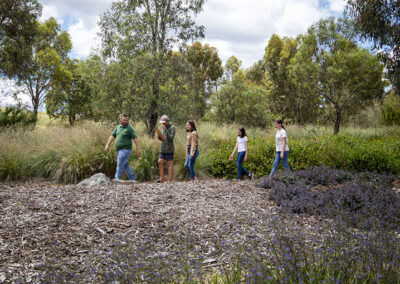 STEP 2
Where is the best location for our plant-use garden?
It is important to evaluate the site to determine the best location for your plant-use garden. Consider how accessible is the area for construction and maintenance, how to access water, availability of sunlight, the soil type and topography, and if it is sheltered from extreme weather.
Drawing your base map (Bird’s eye view)
Take a large sheet of paper (or use a portable whiteboard) out to the site. Find out what direction North is and add that to your map.
Draw a grid using a ruler to help draw to scale. Plot out the permanent fixtures of the site (such as paths, fences, taps, established trees, etc) and measure the distances of those features from each other. Record their location on your map. This map will be the base for you to draw the garden design from the vision activity.
Taking photographs of the site from different directions are a great record of your progress too.
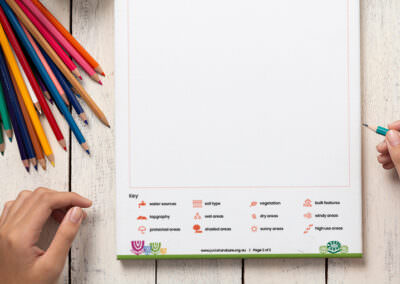 STEP 3
Drawing your vision
Using the base map and your vision, sketch out your garden design on the activity sheet.
This is best done in pencil so you can easily make changes. Think about the structures that you need to build such as paths or raised garden beds. You may like to use garden edging or mounds to represent the shapes of animals, a river or a significant landscape.
How could you tell a story or create a learning space for different people to use and enjoy? Consider what materials could be used to build these elements.
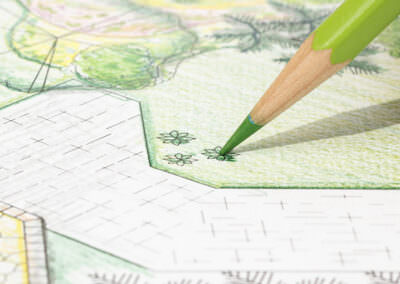 STEP 4
Finalise your design
Use your prior sketches and maps to create the final design of the new garden on your activity sheet.
Remember to include which direction your garden will face and the permanent fixtures of the space (such as existing trees, paths, taps, fences, etc). You may wish to use a key and symbols to show what you are drawing. Using different colours and symbols is a great way of mapping out your elements. In your key, describe what each of these elements are made of (e.g. wood, plant, bricks).
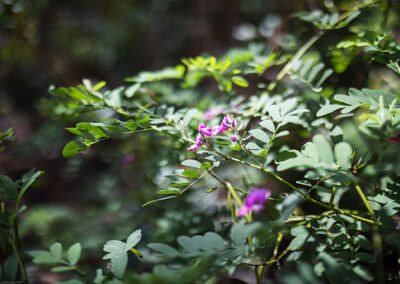 STEP 1
Begin this activity at your location with an Acknowledgement of Country. By acknowledging the Land, you are also making a promise that you will care for the land, the waterways, the plants and the animals.
For thousands and thousands of years, First Nations peoples have utilised the environment for everything they needed to survive.
Discuss how nature could be seen as a shopping centre for food, tools, medicine, shelter, clothing, hunting, carrying, water craft, ceremony and land management for First Nations peoples.
Focus on how First Nations peoples used and still use different plant parts such as root, leaf or shoot, flower, fruits, seeds, stems or wood.
Refer to the activity sheet and discuss the list of Indigenous plants that have been included. In the discussion, encourage the learners to share their knowledge including:
- which plants are familiar to them?
- where may these plants be used? food, medicine, utensils etc.
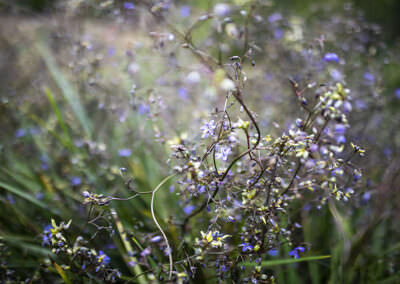 STEP 2
It is important for our learners to understand the importance of planting native plants local to the region and resilient to climate.
Following the initial discussion, ask each student to choose five plants that were/are commonly used by First Nations peoples to research, focusing on:
- how the plant was/is used and which parts were/are used
- where in Australia does it naturally grow
- growing conditions needed.
Use the activity sheet to record findings.
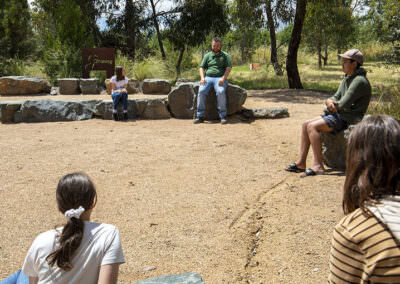 STEP 3
After completing the activity sheet, discuss the results as a group.
For each plant, decide if it will be suitable to grow in your area. Discuss the conditions required by the plant. Can this be provided in your garden?
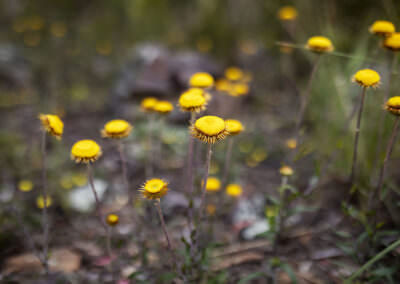 STEP 4
Now that you have considered suitable plants, finalise your list of plants for your garden referring to your activity sheet.
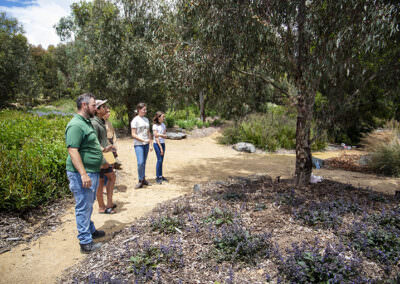 STEP 1
Begin this activity at your location with an Acknowledgement of Country. By acknowledging the Land, you are also making a promise that you will care for the Land, the waterways, the plants and the animals.
A vision will guide the decisions needed in creating your Indigenous plant-use garden.
Discuss the 5 main elements to consider when developing the vision for your garden:
- How are you going to connect to Aboriginal and Torres Strait Islander people and cultures?
- How are you going to connect to your garden space and the environment?
- How is your garden contributing to the biodiversity of the area?
- How are you going to use the plants?
- How will you care for your garden?
Use the activity sheet to help the children record their learnings.
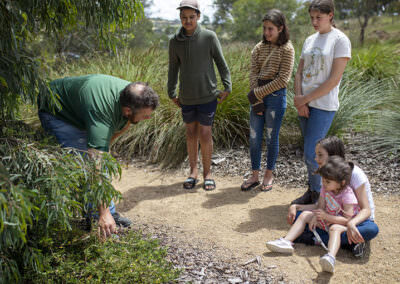 STEP 2
Creating an Indigenous plant-use garden is an important opportunity to build relationships with your local First Nations community. This is an important aspect of reconciliation.
Consulting with your local Elders and First Nations community is essential to build relationships. This is important throughout the whole process. This is a good opportunity to invite an Elder to speak at your school or to your group.
You may also like to reach out or find contacts in your local First Nations community. You could speak to parents of First Nations students, speak to the Indigenous Learning Officer at your school, your local Land Council or Landcare group.
Alternatively use The AIATSIS Map of Indigenous Australia interactive map.
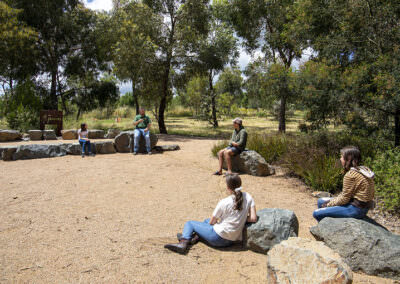 STEP 3
Consider engaging a First Nations peoples artist or Aboriginal and Torres Strait Islander owned business (such as nurseries, landscapers and garden designers) to be part of your project, a great place to source your plants and to help out with knowledge about how to grow and use them.
There are many elements other than plants that you may like to include.
- Commission a local First Nations artist to work with you to create a cultural art piece or instillation.
- Create a Yarning Circle to meet and yarn.
- Work with local Elders to develop signs that include appropriate plant use information.
- Design your garden to include important elements for the local First Nations peoples group. This may include story poles, stepping stones and natural sculptures of animals.
If you are interested in using an Aboriginal or Torres Strait Islander name or word, story, or artwork, it’s important to request permission and consult with your local Traditional Owners. Refer to the Educator notes for more information.
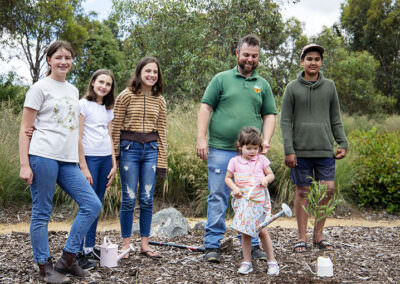 STEP 4
Connection to the Land (Country) is very important for First Nations peoples.
Consider how you are going to connect to your new space. Think about the different ways that you can use the space. Is it going to be a place of learning, reflecting, quiet, enjoyment? How will it help your physical health as well as your mental health?
Consider how other people may use the space. What will be the benefits of the garden to you and other people?
This garden will help support biodiversity because it will provide a space for plants and animals that would naturally live in your area.
What are some of the animals that you may see come back into this space?
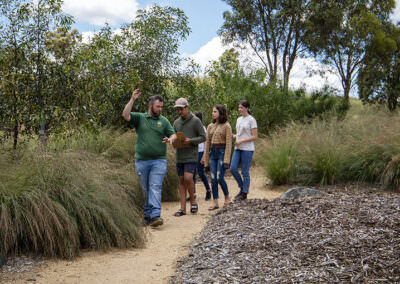 STEP 1
Preparing
For many thousands of years, Aboriginal and Torres Strait Islander peoples have depended on the bush for everything they needed to survive.
The materials that a plant provided would depend on the different times of the year. Different parts of a plant were used for a variety of purposes. The different plant parts used included the root, leaf or shoot, flower, fruits, seeds, stems or wood.
Before you go on your walk, you may like to explore some of the field guides and resources. Using the Aboriginal and Torres Strait Islander Plant use in South Eastern Australia and Aboriginal and Torres Strait Islander Plant use and technology (or a local guide for plants local to your area) will help you to identify some of the plants on your walk and what they are used for.
Having a First Nations person guide you on your walk is even better as they can explain how the plants are used and share stories and culture.
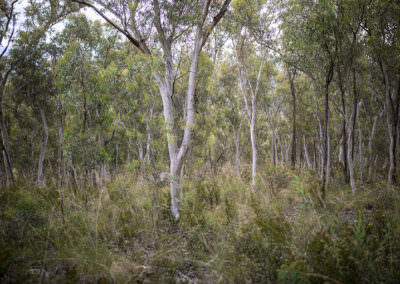 STEP 2
Exploring
Begin this activity at your location with an Acknowledgement of Country. By acknowledging the Land, you are also making a promise that you will care for the Land, the waterways, the plants and the animals.
Complete the Whose Country are you on? learning activity to determine your local First Nations language group.
Explore a bushland area close by and complete the activity sheet by drawing the different plant parts that you found on your walk. You may also like to take photos.
While you are on your walk, use your senses to observe your surroundings. What do you see, smell, hear, feel?
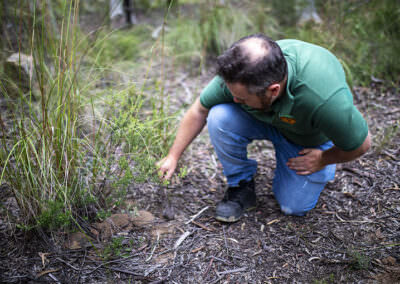 STEP 3
Observing
Dependent on the time of year, you may not see flowers, fruits or seeds. Look for examples of seed pods, dried fruits or flowers on the ground.
If you haven’t seen any flowers, fruits or seeds, think about how other parts of the plants (bark and the wood) may be used.
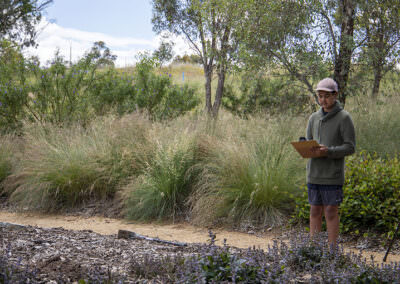 STEP 4
Identifying
Using the plant field guides or online resources in the resource list, identify the plants that you have observed and recorded in your activity sheet.
This is a great time to consider if any of these plants would be suitable to include in your plant-use garden.
Research further information about the plants observed and how they can be used as food and fibre. Complete the activity sheet, write about the food and fibre use and include a climate zone. The climate zone will help determine its suitability for your location.
Make sure you ask questions of your guide to help increase your understanding and knowledge.
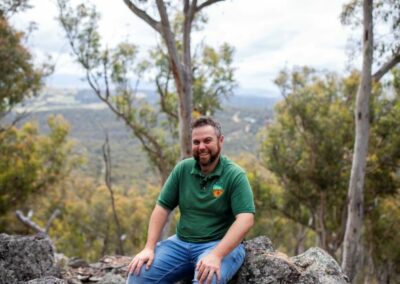 STEP 1
Begin with an Acknowledgement of Country.
Complete the Whose Country are you on? learning activity to determine your local First Nations peoples language group.
Acknowledgment – We would like to say thank you to the First Nations peoples (refer to your local group if you know it) who have cared for and continue to care for this Land we are on for thousands of years. We promise that we are going to care for the Land and all of the plants and animals that live in it.
Conduct a discussion on seasons and what the children know.
Ask the children what they know about seasons. What is the temperature like outside for each season? Is it hot, cold or in the middle?
How many seasons are there? Is it just four, or are there more?
Following your discussion, find a place outside to sit away from others. Use all your senses to observe what is around you for 10 minutes.
Even in an urban area, look for native species you might observe such as insects, birds and plant growth or development.
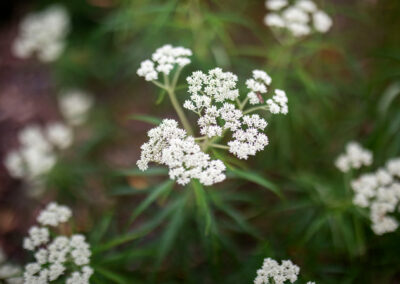 STEP 2
Use the journal page of the activity sheet to record your observations by writing or drawing.
What do you see? Is it sunny? Is it cloudy? What are the clouds like? Are they moving fast or slow? What are the birds and animals doing?
What do you feel? Is it cold or is it hot? Can you feel the wind? Can you feel the warmth of the sun?
What do you hear? Can you hear the wind? Can you hear birds? Can you hear any insects? What are they doing? What other noises can you hear?
What can you smell? Flowers? Rain? The earth?
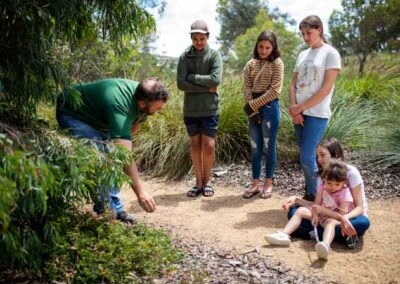 STEP 3
Encourage discussion by retelling the seasons story from Adam and Jarrah in the activity sheet. These seasons include: first summer, deep summer, first winter, deep winter, first spring, deep spring.
Explain that in the story Jarrah was on a walk with Adam and as he learnt about the seasons, Jarrah wrote it down and drew pictures.
Ask the children to use their observations and discuss what season they are in.
 STEP 4
Using the My Seasonal observations page of the activity sheet, draw or write about at least one thing you observe locally. Look at the animals, plants and weather to help describe the season you are in.
You may like to do this activity again at another time during the year to observe the differences.
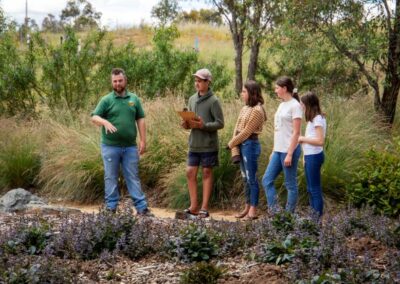 STEP 1
Begin this activity at your location with an Acknowledgement of Country. By acknowledging the Land, you are also making a promise that you will care for the land, the waterways, the plants and the animals.
Use the story to encourage the students to talk about their understanding of First Nations languages. What did they learn from the story? What do they know about the languages of First Nations peoples? Have they heard anyone speak in these languages? Do they know some words for their local language group?
Can First Nations students share some language from their own culture with the others?
 STEP 2
Use the online Gambay First Languages Map to explain the significance of language. Tell the learners that each language group had and still has, an important relationship with their Country and between Countries. No part of Australia was empty or without people. Language is important for identity.
Compare the language map with a political map of Australia showing the States and Territories.
How are they different? Compare the sizes of the groups? Why would they be different sizes? How would the groups differ across Australia?
What role would the type of environment and climate play in where people live?
STEP 3
Take some time outside with the students to sit quietly and listen for 2 minutes.
Is there an environmental sound that they heard that they have heard before – or that they like to hear? How could they look after the land they are on to ensure that these natural sounds can continue?
How they might behave to show respect for the land and Country they are on? What other ideas do they have and what actions can they take?
Discuss that an Acknowledgement of Country is way of showing respect for the Aboriginal or Torres Strait Islander Traditional Owners and Custodians of the land on which learning is taking place or a meeting or event is being held.
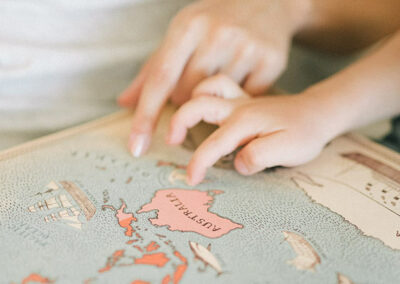 STEP 4
Find the location of where you are on a map of Australia. Find that location on the language map to find the name of the group for where you are located.
Not only are there many different First Nations communities across Australia, there is a great diversity of languages and therefore diversity of cultures. These languages are complex and as diverse as the people.
Use the activity sheet to write the location of where you live, and the language group of that place. You can also write the language groups for each Australian capital city. Write an Acknowledgement of Country for where you live. Find the language group for some other locations of your own choice.
STEP 1
Begin this activity at your location with an Acknowledgement of Country. By acknowledging the Land, you are also making a promise that you will care for the land, the waterways, the plants and the animals.
Use the story to encourage the children to talk about their understanding of First Nations peoples languages. What did they learn from the story? What do they know about the languages of First Nations peoples? Have they heard anyone speak in these languages? Do they know some words for their local language group?
Listen and watch the Marin Gamu song where schools around Australia sing this song about body parts in their local language. Marrin’ and ‘Gamu’ mean ‘body’ in the Kalaw Kawaw Ya (Torres Strait) and Wiradjuri (NSW) languages.
Do you know any other songs about the body in language other than English? (example Head, Shoulders, Knees and Toes)
Not only are there many different First Nations communities across Australia there are a great diversity of languages and therefore diversity of cultures. These languages are complex and diverse as are the people.
Who could we ask to find out more about local language? Use this opportunity to invite local Aboriginal and Torres Strait Islander community members and people involved in language revitalisation work to help you explore First Nations Peoples’ culture and language for the people in your local area.
STEP 2
Use the online Gambay First Languages Map to explain the significance of language. Tell the children that each language group had an important relationship with their Country and between Countries. No part of Australia was empty or without people. Language is important for identity.
Find the location of your setting on a map of Australia. Find that same location on the Gambay First Languages Map to find the name of the group where your school, youth group or home is located.
Use this Language Map to compare with a map of Australia showing the states and Territories.
How are they different? Compare the sizes of the groups? Why would they be different sizes? How would the groups differ across Australia? What role would the type of environment and climate play in where people live?
STEP 3
Take some time outside to sit quietly and listen for 2 minutes. What do you hear – are there any sounds of animals or other natural environment sounds?
Explain safe and respectful behaviors and then give children the opportunity to explore for natural objects on the Country they are on. What can they find that makes them feel connected to place?
Discuss with the children what they have found on Country and how it makes them feel.
Discuss with the children how they might be able to look after the Country they are on. What other ideas do they have and what actions can they take? What can they do to show they feel thankful?
Discuss that an Acknowledgement of Country is way of saying what we are thankful for – we are thankful for the land, the water the plants, the animals, the people and looking after each other.
STEP 4
Find your location on a map of Australia. Find that same location on the Language map to find the name of the group where you are located.
Use your research to add answers to the activity sheet.
Write an Acknowledgment of Country in the activity sheet. You can draw significant places, plants or animals for your Acknowledgment of Country.
Find the language groups for some of your favorite Australian locations on your sheet.
Explore some more local language uses with local Community Elders; use the online resources provided in the reference list to help you. Use the Welcome to Country App and search for your location on the map. Listen to a Welcome in the local language (if available).
STEP 1
Begin this activity at your location with an Acknowledgement of Country. By acknowledging the land, you are also making a promise that you will care for the Land, the waterways, the plants and the animals.
Using the stories, songs and videos from the reference list, help the children begin to understand that First Nations peoples are the traditional custodians of our land, waterways and skies.
What do the children know about Aboriginal and Torres Strait Islander people, culture and language? Do the children know any Aboriginal or Torres Strait Islander words? Who could we ask to find out more about local language? Use this opportunity to invite local Aboriginal and Torres Strait Islander community members and people involved in language revitalisation work to help you explore First Nations peoples culture and language for the people in your local area.
STEP 2
Use the online Gambay First Languages Map to explain the significance of language. It is important to learn which language is represented from where they live and learn.
Tell the children that each language group has an important relationship with their Country and between Countries. No part of Australia was empty or without people. Language is important for identity.
Find the location of your setting on a map of Australia. Now find that same location on the Language Map to find the name of the group where you or your home is located.
STEP 3
Take some time outside to sit quietly and listen for 2 minutes.
Explain safe and respectful behaviors and then give children the opportunity to explore for natural objects on the Country they are on. What can they find that makes them feel connected?
Children discuss what they have found on Country and what it makes them feel. Does it make them feel grateful and thankful? Does it make them feel grounded?
Remind the children of the Acknowledgement of Country that was said. at the beginning of this activity. Discuss that an Acknowledgement of Country is way of saying what we are thankful for. “We are thankful for the land, the water the plants, the animals, the people and looking after each other.” We can use this Acknowledgment of Country every day to show our thanks.
STEP 4
Using the name of the language group of your location, children complete the activity sheet to create a sign – We live, learn and play on ……. Land.
Children can decorate the sign by gluing and sticking on natural objects, or using pencils, pens or paints to decorate it. Once complete, return any leftover natural materials to the places where they came from.
Children practice reading their sign and give some examples of how they might be able to look after the Country they are on.
Explore some more local language uses with local Community Elders and use the online resources provided in the reference list to help you. Use the Welcome to Country App and search for your location on the map.
Listen to a Welcome in the local language (if available).
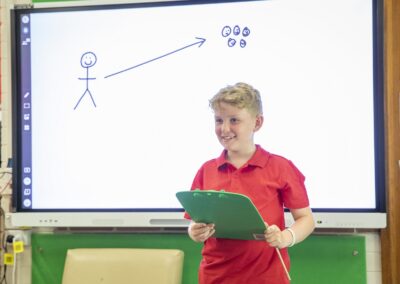 Step 1
Introduction:
Begin this activity with an Acknowledgement of Country. By acknowledging the Land, you are also making a promise that you will recognise the Cultural practices of First Nations people.
Use the story above to introduce the topic of a yarning circle.
Have a discussion with students about what they know about yarning circles, including what they were and are still used for today.
Remind children of the different ways we can communicate with one another e.g. verbal and non-verbal communication.
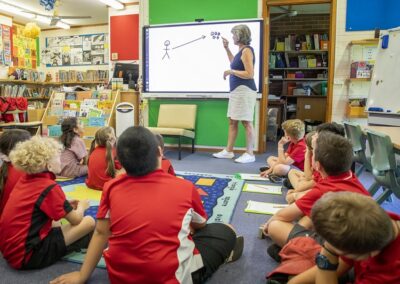 Step 2
Mapping:
Next, discuss how a teacher or facilitator’s position standing in front of a class or group may affect these types of communication.
Use a whiteboard to map the direction of communication. Use a bird’s-eye view with dots to show the teacher/facilitator and the students. Use different coloured whiteboard markers to draw arrows to show the direction of the verbal and non-verbal communication. (Much of it will be back and forth.)
Ask the question: How much do we communicate or listen to each other when we are assembled like this (in a circle)?
Then ask how much we communicate and listen to one another when someone is positioned in front of a class or group of people.
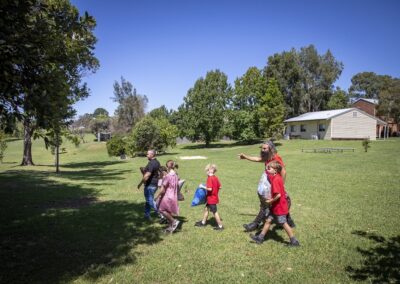 Step 3
Predicting differences:
Head outside. As a group, find a suitable place to sit in a circle, like under the shade of a tree. This could even be where you would like to set up your yarning circle.
Sit in a circle.
Ask students to form pairs so they can predict together (turn-and-talk) how sitting in a circle could affect or improve communication (verbal and non-verbal).
Hand out the Activity sheet and clipboards so they can record their predictions.
Explain that as a group, you will be sharing your predictions from the turn-and-talk activity, and you will also be recording the direction of discussion as well as non-verbal communication, such as eye contact.
 Step 4
Recording results:
Ask the children to represent each person in the group by drawing circles or dots on the sheet.
As each pair reports their ideas from the ‘turn-and-talk’ activity, ask the students to map the direction of the communication after each group’s turn.
At the end of the discussion, ask the students to share their communication maps.
Record any additional results, such as whether it was easier to understand what was said or how body language was observed during this sharing time.
As a group, reflect on your results and take a moment to consider why yarning circles are an important part of First Nations Culture and can be beneficial for different types of communication.
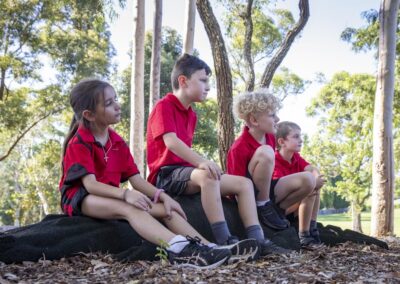 STEP 1
Introduction:
Begin this activity with an Acknowledgement of Country. By acknowledging the Land, you are also making a promise that you will recognise the Cultural practices of First Nations people.
Before you head outside, explain that today you will be comparing different sites to decide where to set up a yarning circle and to produce a persuasive argument about the preferred site.
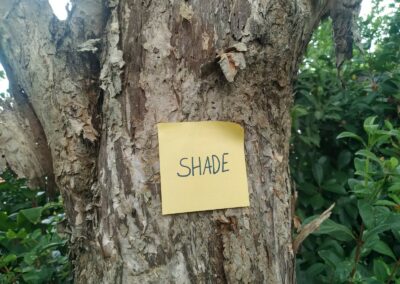 STEP 2
Site evaluations:
If you are able to work with a local Elder or First Nations group, getting their feedback about the pros and cons of a particular site can be valuable in helping to select the right location.
Begin by going to a location that you think would NOT be a suitable site for a yarning circle. Explain that you think this probably wouldn’t be a good site.
Hand out post-it notes and pencils.
Sit in a circle and ask the students to evaluate the site and explain whether there are positive or negative aspects to the location. Ask the students to record these ideas on a post-it note.
Repeat the process with the site(s) that could be better.
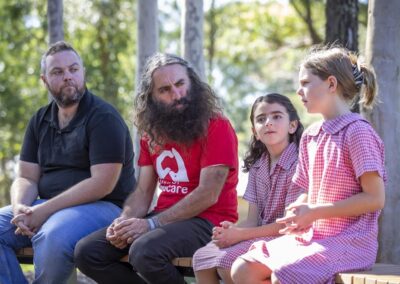 STEP 3
Discussion and elaboration:
As a group, share your observations and the data collected on the post-it notes. If possible, it is a good idea to do this whilst sitting in the preferred space for your yarning circle. Some guiding questions include:
- How well do we all fit in this space?
- How do we feel when we’re in the area?
- How well can we see and hear one another? How well can we be heard?
- What access requirements might we need to consider in this space?
Consider the positive and negative aspects of the different locations.
 STEP 4
Persuasive writing:
Distribute the Writing Frame Activity Sheet.
Ask students to use the Writing Frame as a template to produce a persuasive argument. Their persuasive argument should be why the site chosen would be the best location to situate the yarning circle.
Present the arguments to School Leadership/Council and seek their feedback about the site you have selected.
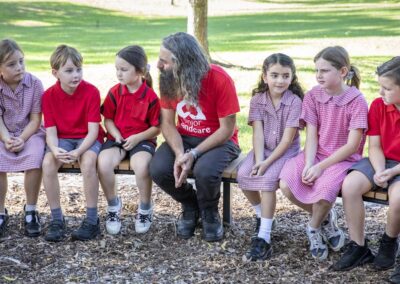 STEP 1
Introduction:
Begin this activity with an Acknowledgement of Country. By acknowledging the Land, you are also making a promise that you will recognise the Cultural practices of First Nations people.
Use the story above to provide background information.
Ask the students: “Why is it important that we work with First Nations people as much as possible for this project?”
Remind them that consulting with your local Elders and First Nations community is essential to building relationships. This is important to do throughout the process of setting up your yarning circle.
Creating a yarning circle is also a good opportunity to invite an Elder to speak at your school or to your group on regular occasions.
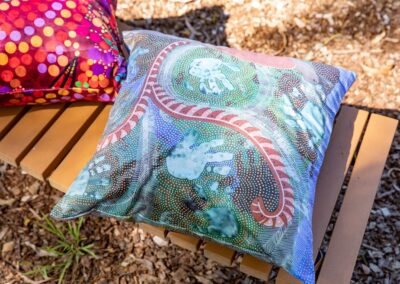 STEP 2
Identify learning needs:
You may also like to reach out or find contacts in your local First Nations community. You could speak to parents of First Nations students, speak to the Indigenous Learning Officer at your school and/or your local Land Council or Landcare group.
Alternatively use the interactive AIATSIS Map of Indigenous Australia.
As a group, find out ‘Whose Country am I on?’
Consider engaging a First Nations artist or First Nations business to be part of your project (such as landscapers, garden designers or nurseries, which are great places to source your plants and to help out with knowledge about how to grow and use them).
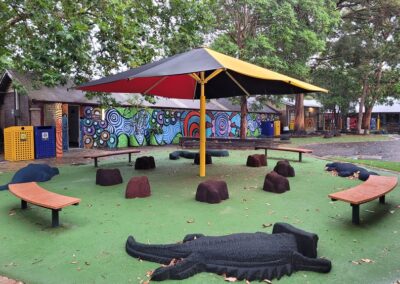 STEP 3
Investigate opportunities:
As a group, discuss how your project could be improved by working with First Nations people.
There are many elements that you may wish to include, for example:
- Commission a local First Nations artist to work with you to create a Cultural art piece or installation.
- Create an Indigenous plant use garden and work with local Elders to develop signs that include appropriate plant use information.
- Design your yarning circle to include important elements to the local First Nations peoples group.
If you are interested in using an Aboriginal or Torres Strait Islander name or word, story or artwork, it is important to request permission and consult with your local Traditional Owners. Refer to the Educator Notes for more information.
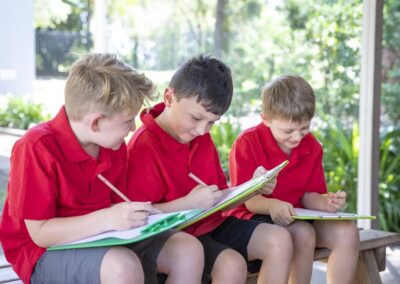 Step 4
Make a project plan:
Compile a list of the different stages of the project.
Discuss how you could involve First Nations people at each stage of the project. Note: all stages of this project have the potential for First Nations involvement, input and participation.
Your students will probably have a lot of questions at this point.
As a group, identify what questions could be answered by First Nations people.
Compile this list and add it to the children’s ideas of how you might involve First Nations groups in your project.
Present this list to School Council/Leadership.
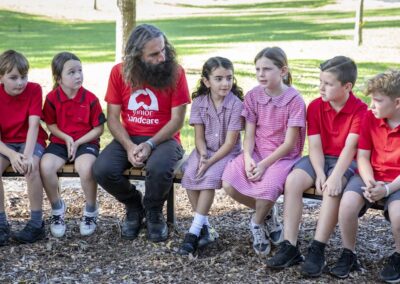 Step 1
Introduction:
Begin this activity with an Acknowledgement of Country. By acknowledging the Land, you are also making a promise that you will recognise the Cultural practices of First Nations people.
As a group, discuss why accurate mapping will help to complete the project.
Review:
- How to draw a bird’s-eye view
- Perimeter
- Area
 Step 2
Head outside:
Explain that in this activity you will be mapping the space that will host the yarning circle – this includes the seating area and space around the circle.
Go outside and sit in a circle in the space that the yarning circle will occupy.
Use chalk/charcoal or even a stick etched into the earth to mark out that circle.
Next, use chalk or witches hats to mark out the space around the yarning circle. This may include bush tucker garden beds, artwork, native trees or pathways.
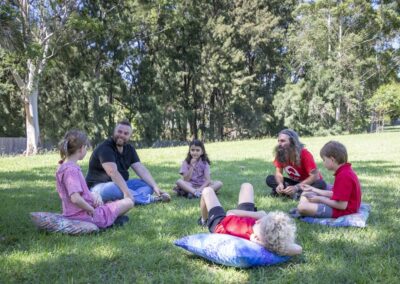 Step 3
Sitting in the yarning circle:
Sit in the yarning circle to see how it feels.
It is important to remember that if you do not have a budget to have a yarning circle built in your space, this is enough. Of course, it can be nice to have seating (rocks, logs, etc.) in the space but this is not essential. The act of sitting in a circle and being in contact with the earth is an important part of traditional yarning circles.
Distribute the Activity Sheets.
Discuss what other design elements will be in incorporated into the space, for example: rocks, artwork, Indigenous plants or a bush tucker garden.
Step 4
Mapping the space:
In pairs, ask students to map the space and calculate:
- Perimeter
- Area
For older grades, you may wish to calculate the circumference of the circle too, or use a flexible measuring tape to work out this figure.
Using the Activity Sheet,ask each student to produce a site map of the space on their own.
When complete, share and discuss the individual maps as a group, considering any additional information that needs to be included.
As a group, share the maps, considering if there is any extra information that needs to be included, such as:
- Location of buildings and other features such as trees, gardens or equipment
- Visibility
- Ease of access
- Drainage
- Shade
- Wind
- Safety – for example trees that could lose a branch.
Step 1
Preparation:
In this activity you will be showcasing your yarning circle to your local Landcare or environmental group.
Use the Find a Group directory on the Landcare Australia website if you do not already know who your local group is and invite them to come to your school. If there is no local Landcare group near to your school, contact other environmental organisations working in your area.
Get in touch with your local First Nations representatives or community members who you have been working with and invite them as well. If you do not have any existing contacts or direct links with First Nations organisations or people in your area, a good starting point is to contact either the Local Aboriginal Land Council (LALC) or Local Aboriginal Education Consultative Group.
Note: this activity can be undertaken at any time during the development of your yarning circle project.
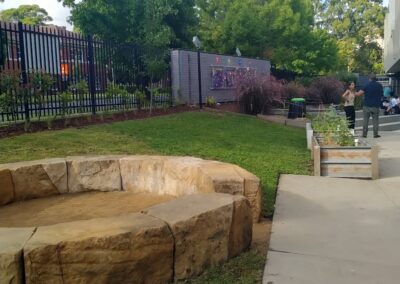 Step 2
Identify needs:
Head outside with your students.
Using the Activity Sheet, identify what is working well in your space and what you could use some assistance with from a group such as Landcare.
Examples include:
- Help sourcing and planting Indigenous plants around the yarning circle
- Identifying the plants and animals in the area around the yarning circle
- Weeding/weed removal.
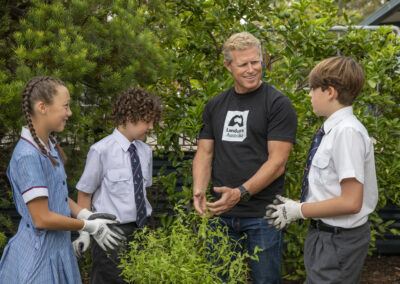 Step 3
Present:
Begin this activity with an Acknowledgement of Country. By acknowledging the Land, you are also making a promise that you will recognise the cultural practices of First Nations people.
As a team, present to your invited guests.
Explain what you have set out to achieve, what has worked well and what you think you would like some assistance with to enhance your yarning circle and the surrounding area.
Ask for suggestions and thoughts on things you may not have considered.
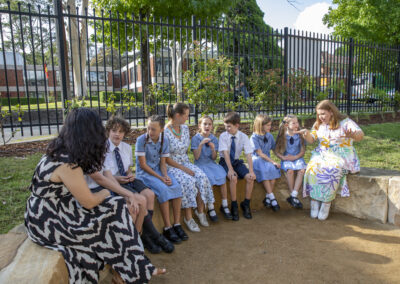 Step 4
Sharing:
Have a conversation between your students, the Landcare members and/or the First Nations representatives or community members who have come to your school.
Think about:
- How you can work together?
- What assistance/expertise Landcare can provide?
- Other resources you could develop/share?
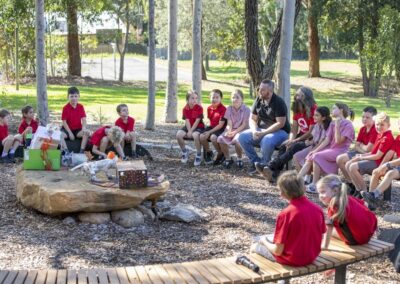 Step 1
Head outside:
Open the yarning circle.
If possible, invite a local Elder or respected community member to help lead and run the yarning circle. We understand this won’t always be possible.
Begin this activity with an Acknowledgement of Country. By acknowledging the Land, you are also making a promise that you will recognise the cultural practices of First Nations people.
Invite students to sit in the space to have a discussion.
Reflect on your earlier learning in the first activity in this sequence ‘Creating a yarning circle – background’.
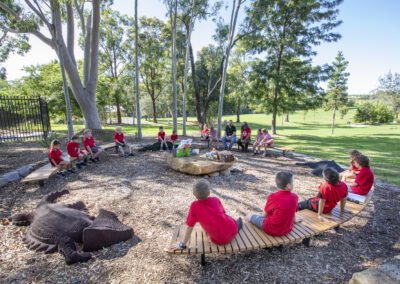 Step 2
Communication in a yarning circle:
Explain to your students that in the circle you are all facing each other and so are visible to one another.
- This is important for First Nations people as body language is a culturally important part of communication.
- It also sets up a level or equal communicative line as opposed to one person talking or leading conversation in front of a group.
- The circular shape promotes equality, dialogue and mutual respect.
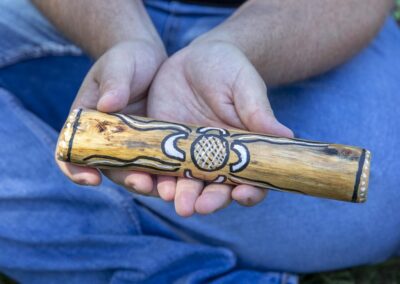 Step 3
Taking turns with talking sticks:
Explain that taking turns is an important part of a yarning circle so that everyone is heard.
A useful tool to ensure that everyone has a turn in a yarning circle is a talking stick.
A talking stick is often designed with cultural markings. (A member of the circle can request the stick from an Elder or community member when you are planning for the opening of your yarning circle and beginning the proceedings and conversation.)
Ask the students whether they think using a talking stick would be a good addition to your yarning circle.
Model how it could be used.
(If an Elder or local First Nations community member is present, ask them to explain the significance of the type of material and any markings that can or have been applied to the talking stick.)
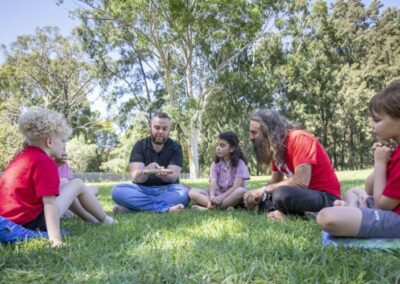 Step 4
Investigating talking stick materials:
You or your students may suggest that they make their own talking stick. This could be appropriate, with guidance from your local Elder or First Nations community member/s.
Explain that First Nations cultures have beliefs about plants, animals and the landscape.
Explain that some materials, such as a stick from a particular Eucalypt, may not be culturally appropriate to use in your area.
Ask students for ideas about the types of materials they could use to make a talking stick and how they could investigate if these materials would be culturally appropriate to use? You could also discuss alternatives to a talking stick (some schools even use a microphone).
Discuss with students how they can share the information and knowledge they have learned with others in the school and community.
Make a plan about how you will share your knowledge to the school community.
If you already have guidance from an Elder about making a talking stick for your yarning circle, ask your students to draft an information text about the stick, the materials that have been used to make it and its significance.
Step 1
Before you start:
Research morning circles, what they are used for and how they can be conducted. It could also be useful for you or members of your team to undertake professional development, such as the Berry Street Educational Model to give you more confidence in running this type of activity.
Morning circles are part of the daily routine and provide a consistent, predictable way to start the day and emphasise connectedness and belonging.
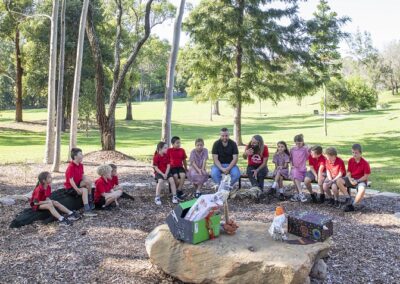 Step 2
Start your morning circle:
The morning circle can be led by the teacher or students as they learn how to run the circle.
Begin this activity with an Acknowledgement of Country. By acknowledging the Land, you are also making a promise that you will recognise the cultural practices of First Nations people.
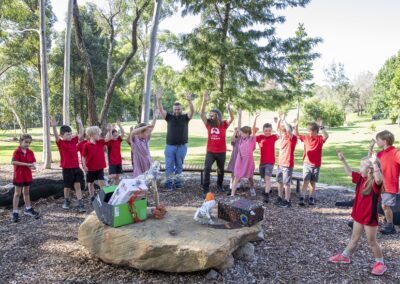 Step 3
Create a positive start:
Start with a greeting that moves around the circle. This may include a fist-bump, gesture or similar. Include an Indigenous word from your area that is used as a greeting. (Use the research from the extension activity in Creating a yarning circle: Connecting with First Nations people for more information.)
Check in. This can be a response to a question such as, ‘How are we feeling?’ or ‘Are we ready to learn?’ Students can respond with a gesture or verbally. (This provides the teacher with an indication of where everyone is at and if further follow-up is required.)
Describe a value/trait/skill that you would like to focus on and how you would like to achieve this. Ask other participants in the circle to describe their own value/trait/skill that they would like to focus on today.
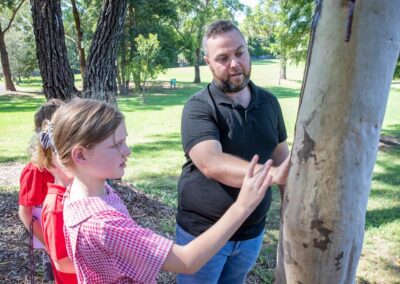 Step 4
Set up the day:
As a group, discuss the expectations for the day. Get feedback from the group about how the expectations can be met.
Make any announcements that will affect how the day will run and allow students to share important news/events such as birthdays.
Finish your morning circle with an activity such as a positive primer or brain break activity. This activity should be short, engaging and include the whole group. It could be:
- a short game
- investigating or observing a plant or animal in your yarning circle space
- brain teasers or puzzles.
 Step 1
Introduction:
Begin this activity with an Acknowledgement of Country. By acknowledging the Land, you are also making a promise that you will recognise the cultural practices of First Nations people.
Explain to your students that today you are going to create a calendar for the yarning circle. This is to help everyone know what the circle can be used for, when it will be in use and to remind everyone that it is there to be used.
Head outside to the yarning circle.
Review the local seasonal knowledge for your area using the Local Seasons: exploring First Nations weather knowledge Learning Activity.
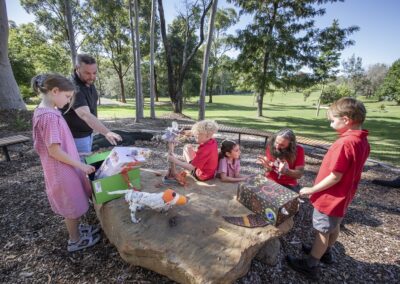 Step 2
Activity allocation:
Working in pairs or small groups, assign students ownership of an activity that could occur in around the yarning circle, such as:
- Junior School Council meetings
- Morning circles
- Yarns around important events in the calendar, for example, NAIDOC Week, Reconciliation Week, National Sorry Day, Mabo Day and reflections on these days
- Observations about seasonal changes
- Planting bush tucker and Indigenous plants around the yarning circle
- Nature study
- Peer Mediation/Restorative Practice
- Brainstorming projects
- School Council meetings
- Traditional Cultural Knowledge workshops or incursions with First Nations educators
- First Nations stories and storytelling.
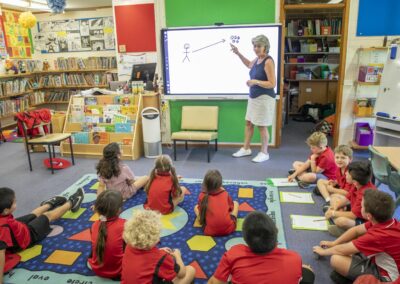 Step 3
Add to the planner:
Head back inside to the classroom and distribute the coloured card paper and other materials.
Begin adding known dates and information about your local seasons to the planner.
If an idea for the yarning circle doesn’t have a planned date – for example, Peer Mediation or Restorative Practice – use the pens and coloured card to create an information box about how and when it could be used.
Get the students to make additional information boxes outlining what a yarning circle is and reminders of how it can be used respectively.
Step 4
Display and publicise:
Display the planner in a prominent location in your school.
Get your students to plan a short speech for assembly so that everyone in your school knows that the yarning circle is ready for them to use.
Draw on the knowledge learnt in this activity to talk about the many different ways that the yarning circle can be used throughout the year.
 Step 1
Head outside
Find an area that enables the opportunity to sit and have quiet reflection. Ensure learners are able see, hear and take in some form of nature at this location; for urban areas, this could be as simple as sitting under a tree or alongside a veggie patch.
Begin this activity with an Acknowledgement of Country.
Mention the Traditional Owners of the land and the Country you are on. If you are not sure of the Country you’re on, use the AIATSIS interactive tool.
Explain to your learners that today they are going to be writing a love letter to the land; but to do this we need to take the time to quietly observe, consider and reflect. To do this, we will take some time to sit quietly and then share; this will help inspire our writing.
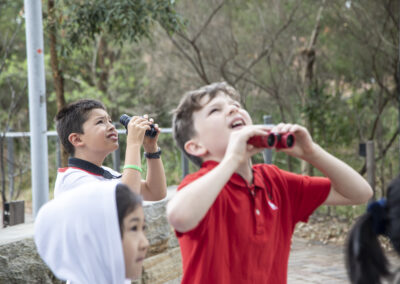 Step 2
Observe
Tell your learners that they will be observing the natural world around them. Discuss what this could mean. It could include:
- Trees, plants and flowers (flora)
- Animals e.g. birds, insects, etc. (fauna)
- Natural features e.g. rocks, soil, creeks, etc.
Explain how we can engage our senses to make observations. For example, ask learners if they can:
- Hear the wind in the trees or calls of birds
- See roots in the soil or the shade of a tree
- Smell the earth, leaves or flowers
- Feel the ground under their feet or cool breeze from the trees.
Conduct your observation.
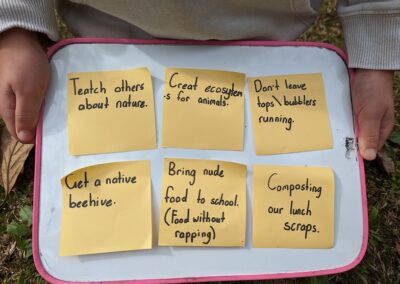 Step 3
Share, consider and reflect
Sit in a circle (you may like to refer to our Yarning Circle Activities for background and inspiration to set up a yarning circle) and share your observations.
As the children share, record their observations on the post-it notes.
Discuss with your learners how they think the land has changed in the last few hundred years. Point out how the trees, gardens and other natural features that you just observed have been planted, protected and enhanced by others, and that the small action of planting a tree many years ago gives us shade to sit under now.
Ask your learners what small actions each of us can do that would help the land now and into the future.
Reflect on these small actions and discuss how, once they are all combined, these actions can make a big difference. Record the responses on the different coloured post-it notes.
Challenge generalised notions such as ‘I won’t litter’ or ‘I won’t pollute’ or ‘I won’t waste water’. Ask the children what specific actions they can take. For example, ‘I will wrap my lunch in reusable covers like beeswax wraps, not plastic.”
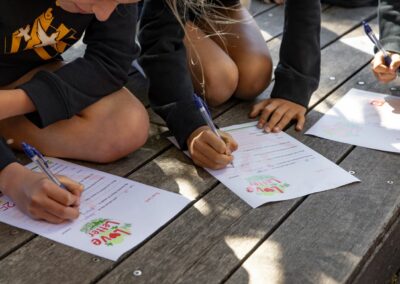 Step 4
Write and share
Head back inside (or if it is a nice day, stay outside and use the clipboards to lean on). Distribute the Love Letter templates. You can choose from a pre-filled template for younger learners or a blank template for older students.
Invite children to complete their Love Letter to the Land. For older students, encourage them to elaborate their ideas with explanations. For younger learners, you can use the pre-filled template with sentence starters. Download here.
As a group, share your letters.
Then ask your learners: What should we do with our letters and our ideas about how we can help the land?
Ideas could include:
– Make an action plan to implement some of the ideas in your school
– Make a time capsule and bury your letters for future generations of students to read
– Send your letters to your local Member of Parliament
– Send your letters to a sister school and ask them to share with you what they love about their local environment and steps they are taking to care for it.
– Publish your Love Letters in the school newsletter or share them with local media.
– Present them at your school assembly.
– Send them to Junior Landcare for Costa to read, here.
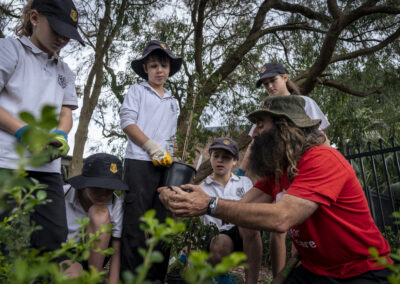 Step 1
Engage
Explain that today you will be planting out a sensory garden and that sensory gardens allow users to engage all their senses.
This may include:
- sight e.g. observing the changes in the colour of flowers or foliage
- sound e.g. the sound of feet walking on gravel, the splashing of a water feature or the sound of foliage in the wind
- touch e.g. the texture of leaves, soil, bark and other elements
- smell e.g. the aroma from flowers, herbs or leaves
- taste e.g. the taste of edible leaves, flowers and fruit.
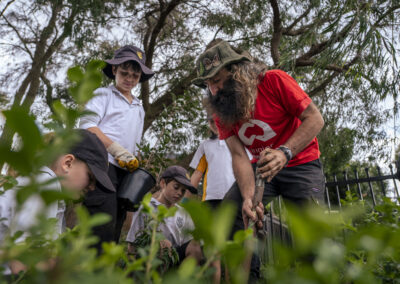 Step 2
Explore
Discuss how important sight is and how much we rely upon it. Explain that because sight is a common way of observing a garden, we will be doing an activity that will encourage you to use other senses to make identifications.
Hand out the mystery bags and the activity sheets.
Ask learners to get into pairs or groups of 3.
Use the mystery bags and the activity sheets to engage senses other than sight.
Upon conclusion, discuss what senses were used to identify the contents and how the contents of the bag could be used in a sensory garden.
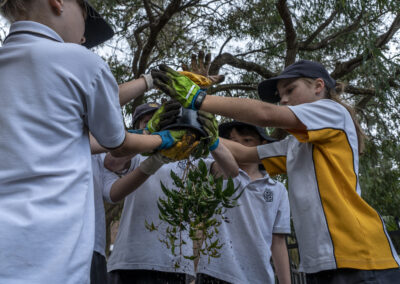 Step 3
Plant
Head outside.
You will need to obtain plants for your sensory garden. These can be started from seed, grown from cuttings, or purchased as mature plants.
Consider purchasing some mature plants that will help make the garden feel more complete.
When planting seedlings, space them in their pots out on top of the soil, check the label, and see that you have spaced them correctly with a ruler.
When you plant for colour, plant them in clumps so that they create blocks of colour.
Assign tasks for each participant and model how to perform each task such as planting and watering.
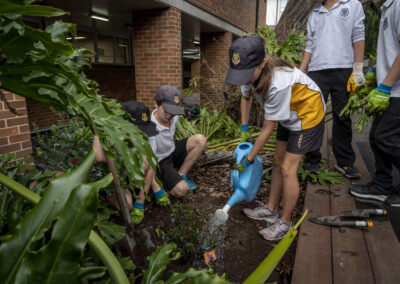 Step 4
Care and Evaluate
Ensure that your plants have follow-up watering, especially if the weather is warm (and over school holiday periods).
As a group, move through the garden space and discuss how each of the senses can be engaged by the various elements.
Consider if there are improvements that can be made to increase the amount of sensory participation.
Make a plan to improve the sensory experience with additional planting and other elements, such as:
- water features
- fountains
- wind chimes
- stained glass and mirror walls
- freestanding rocks
- play sculptures.
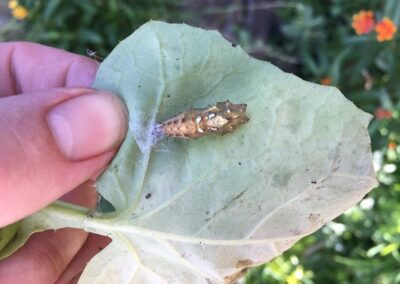 Step 1
Explain that today you will be planting a butterfly garden.
Discuss the role that butterflies play in nature. As nectar eaters, butterflies play an important role in pollination; as they visit flowers, they transport pollen from one flower to another.
Ask the students what butterflies they have seen and where they have seen them.
Display images of butterflies common in your area.
Use the activity sheet to illustrate the butterfly life cycle to help your learners identify the butterflies and caterpillars local to your area.
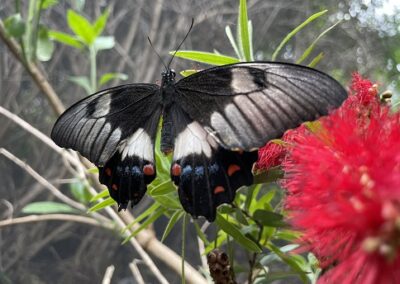 Step 2
Explain that there are two purposes for the plants that will be planted today.
The first purpose is nectar: these plants produce flowers that will feed the adult butterflies. The flowers we plant for butterflies often have clusters of small flowers – this allows the butterfly to get lots of small drinks at the one stop-over.
The second purpose is as a host plant. These may not have flowers suitable for butterflies but will instead be suitable for your local butterfly species to lay their eggs and raise their caterpillars. Discuss a butterfly local to your area and its caterpillars. Add a picture of the host plant to the activity sheet.
Use a T-chart to list the different plants and their purpose in the butterfly garden.
Step 3
Head outside to your prepared site.
Creating a butterfly garden can be a bit of an experiment.
Use the labels on the seedling punnets to decide on how to space your plants. Nectar plants are often planted in clumps as it helps butterflies to see them and is more inviting.
Use a trowel to dig a hole just big enough so the plant’s root section can be inserted. Tap the pot gently and squeeze the plant out without damaging the roots; place it in the hole and fill it with soil.
Create a saucer-shaped depression in the soil to act as a dam, and then water in the plants gently. Mulch around them to help reduce water loss and suppress weeds.
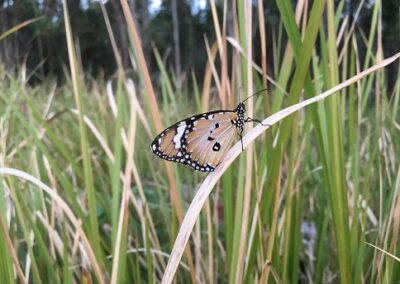 Step 4
Monitor and care for your butterfly garden.
As the plants mature, take note of the different butterflies that arrive. You may like to integrate this with our Getting the Buzz on Bees and other Beneficial Insects activity to help monitor both the butterflies but also other beneficial insects that will utilise your garden.
You may also add some other features for your butterflies, such as a damp soak (see the Water for Wildlife activity for more information).
Extension Activity
Write or draw a checklist with the children to use to make sure they care for their seedling.
The seedling activity provides an opportunity to chat with the children about concepts such as recycling, healthy soils, pesticides and water conservation.
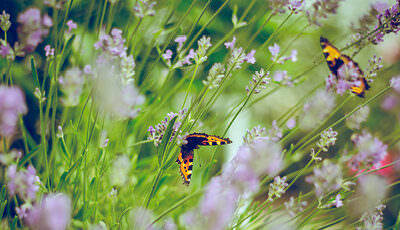
Bees are most busy is spring; why might that be so?
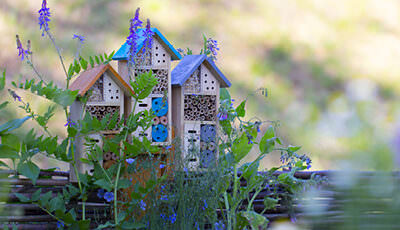
Discuss actions that you could take to attract native bees and other beneficial insects to your school yard or back yard. Watch this Gardening Australia clip with native bee researcher Kit Prendergast.
Bees are most busy is spring; why might that be so?
Discuss actions that you could take to attract native bees and other beneficial insects to your school yard or back yard. Watch this Gardening Australia clip with native bee researcher Kit Prendergast.
Investigate Indigenous Australians use of scientific knowledge to manage water resources in dry conditions.
Find out how Australian desert animals survive dry conditions with little available water.
Explore the water cycle.
How are some plants adapted to cope with low rainfall?
Bees are most busy in spring; discuss why that might be so.
Discuss actions that you could take to attract native bees and other beneficial insects to your school or backyard. Watch this Gardening Australia clip with native bee researcher Kit Prendergast.
Investigate Indigenous Australians use of scientific knowledge to manage water resources in dry conditions.
Find out how Australian desert animals survive dry conditions with little available water.
Explore the water cycle.
How are some plants adapted to cope with low rainfall?
How might we know an animal is living in a habitat without seeing them? What traces might they leave behind?
Now you have your vision for creating your food garden, discuss how can you share your ideas and encourage others to help you. Design a poster or write a story for your newsletter or a social media post so others can be inspired to get involved. How and where would you like them to contact you? Can you set a date for a meeting to discuss the vision?
What skills do you already have to create a food garden? Are there other skills that you need from people in your community? Where can you find out more? Contact your local Landcare group by searching the National Landcare Directory to find a local grant recipient near you. We encourage you to strengthen your connection with the Landcare community. Starting a Junior Landcare group onsite to help organise and gather support for your food garden activities is a great beginning.
Ask others for help in making your ultimate location decision. Contact your local Landcare group by searching the National Landcare Directory or use the Woolworths Junior Landcare Grants Map to find a local grant recipient near you. We encourage you to strengthen your connection with the Landcare community.
Printing out a location map can help you develop further plans, these can be used as a base for a garden design. Collect the maps, photos and drawings to display in an ideas folder or the class journal. These will also help develop ideas for writing an application for a Junior Landcare grant.
Write or draw a checklist with the children to use to make sure they care for their seedling.
The seedling activity provides an opportunity to chat with the children about concepts such as recycling, healthy soils, pesticides and water conservation.
Does your soil hold a little or a lot of water? How could you test this?
What could you do to improve your soils capacity to grow food?
Design a water wise garden
Water wise plants can cope with low rainfall and are a perfect addition to your garden. Think of what plants are already in your garden. What plants can you add to make a variety of places for animals to shelter? You can also use shallow containers for water, add sticks or stones on one side so smaller animals can get out if they fall in. Contact your local Landcare group for more information about the best plants suited to your local area.
Investigate how local Aboriginal or Torres Strait Islander communities maintain a special connection to, and responsibility for Country/Place.
What would your weekly garbage selfie look like? Take a photo of yourself surrounded by your rubbish for 1 week. What can you learn from this?
What sustainable actions can you adopt at home to minimise rubbish going to landfill?
What do you think are the advantages of creating a no dig garden? How is this approach different to digging up the ground to create a food garden?
Besides using cardboard as a weed barrier, what are other ways or resources you could use that you could control weeds when building a garden?
Investigate companion planting as a way to manage plant pests.
Find out how you can use bugs to control unwanted pests.
Investigate how worms grow, change and have offspring similar to themselves.
Now you know how to make a worm farm-make one for a neighbour, a community house, or a sports club!
Investigate how worms grow, change and have offspring similar to themselves.
Now you know how to make a worm farm-make one for a neighbour, a community house, or a sports club!
Now that you have planted out your food garden, design labels to create signage for the garden and the plants. What information will be important on your label? How can you decorate and make your signs attractive?
Are there some plants that you can eat without growing in soil? Can you design a method to growing edible sprouts?
Explore Aboriginal and Torres Strait Islander Peoples’ connections with, and valuing of, water and water resource management.
Research natural water sources in Australia that have been listed as either World Heritage sites or national parks for their aesthetic, environmental or cultural value.
Contact your local Coastcare Facilitator to see how you can become involved. Community volunteer groups help to maintain our marine and coastal environment through activities such as revegetating coastal areas, building boardwalks, fencing, building tracks, monitoring native shorebirds and other animals, presenting education and awareness raising community meetings, planting and weeding, landscaping coastal areas and protecting cultural sites.
How can you grow your food plants for next year? Discuss in groups the types of plants you have planted. How can you plan to collect the seed so you can plant these plants again next near? What steps will you need take? What else might you like to grow?
Explore some of the ways you can share your harvest with your community. How can this serve and help other people and build the Junior Landcare community?
Adopt a spot. The collective effort of being active and involved in your local area through Landcare, Coastcare and other environmental community groups helps to make a real difference. Head to the National Landcare Directory to find contact details for groups, networks or community support officers in your local area. There may also be local council committees or trusts looking after your local parks and reserves.
Investigate how local Indigenous people are spiritually connected to waterways.
Read the Dreaming story of Tiddalik the frog (this can be found in print or online). This story has important messages about the impact of our choices. How might this be relevant today with respect to humans and the environment?
Use the Australian Museum’s FrogID mobile app, to discover which frogs live around you, and can also be used contribute to the Australian database of frogs as citizen scientists.
Create a prototype of the frog habitat design using modelling clay, sand, thick plastic, water and materials to create artificial plants, grasses and shrubs. This will provide a 3D model as a point of reference and a wonderful visual for the learners.
Refer to your local frog and habitat experts to help you understand more about the habitat and frogs in your local area. Contact your local Landcare group by searching the National Landcare Directory to help find experts who are skilled in designing natural habitats and can share valuable knowledge, such as working closely with councils.
Create a boundary around the pond with a low fence, log seating or large rocks. Continue to develop the habitat around your pond to encourage a range of animals including frogs to the area.
Continue to monitor your frog pond to look for signs of habitation. Start a class journal that documents the changes observed over time and submit any sightings to Frog ID to keep a valuable record of frog populations for citizen science. Support citizen science and run special events during FrogID Week.
Now that you have created your wicking bed, how could you monitor how much water your wicking bed needs? Could you create a research process that measures how much water is needed per day? Or could you measure the mass of the wicking bed at the beginning of each day to find out how much water use has occurred?
Research ‘capillary action’ experiments and conduct your own capillary action trial. Can you explain how water can move upwards against gravity?
Investigate the life-cycle of a springtail, drawing the stages of its life.
Become mycologists (fungi scientists) and grow your own mushrooms with a mushroom kit (these are commercially available).
Use a thermometer to check the temperature of the compost regularly and record the results in a graph.
Use the World as an Apple exercise to illustrate how important soil is and the scarcity of this resource (see the educator notes for more information about this exercise).
Design an experiment to assess whether beneficial planting is effective. What could you change or remove to test whether you’re on the right track?
Design a poster to promote beneficial planting. Focus on three key messages that you would like your audience to know.
Know your enemy. Collect some stems from Aphid-affected plants in the garden (common plants that have aphids include Beets, Chard, Roses, Lettuce, Bok Choi and Beans). Put the stems in a vase to raise them inside. Monitor how their population grows and how quickly they reproduce.
Investigate the land management practices of Aboriginal and Torres Strait Islander peoples. How does sustainable management of the environment protect biodiversity?
Use Information Computer Technology (ICT) programs such as Excel to display your data in different types of graphs. Share it on your organisation’s communications platform.
Time your invertebrate activity to run during a local community celebration. It’s a great way to celebrate together and get people involved in finding and learning about invertebrates. Celebrate Landcare Week at the start of August!
Ask the students to research the traditional uses of the native plants you have selected in your wildlife habitat.
Ask your local Landcare group or local Traditional land owners to give a talk to your students about how to care for native plants.
Hold a wildlife habitat design competition with your Junior Landcare group or school.
Create a play: Imagine you are one of the animals in your local area discovering this new habitat for the first time. What would you be thinking and doing? Work with your friends to write the story and incorporate other characters.
Invite students to join a Junior Landcare group and participate in an upcoming Landcare or environmental event. You could also invite your local Landcare group out to your school.
Use the Conservation Management Zones of Australia to identify the management zone you live in. Download the PDF to discover any Vulnerable, Endangered or Critically Endangered species live near you. Write down their common name, species names and their conservation status in the table in the Activity Sheet. Discussion: Would your wildlife habitat help these species? How?
Celebrate the establishment of your garden and ask the local Traditional owners to come and provide a talk or Welcome to Country.
Get your Junior Landcare group to develop monitoring programs for the animals that now live in your native wildlife garden.
Research natural hazards that have affected your local area in the past: fire, floods and drought. Describe how these natural hazards may have impacted native wildlife and their habitat?
Start a Junior Landcare group can help kick-start some great biodiversity initiatives in your local areas and backyards. Find out more about how to start a Junior Landcare group. Check in with your local Landcare group or local council to find out if there is a community planting event coming up in your area.
Now you have created a bee hotel, encourage others in your community to create them also. Write an article for your local newsletter and share the benefits of looking after native bees in your environment.
Australian Pollinator Week is held every November.
Create a children’s story that includes native bees and their habitat. You may like to ask others to help you write and illustrate the story using the research you have conducted.
Research how Stingless Bee honey; ‘sugarbag’ is collected and used by Aboriginal people.
Plant comparison – investigate just how much better the wicking bed is by also planting some of the plants in the ground nearby. What do we observe? How do their water requirements differ? Record your observations.
Water level diary: Using a ruler or dowel as a dip-stick, monitor the water level via the filling tube. Record this information in a diary, noting the water level, weather conditions and recent rainfall.
Come up with a strategy to remove weeds that you explored in this activity.
Use online resources or field guides to research a weed and create your own information sheet.
Clean up our waterways: Students can use plastic strainers to remove the floating pollution and discuss ways of stopping it returning. Once the water has settled students can scoop of the cleaner water into a separate container. What objects were easier to clean? What items were more difficult?
Children can tell their own stories about the journey of water. What would they do differently to help keep the waterways clean? Draw, write or perform the story.
You can incorporate aspects from the Junior Landcare learning activities Every drop counts, being water wise!, Water for Wildlife, Waterways: behaviour change or Waterways: clean-up activities.
Growing from seeds. Now that you have mastered propagation from stems, try growing plants from seeds that you find in your kitchen fruit and vegetable scraps. Avocado seeds are a great way to demonstrate seed growth and are featured in this Junior Landcare Video.
Creating cuttings. Try propagating different plants by taking cuttings of plants such as mint, rosemary, pineapple, geranium, etc. What other plants would children like to try with this method? Learn from the results and care of the new plants created.
Sort through and classify the microplastics found during the beach survey. This could be by size or shape (fragments, fibres, beads, foams, pellets). Review your collection and devise a way to represent what you have collected. You could use infographics to communicate this.
Link your clean-up project to Coastcare Week, Landcare Week, Clean up Australia Day or the Marine Environment Litter Program. Share your work and successes to encourage others to care for the coast.
Choose a weed from your investigation or local area and explore its impacts and how it can be managed locally. Use this information to create a ‘Wanted’ poster for your weed. Consider ways you can convince others to help find and control this weed.
Research local Indigenous land management practices in your area by reaching out to the Local Traditional owners and Aboriginal community groups who can assist in knowledge sharing and understanding local land. What practices would help with controlling weeds in your local area?
Sort through and count the different types of rubbish collected. Recycle or reuse the rubbish where possible. Take a photograph of the sorted rubbish to communicate the impact your collection has made to share your story with others.
Research the environment of your local area, what animals and plants will benefit from your clean-up? What impacts is plastic having on their environment?
Hollow count: conduct a walk around your local area, taking note of the established habitat trees. How many hollows are present?
Upload your animal data. Once your nest box is being used, identify the animals using it and add your data to the online database, the Atlas of Living Australia.
Growing from seeds. Now that you have mastered propagation from stems, try growing plants from seeds that you find in your kitchen fruit and vegetable scraps. Avocado seeds are a great way to demonstrate seed growth and are featured in this Junior Landcare Video.
Creating cuttings. Try propagating different plants by taking cuttings of plants such as mint, rosemary, pineapple, geranium, etc. What other plants would children like to try with this method? Learn from the results and care of the new plants created.
Monitor the toilet paper, tissue and wet wipes to see how long it takes them to break down in water. Check on your experiment each day over the next 4 weeks to see and record if they have broken down.
Now that you understand more about your local catchment, how can you share your discoveries to motivate others? Devise an onsite project to gather support and increase awareness with your peers and the community.
Use the map and urban water cycle checklist you created in the water sustainability activity to determine where the stormwater from your school ends up.
Now that you have done a stormwater assessment, look to creating an onsite Junior Landcare group to begin to monitor areas of concern regularly, develop innovative ideas, and clean up to help minimise waste impacts in your local environment.
The Water Footprint network explains What is a Water Footprint? Use the personal water footprint calculator to calculate your personal water footprint.
Make a water management plan for your school.
Contact your local Aboriginal or Torres Strait Islander group to find out their words or names for local water and rivers. Invite them to your location to share the cultural significance of your local waterways and how resources are used.
Research changes in land use in your local area over time. How has access to clean freshwater changed in your local area over the last 500 years? Create a timeline of these changes.
Make your own catchment.
Use the activity sheet to make your own catchment. In two groups, make a natural or urban catchment model. Compare the flow of water between the two models.
Use the recording devices to create a guide about how to grow potatoes.
Ask the children to keep a record or a diary of every food advertisement they see on TV over the course of a week. As a group, compile the results and discuss whether the advertisements were for natural, unprocessed foods, junk foods or fast food providers. Discuss what this might mean for the health of consumers.
Write your recipe as a procedural text.
Conduct an investigation to research how potato chips have grown in popularity over time.
Research how the humble potato has grown in popularity over the last few centuries.
There are many ways to grow potatoes, the simplest being straight in the ground. However, you can help your plants and their yield by using materials such as timber, tyres, and even old pots to create potato towers, which add soil to the growing stem of the potato plant, encouraging production.
Research how the ingredients that are used on pizzas are grown in different parts of the world. Choose an ingredient and research the farming practices that are used to produce it. Can you discover:
- its country of origin
- whether it is imported or if Australia exports this product
- how its manufacture originated
- whether its manufacture differs in different parts of the world.
Now that you have considered growing your own pizza, discuss some of your other favourite foods. What would you need grow to be able to produce these other foods?
Extension 1
Create a harvest schedule for your Indigenous plant-use garden and record what month and plant part you will be harvesting.
Extension 2
Imagine you have a native food restaurant what would you serve? Design a two course meal using ingredients from your Indigenous plant-use garden.
Extension 1
Now that you have planted out your Indigenous garden, design labels to create signage for the garden and the plants. What information will you include in your label? What information can you share regarding how First Nations peoples utilise this plant? Reach out to your local Traditional Owners and First Nations community groups to collaborate with.
Extension 2
Look at the range of plant forms you have in the garden and determine what quantities you have of each type. Do you have more shrubs than grasses? How many trees do you have? What might you need to plant more of in the future once the garden establishes?
Extension 1
Imagine you were a bird flying above the garden. Draw what it would look like when the garden is completed.
Extension 2
Imagine you were visiting the garden one day. What do you think the Land your garden is on would have looked like in the past? What does it look like now? What would it look like walking towards it? Draw the main entrance to the garden. What will it look like into the future (when you’re an adult)?
Extension 1
Reach out to your local Traditional Owners and First Nations peoples community groups to assist in knowledge sharing and understanding of local land, stories and culture.
Extension 2
Research different methods First Nations peoples used/use to harvest plants.
Extension 1
Once you have completed your vision think about how you can share your vision and encourage others to be part of creating a plant-use garden. This can be part of your invitation for local First Nations peoples and community to be part of the project. Design an invitation, poster or story for your newsletter or a social media post so others can be inspired to get involved.
Extension 2
What skills or knowledge do you already have to create an Aboriginal and Torres Strait Islander plant-use garden? Maybe you learned from your own Elders or from previous involvement in such activities and would like to share information? Are there other skills that you need from people in your community particularly First Nations peoples knowledge holders and Elders. Where can you find out more?
Extension 1
Using the plants included in the plant list activity in this series, create your own plant identification guide or informative sign. Use scientific names and common names and the name in the local First Nations peoples language if you are able. Describe what the plants look like, how they are used and include images of the different plant parts to make it easier to identify.
Extension 2
Explore the effect of European settlement on the availability of plants for use by the First Nations peoples. How did the introduction of hard hooved animals such as cattle and sheep change the landscape for First Nations peoples?
Extension 1
Connect with your local First Nations community and invite them to share their knowledge with you.
Extension 2
Use information from the Bureau of Meteorology’s Indigenous Weather Knowledge site and find the Seasonal calendar from the First Nations community closest to you. Select a Language group and open the page showing the seasons for that group. Compare with the seasons in the story. Use with other online resources or books to construct a chart or write a story about the seasons in your area. You may like to use pictures to help.
Extension 3
Share your knowledge and tell a story about how a plant or animal changes through the seasons.
Extension 1
Research the First Nations peoples language in your local area for native plants and/or animals. Contact a local Elder and use the resources provided to help you with the research. You could use this information to help design the signage for your Indigenous plant-use garden.
Extension 2
Practice saying words from your local First Nations peoples language group. What ways can you incorporate this language into your everyday life?
Extension 1
Find out the Country or language group for each of Australia’s capital cities.
Extension 2
Listen to the First Nations peoples language words from your location on the interactive 50 words map from the Research Unit For Indigenous language from the University of Melbourne and practice saying them.
Extension 1
When you read a book about First Nations peoples or written by a First Nations person, see if you can find where they come from (their language group) on the map.
Extension 2
Listen to the First Nations peoples language words from your location on the interactive 50 words map from the Research Unit For Indigenous language from the University of Melbourne and practice saying them.
Create a class list about the different types of verbal and non-verbal communication we use every day.
Investigate other ways First Nations people share ideas and information and compare their Cultural practices around communication.
Either formally (with a sound meter) or informally, measure the volume of background noise at various parts of the school.
Using a map of the school, review the location of the admin office, classrooms and amenities, like bathrooms. Theorise as to why they have been located there.
Language in your area: research First Nations words and their meanings such as ‘welcome’ that you can incorporate into your yarning circle.
Investigate Indigenous plants in your area and make a plan to include these in and around your yarning circle space. If you already have some of these plants growing in the area, investigate how First Nations people use these.
Photopoint images: Take photos of your yarning circle site – to document the before, during and after phases of construction.
Materials investigation: Get in touch with Traditional Owners and find out what types of local materials such as rocks and wood are culturally important to First Nations people in your area.
Media release: Write a media release for your local newspaper/publication telling them about what you have achieved, learnt and what you are going to do next with your yarning circle.
As a class, make a list of the local:
- Indigenous plants
- Indigenous animals
- Landscape features.
It is likely that many of these will have cultural significance for First Nations people. Discuss how you might be able to find out more information about these.
Use the yarning circle for Restorative Practice conversations, peer mediation and other conversations should they need to occur.
Find out the local Indigenous words for each season and include these on your planner, along with the local Indigenous names of the plants and animals associated with change at this time.
Research how the landscape and land use has changed in the last 200 years in your area.
Research how First Nations people have cared for and continue to care for Country in your area.
Signage: Make signage to help participants engage with the space, including how to safely touch smell and taste the plants.
Pick and dry the fragrant flowers and leaves from the sensory garden to make a potpourri or dry and press the flowers to use in craft activities.
Study the life cycle of caterpillars and their transformation in more detail with a commercially produced caterpillar kit.
Create a poster of the butterflies you observe in the butterfly garden, identifying their scientific name and specific requirements such as their host plants.