
Creating a yarning circle: using your yarning circle
Time Allocation: 45 mins
Activity Level: Moderate
Introduction
You did it! Your yarning circle is now complete. It looks extremely inviting and has become a central point of attraction within your school. The question now is, how and when do you use it?
The main thing is that it does not just become a token gesture and space that isn’t well utilised in the school. A yarning circle can be used as a teaching and learning space for your everyday classes, when sharing and discussion is an important focus of the lesson.
When to use a yarning circle:
A yarning circle can be used whenever you need to have a chat, share or mediate. In a school setting, it could be used when:
You may wish to hold smaller intimate circles on regular occasions (for example, once a week) and then plan to hold larger ones where an Elder or First Nations community member/s are invited into the space, if/when possible.
Talking sticks:
This activity also introduces the concept of a talking stick. The stick symbolises your turn to have your say; when others should respectively listen to you before having their turn to speak with the stick. The yarning circle can continue until everyone has had their turn to speak, be listened to and voice any concerns or opportunities they wish to pursue. This will embed an important practice and safe space for all students so they feel comfortable sharing.
Checklist
Instructions
 Step 1
Head outside:
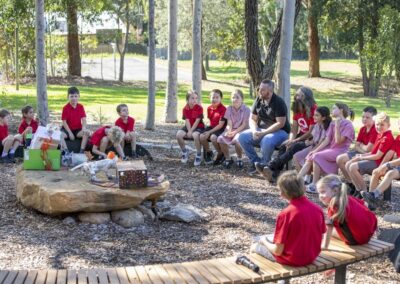
Open the yarning circle.
If possible, invite a local Elder or respected community member to help lead and run the yarning circle. We understand this won’t always be possible.
Begin this activity with an Acknowledgement of Country. By acknowledging the Land, you are also making a promise that you will recognise the cultural practices of First Nations people.
Invite students to sit in the space to have a discussion.
Reflect on your earlier learning in the first activity in this sequence ‘Creating a yarning circle – background’.
 Step 2
Communication in a yarning circle:
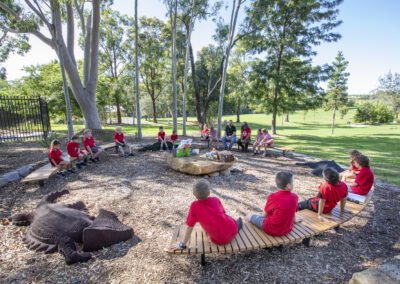
Explain to your students that in the circle you are all facing each other and so are visible to one another.
- This is important for First Nations people as body language is a culturally important part of communication.
- It also sets up a level or equal communicative line as opposed to one person talking or leading conversation in front of a group.
- The circular shape promotes equality, dialogue and mutual respect.
 Step 3
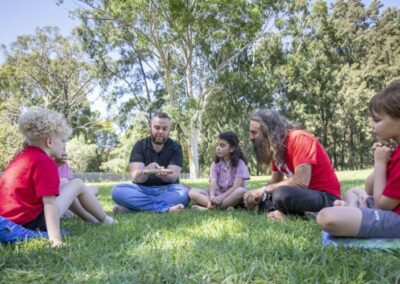
Taking turns with talking sticks:
Explain that taking turns is an important part of a yarning circle so that everyone is heard.
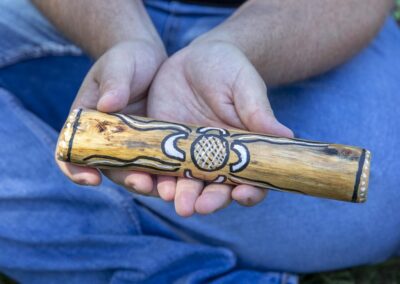
A useful tool to ensure that everyone has a turn in a yarning circle is a talking stick.
A talking stick is often designed with cultural markings. (A member of the circle can request the stick from an Elder or community member when you are planning for the opening of your yarning circle and beginning the proceedings and conversation.)
Ask the students whether they think using a talking stick would be a good addition to your yarning circle.
Model how it could be used.
(If an Elder or local First Nations community member is present, ask them to explain the significance of the type of material and any markings that can or have been applied to the talking stick.)
 Step 4
Investigating talking stick materials:
You or your students may suggest that they make their own talking stick. This could be appropriate, with guidance from your local Elder or First Nations community member/s.
Explain that First Nations cultures have beliefs about plants, animals and the landscape.
Explain that some materials, such as a stick from a particular Eucalypt, may not be culturally appropriate to use in your area.
Ask students for ideas about the types of materials they could use to make a talking stick and how they could investigate if these materials would be culturally appropriate to use? You could also discuss alternatives to a talking stick (some schools even use a microphone).
Discuss with students how they can share the information and knowledge they have learned with others in the school and community.
Make a plan about how you will share your knowledge to the school community.
If you already have guidance from an Elder about making a talking stick for your yarning circle, ask your students to draft an information text about the stick, the materials that have been used to make it and its significance.
Extension Activity
As a class, make a list of the local:
- Indigenous plants
- Indigenous animals
- Landscape features.
It is likely that many of these will have cultural significance for First Nations people. Discuss how you might be able to find out more information about these.