
Creating an Indigenous plant-use garden: planting
Time Allocation: 40 minutes*
Activity Level: Complex
Introduction
Planting an Indigenous plant-use garden is a great way to learn about the importance of native plants to First Nations peoples. It is also an easy way to expand your diet in a way that incorporates foods that are native to this land and have been used by Aboriginal and Torres Strait Islander peoples for a very long time. The health benefits of these plants are becoming more widely understood so it is important for all Australians to start incorporating these foods in their cooking. Of course, many of these foods are extremely tasty as well!
Inviting the community to plant with the children is another opportunity to build relationships with the local First Nations peoples community (as well as other stakeholders in the school community such as parents and carers).
Prepare your garden area before planting. Refer to the site assessment learning activity to create the best conditions for your plant use garden.
*The time allocation for this activity is based on all materials being sourced prior to commencing the activity.
Checklist
Instructions
 STEP 1
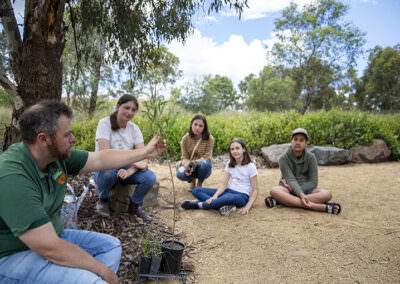
Plan
Begin this activity at your location with an Acknowledgement of Country. By acknowledging the Land, you are also making a promise that you will care for the Land, the waterways, the plants and the animals.
Following a plan is an important process when setting up your Indigenous plant-use garden. A plan will assist you to know where to plant certain plants to achieve the best results.
Go through your checklist to ensure you have all the materials needed.
Review the plan with the children before starting and outline the safety steps by asking them what would make this activity safe. Outline safe tool use.
Space out the pots onto the bare bed, discussing where they may go. Use your final design from the site assessment learning activity to help guide this. Refer to any planting information and plant labels to help guide the discussion.
Remember to consider how much space the plants need when fully grown. Will it shade other plants? Where do you think these plants should go?
 STEP 2
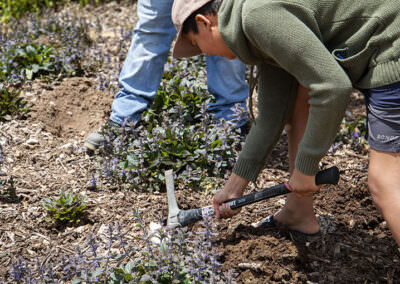
Prepare
Once the plants are in their correct positions, dig a hole that is slightly deeper and wider than the pot. Water the hole in preparation for planting.
Remove the plants from their pots ready for planting. It is best to have the least amount of disturbance to the roots as possible. Keep the soil and plant intact by gently squeezing each side of the pot, then place your hand flat over the soil with the stem between your fingers. This will provide the least amount of stress and disturbance to the plant during the process.
 STEP 3
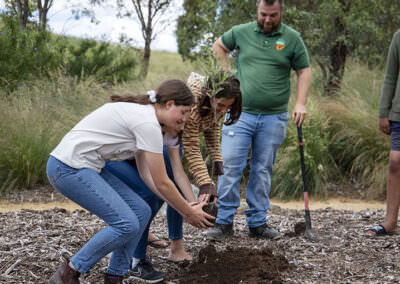
Planting
It is finally time to plant!
If the plant is going into new soil in a garden bed, you will need to dig a hole big enough to fit the plant and totally cover the roots. Press the soil around the plant gently without packing the soil too hard or too tight. Packing the soil hard will push the air out of the soil that is needed by the roots.
 STEP 4
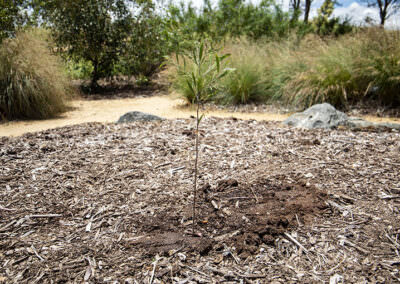
Maintenance and upkeep
Now that you have completed your planting, use the activity sheet to draw a map and listyour plants, include how many plants you have planted.
Create rosters and a task list to share the responsibility to care for your plants with your garden team. This can include watering, measuring growth and plant changes, checking mulch and looking for pests.
The more involvement and ongoing maintenance you put into the garden, the better the results you will have. It is important to respect this area and the significant plants that it holds.
Extension Activity
Extension 1
Now that you have planted out your Indigenous garden, design labels to create signage for the garden and the plants. What information will you include in your label? What information can you share regarding how First Nations peoples utilise this plant? Reach out to your local Traditional Owners and First Nations community groups to collaborate with.
Extension 2
Look at the range of plant forms you have in the garden and determine what quantities you have of each type. Do you have more shrubs than grasses? How many trees do you have? What might you need to plant more of in the future once the garden establishes?