
Creating a yarning circle: background
Time Allocation: 30 min
Activity Level: Easy
Introduction
Building a yarning circle is a great way to create a space that is inviting and connects children to the outdoors. This space can be used by your class or youth group to yarn about important issues in an informal setting, and to learn more about the Cultural practices and teachings of Aboriginal and Torres Strait Islander peoples.
For First Nations people, the yarning circle was and still is an important place to conduct business, talk about issues in the community or on Country, and have a space where all voices are recognised and heard.
“We understand that what was spoken in the circle stayed there, unless it was necessary to take any information away like decisions on Cultural practices for another setting,” explains Adam Shipp, First Nations educator and proud Wiradjuri man.
“Our old people would sit or stand barefoot on the earth, on the dirt, which itself provided a healing and safe environment, and our mother earth provided grounding and strength through direct connection. These are practices that can be adopted in our schools today – and will help with mental, physical and spiritual wellbeing.
“We create this area to be a safe place for all; a place where all people have a chance to yarn on equal terms.”
Establishing a yarning circle in your school or community also provides an opportunity to create an outdoor learning space that will help immerse children in nature. We often think of nature as being separate to us; out in the ‘bush’ far away from our towns and cities. However, when you take the time to sit and observe everything around you, you will soon start to recognise the scents and colours of the trees, plants and flowers in your school; the sounds of the birds that visit those plants; and the insects that many of those birds and smaller animals will feed on. You may be surprised at just how much you can see, smell and hear just by sitting in your yarning circle or outdoor area.
Checklist
Instructions
 Step 1
Introduction:
Begin this activity with an Acknowledgement of Country. By acknowledging the Land, you are also making a promise that you will recognise the Cultural practices of First Nations people.
Use the story above to introduce the topic of a yarning circle.
Have a discussion with students about what they know about yarning circles, including what they were and are still used for today.
Remind children of the different ways we can communicate with one another e.g. verbal and non-verbal communication.
 Step 2
Mapping:
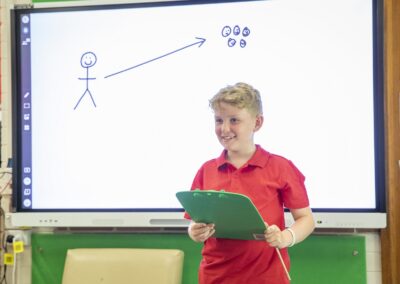
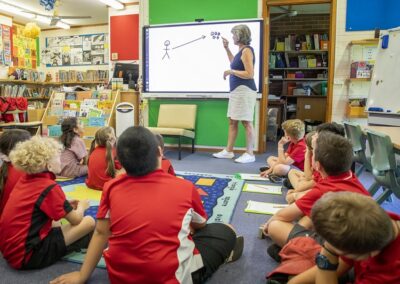
Next, discuss how a teacher or facilitator’s position standing in front of a class or group may affect these types of communication.
Use a whiteboard to map the direction of communication. Use a bird’s-eye view with dots to show the teacher/facilitator and the students. Use different coloured whiteboard markers to draw arrows to show the direction of the verbal and non-verbal communication. (Much of it will be back and forth.)
Ask the question: How much do we communicate or listen to each other when we are assembled like this (in a circle)?
Then ask how much we communicate and listen to one another when someone is positioned in front of a class or group of people.
 Step 3
Predicting differences:
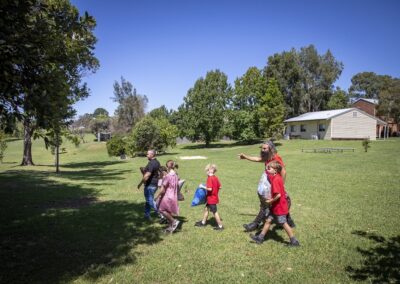
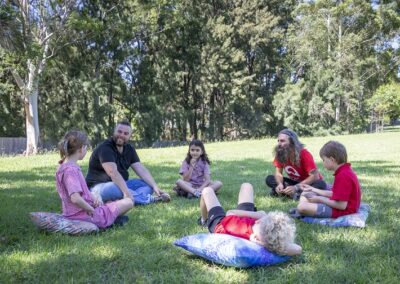
Head outside. As a group, find a suitable place to sit in a circle, like under the shade of a tree. This could even be where you would like to set up your yarning circle.
Sit in a circle.
Ask students to form pairs so they can predict together (turn-and-talk) how sitting in a circle could affect or improve communication (verbal and non-verbal).
Hand out the Activity sheet and clipboards so they can record their predictions.
Explain that as a group, you will be sharing your predictions from the turn-and-talk activity, and you will also be recording the direction of discussion as well as non-verbal communication, such as eye contact.
 Step 4
Recording results:
Ask the children to represent each person in the group by drawing circles or dots on the sheet.
As each pair reports their ideas from the ‘turn-and-talk’ activity, ask the students to map the direction of the communication after each group’s turn.
At the end of the discussion, ask the students to share their communication maps.
Record any additional results, such as whether it was easier to understand what was said or how body language was observed during this sharing time.
As a group, reflect on your results and take a moment to consider why yarning circles are an important part of First Nations Culture and can be beneficial for different types of communication.
Extension Activity
Create a class list about the different types of verbal and non-verbal communication we use every day.
Investigate other ways First Nations people share ideas and information and compare their Cultural practices around communication.