
Creating a frog-friendly habitat: construction
Time Allocation: 40-60 minutes*
Activity Level: Complex
Introduction
There is a comprehensive list of safety and planning considerations, and materials to gather before commencing the construction of a frog pond. Please refer to the educator notes via the button above. Before commencing this activity, the Junior Landcarers will have already created a habitat design, informed by their research to guide this next construction phase of the project. This activity will require adult supervision and some ground work to prepare and move materials. Adequate preparation of materials beforehand and following safety instructions are vital. Having several volunteers to contribute and help when others need a break will ensure this is an effective and efficient activity.
*The time allocation for this activity is based on all materials being sourced prior to commencing construction. Most of the construction materials can be sourced from a local hardware store; and the native aquatic plants and shrubs from a local indigenous plant nursery. It is difficult to advise on how long it will take to dig the pond hole - as this is site and soil specific.
Checklist
Instructions
 STEP 1
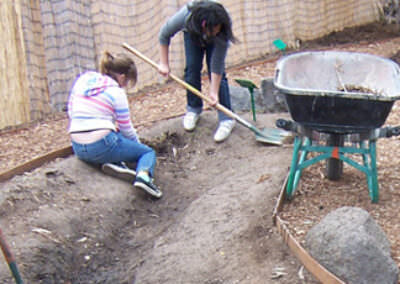
Once you have gathered all the necessary materials and carefully selected a suitable location for your frog-friendly pond, it’s time to get digging!
Dig out a hole approximately 30cm deep, and as wide as your area allows. Make sure the edges of the pond are level: Use a spirit level to check (Should you choose to have varying depths in your pond, a spirit level will not be necessary). Include gently sloping sides to allow frogs to get in and out of the pond easily.
If you are including an overflow pond, be sure to dig out this hole at the same time. The overflow pond will need to be dug out in a location lower than and adjacent to the frog pond.
 STEP 2
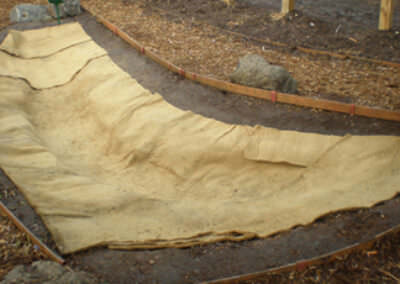
Use the soil removed from the hole to create mounds and undulations near the pond.
Once dug, line the hole with sand, old carpet or hessian bags, which smooths any edges and helps protect the liner.
Lay the pond liner across the sand/soft materials. Layer the base of the lined empty pond with gravel or clean sand.
Add locally-native aquatic plants in pots in the shallowest region, and place a few at the opposite end. Cover the plants with soil or sand and weigh down with a rock if required. The plants will provide habitat for the tadpoles to shelter in while they are small and most vulnerable to predators.
 STEP 3
Before adding water to your pond, ensure your water supply is free of chemicals, rainwater is a good option. If using tap water. Chlorine will dissipate within a week if left to stand, however other chemicals may require you to use water conditioner.
For a healthy pond, add a bucket of water from a nearby natural pond if available.
Place rocks and tree branches (removing any sharp ends) in the pond as resting (basking) and climbing places for frogs.
 STEP 4
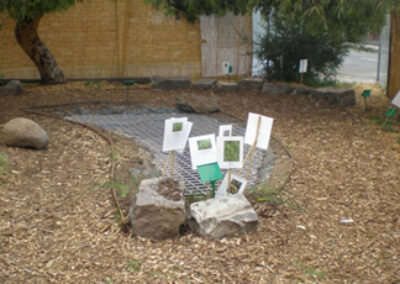
Plant selected native grasses and shrubs densely along the edge of the pond, for hiding spaces and to attract an insect food supply for the frogs.
Place additional rocks, logs, leaf litter and bark around the pond. Create a moist environment around the pond by watering the ground or mulching it. Newly morphed frogs have a better chance of surviving in a place with lots of moisture.
Use the activity sheet to create signage to keep the frogs and your frog-friendly habitat safe.
Be patient; frogs may take up to two years to begin settling into your frog-friendly habitat – it will be worth the wait!
Extension Activity
Create a boundary around the pond with a low fence, log seating or large rocks. Continue to develop the habitat around your pond to encourage a range of animals including frogs to the area.
Continue to monitor your frog pond to look for signs of habitation. Start a class journal that documents the changes observed over time and submit any sightings to Frog ID to keep a valuable record of frog populations for citizen science. Support citizen science and run special events during FrogID Week.